Note:
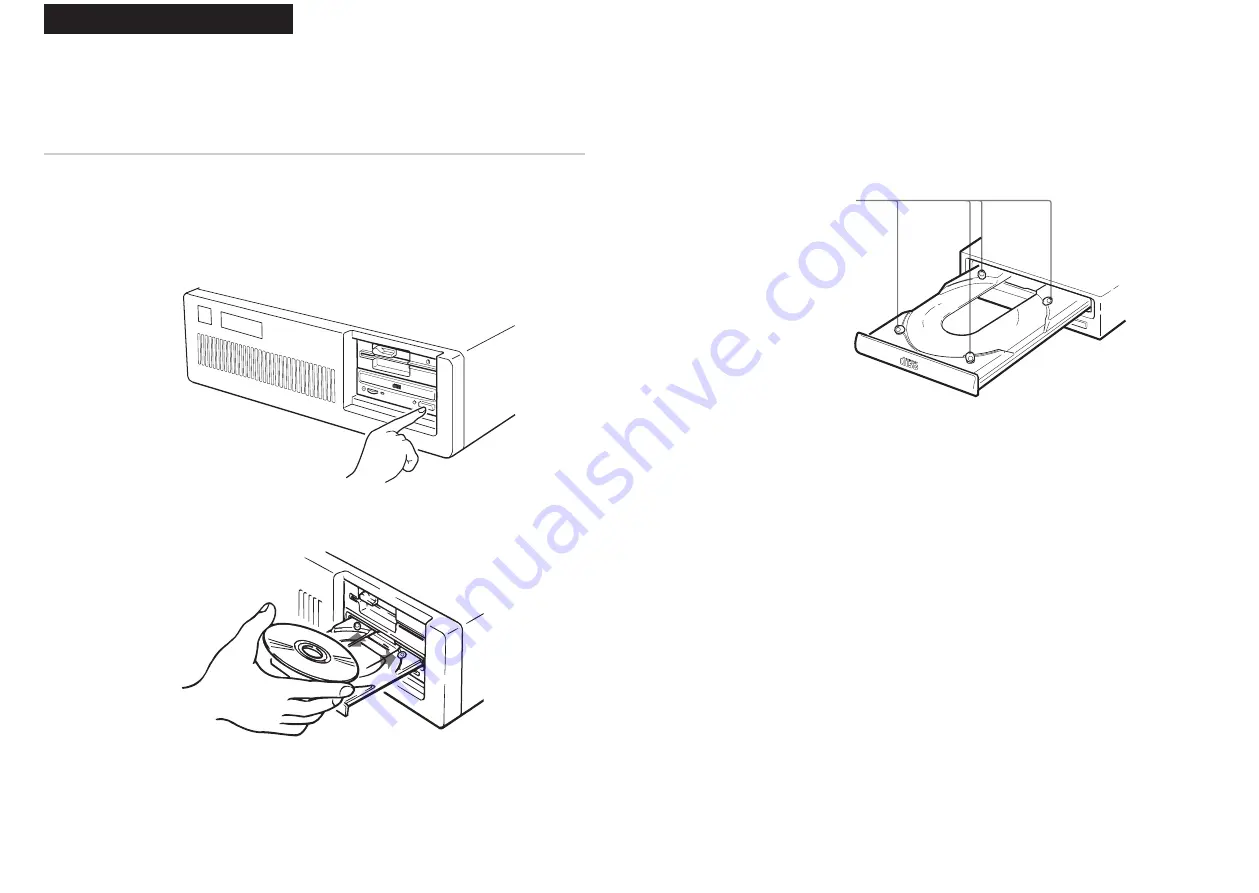
When the drive is set up in vertical position, use the disc locks to prevent
your disc from falling. See “How to Use the Disc Locks” on page 22 for
details.
4
Gently push the drawer or press the eject button to close the drawer.
The drive may begin reading the Table of Contents (TOC) data when it
accepts the disc. The busy indicator lights up in amber while the drive
is reading the TOC.
For subsequent drive operations, follow the instructions provided with
the application software you are using.
Note:
The busy indicator stays lit in amber if:
– the disc is not properly placed on the loading tray
– a malfunction occurs.
In either case, eject the disc and place it in the loading tray again making
sure that it sits properly in the tray. If doing this does not solve the
problem and the busy indicator still remains lit in amber, consult your
dealer or qualified service personnel.
Caution: Do not forcibly close the disc drawer. Applying excessive force
may damage the loading mechanism. The tray’s mechanism is designed to
operate with a “feather touch”.
22 Operating the Drive
Disc locks
Operating the Drive
This section describes how to start the drive and eject a disc.
Starting the Drive
1
Turn on the power of your computer.
2
Press the eject button.
The drawer comes out automatically.
3
Place a disc in the drawer with its label side up.
Operating the Drive 23
Place a disc with
its label side up.
Press the eject button.


