background image

Getting Started

4

Getting Started

Hooking Up the System

Overview

This section describes how to hook up the CD player to
an amplifier. Be sure to turn off the power of each
component before making the connections.

Unpacking

Check that you received the following items:
• Audio cord (1)
• CD booklet holders (2) and label (1)

How to use the CD booklet holder

The CD booklet holder helps you locate the disc easily.
After you have inserted discs into the player, you can put
the CD booklet (which comes with a CD) into the
supplied holder. Put two CD booklets facing back to back
into a pocket. Stick the number label on each pocket,
matching the number of the disc slot where you have
inserted the disc. You can put up to 200 CD booklets into
the holders.

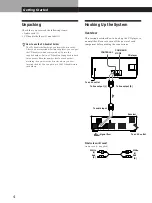
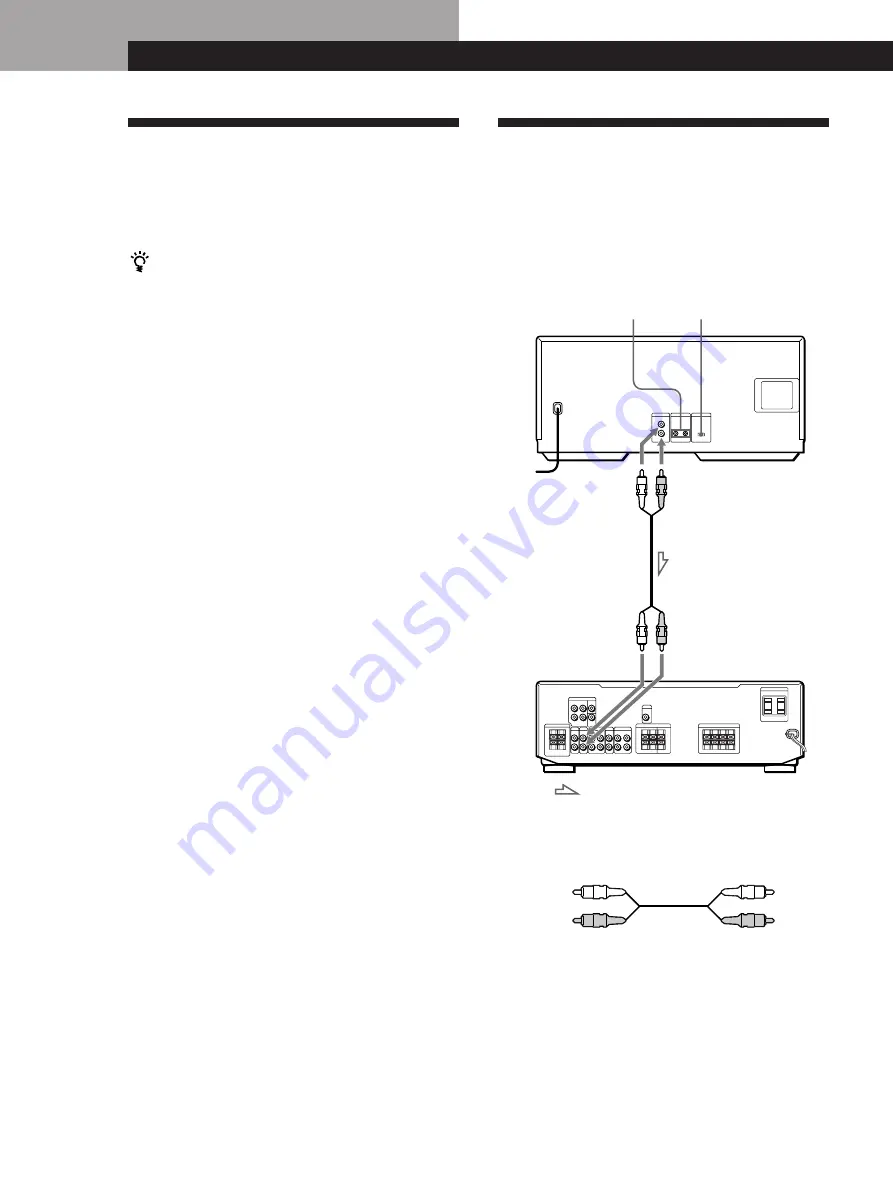
What cords will I need?

Audio cord (1) (supplied)

White

(L)

Red

(R)

White

(L)

Red

(R)

CD player

COMMAND
MODE

CONTROL A1

Receiver

To line output (L)

To line output (R)

To audio input

To an AC outlet

: Signal flow

To an AC outlet

Summary of Contents for CDP-CX681 - 200 Disc Cd Changer

Page 1: ...3 862 574 11 1 1998 by Sony Corporation CDP CX681 f Operating Instructions ...

Page 2: ...are designed to provide reasonable protection against harmful interference in a residential installation This equipment generates uses and can radiate radio frequency energy and if not installed and used in accordance with the instructions may cause harmful interference to radio communications However there is no guarantee that interference will not occur in a particular installation If this equip...

Page 3: ...ing a Specific Disc 10 Specifying the Next Disc to Play 10 Locating a Specific Track 11 Playing Repeatedly 11 Playing in Random Order Shuffle Play 12 Creating Your Own Program Program Play 13 Playing in a Group Block Play 14 Additional Information Precautions 16 Notes on CDs 16 Troubleshooting 17 Specifications 17 Index 18 ...

Page 4: ...ps you locate the disc easily After you have inserted discs into the player you can put the CD booklet which comes with a CD into the supplied holder Put two CD booklets facing back to back into a pocket Stick the number label on each pocket matching the number of the disc slot where you have inserted the disc You can put up to 200 CD booklets into the holders What cords will I need Audio cord 1 s...

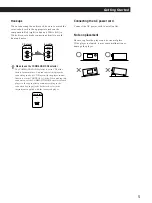
Page 5: ...player by connecting to a Sony CD Player with the player control function via the CONTROL A1 jacks When making this connection set the COMMAND MODE selectors of each player to the appropriate position according to the connected line input jacks For details refer to the instructions supplied with the connected player Connecting the AC power cord Connect the AC power cord to a wall outlet Note on pl...

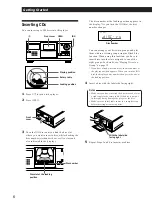
Page 6: ... arrange your discs into groups and play them within a certain group using the Block Play function When using this function you have to insert discs into the slots assigned to one of the eight groups For details see Playing Discs in a Group on page 15 If you have already inserted discs the disc number at the playing position appears When you turn the JOG dial the displayed disc number changes to t...

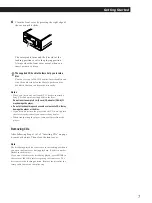
Page 7: ...insert an empty 8 cm 3 inch CD adaptor CSA 8 It may damage the player Do not attach anything such as seals or sleeves to CDs It may damage the player or the disc If you drop a disc into the player and the CD won t go into the slot correctly consult your nearest Sony dealer When transporting the player remove all discs from the player Removing CDs After following Steps 1 to 3 of Inserting CDs on pa...

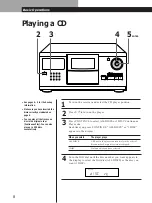
Page 8: ...SCS or 1 DISC Continuous Play mode Each time you press CONTINUE ALL DISCS or 1 DISC appears in the display 3 When you select ALL DISCS 1 DISC The player plays All discs in the player consecutively in the order of disc number Empty disc slots are skipped Only one disc you have selected Turn the JOG dial until the disc number you want appears in the display to select the first disc ALL DISCS or the ...

Page 9: ...by pressing the power switch of the amplifier or receiver while the AC power cord is connected to the switched AC outlet of the amplifier or receiver Display information while playing a disc While playing a disc the display shows the current disc number track number playing time of the track and the next disc number Current track number Playing time of the track Next disc number Current disc numbe...

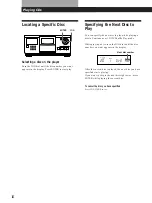
Page 10: ...disc in Continuous or 1 DISC Shuffle Play mode While playing a disc turn the JOG dial until the disc number you want appears in the display After the current disc is played the next disc you have specified starts playing If you want to skip to the next disc right away press ENTER while playing the current disc To cancel the disc you have specified Press CONTINUE twice 1 8 2 3 4 5 6 7 ALL DISCS DIS...

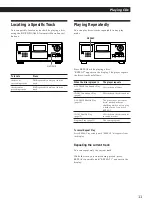
Page 11: ...as follows When the disc is played in ALL DISCS Continuous Play page 8 1 DISC Continuous Play page 8 ALL DISCS Shuffle Play page 12 1 DISC Shuffle Play page 12 Program Play page 13 To cancel Repeat Play Press REPEAT repeatedly until REPEAT disappears from the display Repeating the current track You can repeat only the current track While the track you want is being played press REPEAT repeatedly u...

Page 12: ... to select ALL DISCS or 1 DISC Shuffle Play mode Each time you press SHUFFLE ALL DISCS or 1 DISC appears in the display When you select ALL DISCS 1 DISC The player may play the same track more than once 2 When you want to specify the disc for 1 DISC Shuffle Play turn the JOG dial until the disc number you want appears in the display 3 Press ENTER or ALL DISCS or 1 DISC Shuffle Play starts appears ...

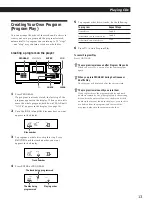
Page 13: ...epeat Steps 2 and 4 3 and 4 2 to 4 Creating Your Own Program Program Play You can arrange the order of the tracks and or discs to create your own program and the program is stored automatically A program can contain up to 32 steps one step may contain a track or a whole disc Creating a program on the player 1 Press PROGRAM If a program is already stored the last step of the program appears in the ...

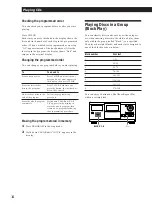
Page 14: ...M in the stop mode 2 Hold down CLEAR until All Clr appears in the display You need to Press CHECK until the track or disc you do not want appears in the display then press CLEAR Press CLEAR Each time you press the button the last track or disc will be cleared Follow the programming procedure Hold down CLEAR until All Clr appears in the display to erase the whole program then create a new program f...

Page 15: ...e display 3 Press Block Play starts from the disc which is the most upward number within a block and located closest to the playing position You can start Block Play from the disc you want When you want to start Block Play from the disc you want turn the JOG dial to select the disc then press ENTER To cancel Block Play Press the corresponding BLOCK 1 8 button Note The block number does not appear ...

Page 16: ... ventilation to prevent heat build up in the player Do not place the player on a soft surface such as a rug that might block the ventilation holes on the bottom Do not place the player in a location near heat sources or in a place subject to direct sunlight excessive dust or mechanical shock On operation If the player is brought directly from a cold to a warm location or is placed in a very damp r...

Page 17: ...kg 19 lbs 14 oz Supplied accessories Audio cord 2 phono plugs 2 phono plugs 1 CD booklet holders 2 Label 1 Design and specifications are subject to change without notice Troubleshooting If you experience any of the following difficulties while using the player use this troubleshooting guide to help you remedy the problem Should any problem persist consult your nearest Sony dealer There is no sound...

Page 18: ... 8 Rotary table 6 Index A AMS 11 Automatic Music Sensor 11 B Block Play 14 C D Connecting 4 Continuous Play 8 E F G Erasing programs 14 H Handling CDs 16 Hookups overview 4 I Inserting CDs 6 J K JOG dial 6 L M N O Locating a specific track 11 using AMS 11 P Q Playback Block Play 14 Continuous Play 8 Program Play 13 Repeat Play 11 Shuffle Play 12 Program changing 14 checking 14 erasing 14 R Repeati...

Page 19: ...Additional Information 19 ...

Page 20: ...Additional Information 20 Sony Corporation Printed in Malaysia ...

Reviews: