


– 15 –
SECTION 5
ADJUSTMENTS
5-1. MECHANICAL ADJUSTMENT
Perform the following steps before carrying out adjustments.
1. Turn ON the power of the unit, set disc to disc table No. 92, and
perform chucking.
2. Turn OFF the power.
3. Remove the case.
4. While pressing the STOP button, turn ON the
1/u
button.
The test mode is set.
5. The POWER button LED starts blinking.
(Test mode)
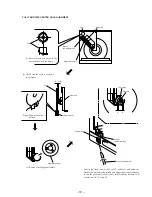
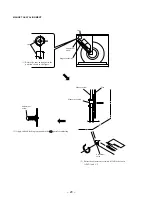
NOTE 1: The cam will start rotating when the GROUP 1 or GROUP
5 button is pressed continuously in the test mode.
NOTE 2: If the power cannot be supplied, the cam can be rotated
by rotating the pulley with your finger.
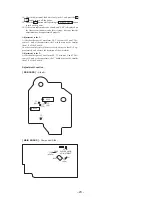
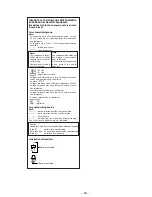
GROUP 1
button
GROUP 5
button
GROUP 1
button
GROUP 5
button
LED
1/u
button
STOP button
Cam
Pulley


