background image

14

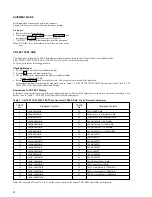
AGING  MODE

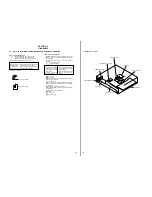
For the aging mode, three modes of all mode, disc table mode, and loading mode are available.

This set has the Aging mode for operation check of the mechanism deck.
• If a failure occurred

The aging operation stops and a faulty status is displayed on the fluorescent indicator tube.

• If no failure occurs

The aging operation continues repeatedly.

Note:

Do not use the test disc when performing aging.
Aging will not be performed properly if discs with tracks shorter than 4 seconds are used.

Aging method 1

(When using the aging remote controller (J-2501-123-A):
1. Set the remote controller 

[CD1/2/3]

 switch to CD1.

2. Press the 

[POWER]

 button and turn ON the power.

3. Set discs on all trays.

(More than two discs if five are not available.)

4. Press the 

[AGING START]

 button of the aging remote controller.

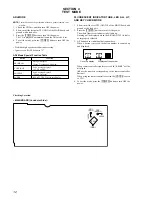
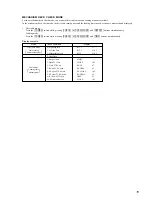
5. Aging starts and the fluorescent indicator tube will display the following.
6. To exit the mode, press the 

[POWER]

 button to turn OFF the power.

Aging method 2

(When no aging remote controller):
1. Press the 

[POWER]

 button and turn ON the power.

2. Set discs on all trays.

(More than two discs if five are not available.)

3. All mode:

Press the 

[CONTINUE]

,

x

and 

[CHECK]

 buttons at the same time.

Disc table mode:
Press the 

[CONTINUE]

,

x

and 

[DISC SKIP]

 buttons at the same time.

Loading mode:
Press the 

[CONTINUE]

,

x

and 

[EX-CHANGE]

 buttons at the same time.

4. Aging starts, and the fluorescent indicator tube will display the following.
5. To exit the mode, press the 

[POWER]

 button to turn OFF the power.

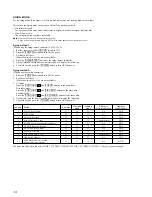
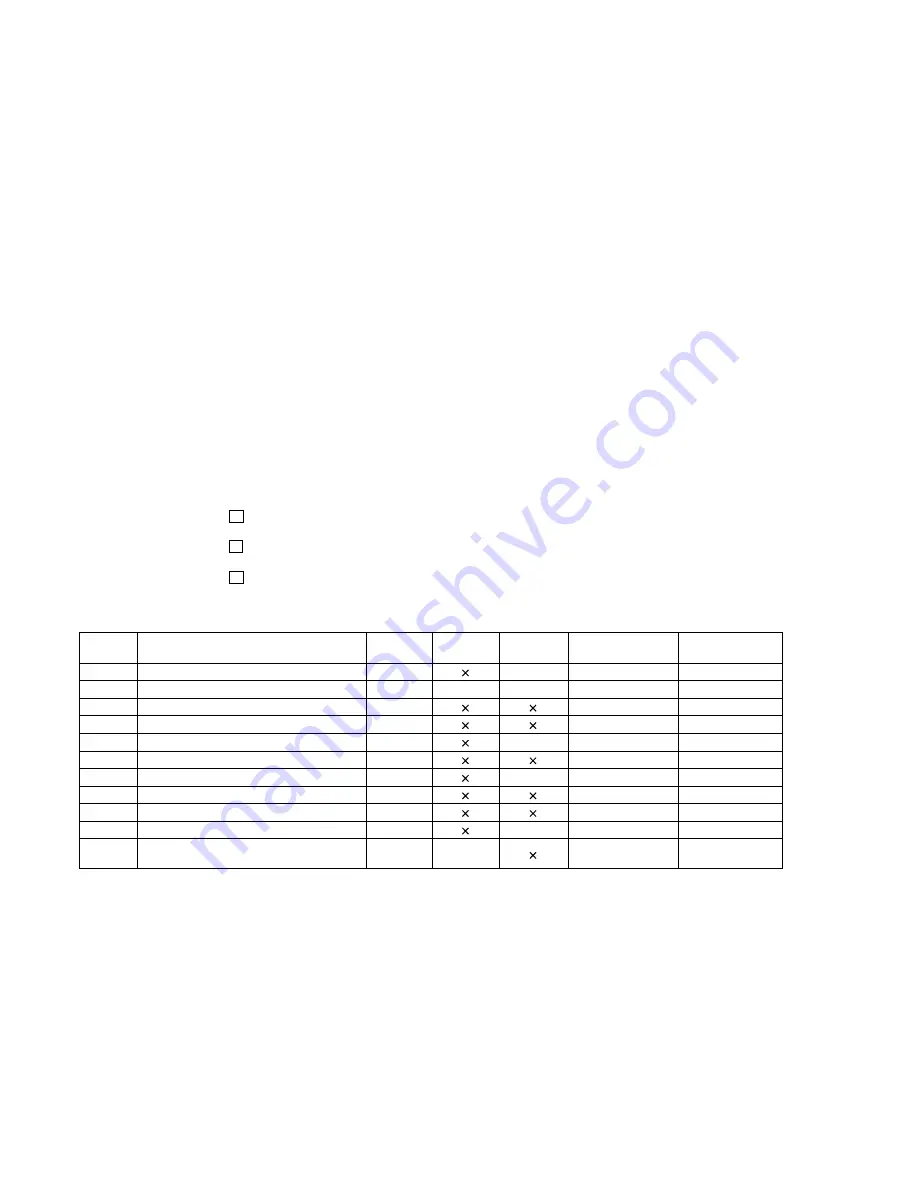
Code No.

Status

All mode

Disc table

Loading

Display in

Display in

mode

mode

Normal operation

case of failure

0

CLOSE (Tray closed)

a

a

A-0

NG 0

1

TOC reading

a

a

a

A-1

NG 1

2

Access to last track

a

A-2

NG 2

3

Play of last track (3 sec)

a

Counter display

NG 3

4

EX OPEN (Tray opened while chucking)

a

a

A-4

NG 4

5

EX SKIP (Disc tray rotated)

a

A-5

NG 5

6

EX CLOSE (Tray closed)

a

a

A-6

NG 6

7

Access to first track

a

A-7

NG 7

8

Play of first track (3 sec)

a

Counter display

NG 8

9

OPEN (tray opened)

a

a

A-9

NG 9

A

DISC SKIP (Disc tray rotated,

a

a

A-A

NG A

and next disc was selected)

The discs are selected in the order of DISC 1 

 DISC 2 

 DISC 3 

 DISC 4 

 DISC 5 

 DISC 1....Empty trays are skipped.

Summary of Contents for CDP-CE545 - Compact Disc Player

Page 1: ...ISC PLAYER US Model Canadian Model AEP Model E Model Australian Model SPECIFICATIONS CDP CE545 Model Name Using Similar Mechanism NEW CD Mechanism Type CDM59 5BD32A Base Unit Name BU 5BD32A Optical Pick Up Name KSS 213BA F NP ...

Page 2: ...AC voltmeter to check AC leakage 1 5 kΩ 0 15 µF AC voltmeter 0 75 V To Exposed Metal Parts on Set Earth Ground TABLE OF CONTENTS 1 SERVICEING NOTES 3 2 GENERAL 6 3 DISASSEMBLY 7 4 TEST MODE 12 5 ELECTRICAL CHECKING 16 6 DIAGRAMS 6 1 Note for Printed Wiring Boards and Schematic Diagrams 19 6 2 Printed Wiring Board BD Board 20 6 3 Schematic Diagram BD Board 21 6 4 Printed Wiring Boards JUNCTION SENS...

Page 3: ...5s Saudi Arabia model 4 224 879 6s HOW TO OPEN THE DISC TABLE WHEN POWER SWITCH TURNS OFF Insert a tapering driver into the aperture of the unit bottom and turn it in the direction of the arrow to OUT direction table tapering driver To close the disc table turn the tapering driver in the reverse direction to IN direction Part No Notes on chip component replacement Never reuse a disconnected chip c...

Page 4: ... No Displayed Contents 22 23 24 25 26 27 28 29 30 31 32 33 34 35 36 37 38 39 40 41 TRACK No Displayed Contents 1kHz 0dB L R 20Hz 0dB L R 40Hz 0dB L R 100Hz 0dB L R 200Hz 0dB L R 500Hz 0dB L R 1kHz 0dB L R 5kHz 0dB L R 7kHz 0dB L R 10kHz 0dB L R 16kHz 0dB L R 18kHz 0dB L R 20kHz 0dB L R 1kHz 0dB L R 1kHz 1dB L R 1kHz 3dB L R 1kHz 6dB L R 1kHz 10dB L R 1kHz 20dB L R 1kHz 60dB L R 1kHz 80dB L R 1kHz ...

Page 5: ... 52 53 54 55 56 57 58 59 60 61 62 63 64 65 66 67 to 99 21h to 27h 1kHz 0dB L R 28h to 2Fh 0 1 2 3 4 5 6 7 30h to 37h 8 9 38h to 3Fh A B C D E F G 40h to 47h H I J K L M N O 48h to 4Fh P Q R S T U VW 50h to 57h X Y Z _ 58h to 5Fh a b c d e f g 60h to 57h h i j k l m n o 68h to 6Fh p q r s t u v w 70h to 77h x y z I 78h to 7Fh i A0h to A7h 8859 1 9C ª PR A8h to AFh 2 3 µ B0h to B7h 1 º B8h to BFh À ...

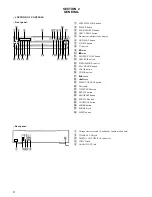
Page 6: ...tton qa A OPEN CLOSE button qs DISC SKIP button qd l AMS L control qf EX CHANGE button qg CLEAR button qh CHECK button qj M button qk m button ql MEGA CONTROL button w Disc table wa TIME TEXT button ws REPEAT button wd PROGRAM button wf SHUFFLE button wg CONTINUE button wh FADER button wj PHONES jack wk MENU button 1 Voltage selector switch E and Saudi Arabia models only 2 CONTROL A1II jack 3 DIGI...

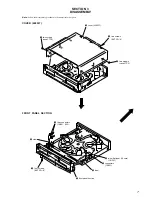
Page 7: ...ure in the numerical order given SECTION 3 DISASSEMBLY 1 two screws case3 TP2 3 cover 409537 2 two screws BVTP3 8 1 two screws case3 TP2 2 two connectors CN601 602 4 claw 3 four screws BVTP3 8 5 front panel section 4 claw 1 wire flat type 19 core CN301 2 connectors CN351 ...

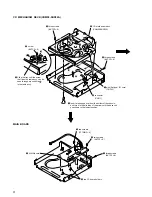
Page 8: ...he screw that fixes the table ass y can be seen through around hole in the table ass y 1 Insert a tapering driver from the bottom of the chassis and turn it in the direction of the arrow until the base unit goes down to the lowest position 6 9 CD mechanism deck CDM59 5BD32A a a 3 two screws PTTWH3 6 2 two screws BVTP3 8 5 MAIN board 1 three screws BVTP3 8 4 two PC board holders ...

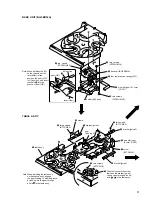
Page 9: ...aft into the groove of gear U D gear U D b b TABLE ASS Y Note When installing the table ass y on the chassis ass y engage the gear loading C with the groove by looking into the gear through a hole in the table ass y qs table ass y 9 three screws BTTP M2 6 q clamp e c c d d e qa bracket guide gear loading C 7 two screws BTTP M2 6 5 screw BTTP M2 6 6 bracket guide 2 two screws BTTP M2 6 1 Slide the ...

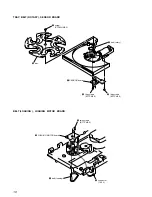
Page 10: ...ENSOR BOARD 1 screw PTPWH M2 6 3 belt rotary 4 two screws BTTP M2 6 4 two screws BTTP M2 6 5 SENSOR board 2 tray BELT LOADING LOADING MOTOR BOARD 3 two screws BTTP M2 6 4 LOADING MOTOR board 1 belt loading 2 connector CN13 ...

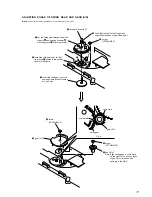
Page 11: ...e chassis and engage its dowel with the groove of rotary encoder 2 Install the rotary encoder so that its groove comes to the position shown in the figure 1 Insert the shaft gear up to the position where its shaft comes out by 5 mm g g h h f f f 7 gear U D 8 screw PTPWH M2 6 q screw PTPWH M2 6 circle mark circle mark swing gear gear RV Fig A 9 gear RV Note Align swing gear a circle mark on the gea...

Page 12: ...TE and Traverse FADER RFCK GFS Error rate display FLUORESCENT INDICATOR TUBE LED ALL LIT AND KEY CHECK MODE 1 Short circuit the test TP2 AFADJ of the MAIN board and ground with a lead wire 2 Press the POWER button to turn ON the power The whole fluorescent indicator tube lights up Nothing will be displayed when the S RAM IC302 is faulty or improperly soldered 3 All buttons have individual button n...

Page 13: ... CLOSE All lit LED lighting AMS button 30 AMS knob When rotated clockwise The music calendar numerals light up in ascending order When rotated counterclockwise The music calendar numerals light up in descending order MEGA CONTROL 22 X FADE 28 NO DELAY 29 CLEAR 18 CHECK 19 M 20 m 21 PEAK SEARCH 3 EDIT TIME FADE 4 TIME TEXT 8 FADER 6 R Light altemately r 1 2 3 4 5 6 7 8 9 10 11 12 13 14 15 16 17 18 ...

Page 14: ...emote controller 1 Press the POWER button and turn ON the power 2 Set discs on all trays More than two discs if five are not available 3 All mode Press the CONTINUE x and CHECK buttons at the same time Disc table mode Press the CONTINUE x and DISC SKIP buttons at the same time Loading mode Press the CONTINUE x and EX CHANGE buttons at the same time 4 Aging starts and the fluorescent indicator tube...

Page 15: ...ously Loading mode Press the POWER switch while pressing CHECK OPEN CLOSE and TIME buttons simultaneously A A Display contents Mode Check command Display Disc table mode 0 Right one turn R 12 5 L Table turning 1 Left one Turn R 12 5 L 10 2 time measurement 2 Measurement end R12 5 L 10 2 3 Undefined 4 Star position START 5 Open Close CLOSE 10 2 6 Close BU up BU UP 0 7 Table mode 7 BU up EX open EX ...

Page 16: ...pe to TP RF and TP VC on BD board 2 Connect between TP AGCCON and TP GND with lead wire 3 Turned power switch POWER button on 4 Load a disc YEDS 18 and playback 5 Confirm that the oscilloscope waveform is clear and check RF signal level is correct or not 6 After check remove the lead wire connected in step 2 Note Clear RF signal waveform means that the shape can be clearly distinguished at the cen...

Page 17: ...17 TP VC TP RF TP FE TP TE TP FE1 TP GND TP PLCK TP AGCCON CN102 IC101 Checking Location BD BOARD Conductor Side ...

Page 18: ...18 MEMO ...
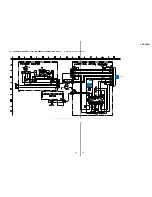
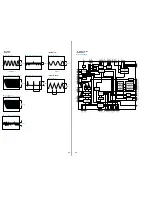
Page 19: ... Voltage variations may be noted due to normal produc tion tolerances Waveforms are taken with a oscilloscope Voltage variations may be noted due to normal produc tion tolerances Circled numbers refer to waveforms Signal path J CD PLAY c DIGITAL OUT Note The components identi fied by mark 0 or dotted line with mark 0 are criti cal for safety Replace only with part number specified Note Les composa...

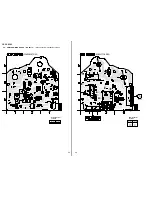
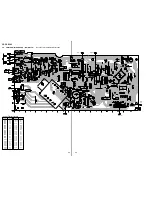
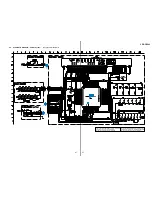
Page 20: ...or Circuit Boards Location A 05 05 TP GND TP FE1 TP RF TP VC TP FE TP TE TP AGCCON TP PLCK LIMIT SPINDLE SLED CONDUCTOR SIDE COMPONENT SIDE Semiconductor Location Ref No Location Q101 C 3 Semiconductor Location Ref No Location IC101 C 2 IC102 B 1 IC103 B 1 Page 24 ...

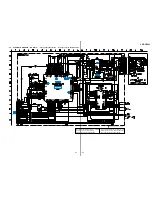
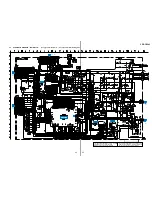
Page 21: ...ck Diagrams PIN FUNCTION Page 25 The components identified by mark 0 or dotted line with mark 0 are critical for safety Replace only with part number specified Les composants identifiés par une marque 0 sont critiques pour la sécurité Ne les remplacer que par une pièce portant le numéro spécifié ...

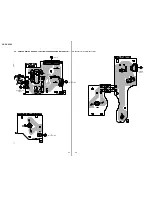
Page 22: ...22 22 CDP CE545 6 4 PRINTED WIRING BOARDS JUNCTION SENSOR LOADING MOTOR Boards See page 19 for Circuit Boards Location TO LOADING MOTOR BOARD TO SENSOR BOARD TO JUNCTION BOARD TO JUNCTION BOARD Page 24 ...

Page 23: ...23 23 CDP CE545 6 5 SCHEMATIC DIAGRAM JUNCTION SENSOR LOADING MOTOR Boards See page 28 for IC Block Diagrams Page 25 ...

Page 24: ... 2 Q355 C 2 Q356 C 2 Q381 C 1 Q402 B 2 Q403 C 1 Q404 B 2 Q502 A 2 Q503 B 2 Q504 A 2 Q601 E 7 Ref No Location Ref No Location D301 D 9 D350 B 3 D351 B 3 D352 C 2 D353 C 3 D381 C 1 D601 D 6 D602 D 6 D603 D 6 D604 D 6 D605 E 6 D606 E 6 D607 D 5 D608 D 5 D609 D 5 IC301 C 10 IC302 D 10 IC303 B 1 IC350 B 4 IC351 A 11 IC402 B 3 IC502 A 3 IC601 E 7 Semiconductor Location Page 20 Page 22 Page 26 Page 26 Pa...

Page 25: ... FUNCTION Page 21 Page 23 Page 27 Page 27 Page 27 The components identified by mark 0 or dotted line with mark 0 are critical for safety Replace only with part number specified Les composants identifiés par une marque 0 sont critiques pour la sécurité Ne les remplacer que par une pièce portant le numéro spécifié ...

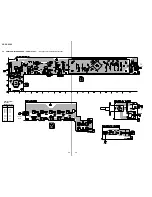
Page 26: ...PANEL Section See page 19 for Circuit Boards Location Semiconductor Location DISPLAY Board Ref No Location D801 B 5 D802 A 4 D803 A 3 D804 A 5 D805 A 5 IC801 A 8 IC802 A 11 Q801 A 7 Q802 A 8 Page 24 Page 24 TO DISPLAY BOARD Page 24 TO KEY BOARD ...

Page 27: ... 25 Page 25 Page 25 The components identified by mark 0 or dotted line with mark 0 are critical for safety Replace only with part number specified Les composants identifiés par une marque 0 sont critiques pour la sécurité Ne les remplacer que par une pièce portant le numéro spécifié ...

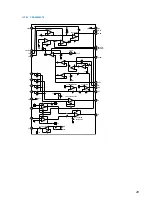
Page 28: ...VSS1 AVSS2 CPU INTERFACE SERVO AUTO SEQUENCER SERIAL IN INTERFACE OVER SAMPLING DIGITAL FILTER 3rd ORDER NOISE SHAPER PWM PWM EFM DEMODULATOR TIMING LOGIC DIGITAL OUT D A INTERFACE DIGITAL PLL ASYMMETRY CORRECTION CLOCK GENERATOR MIRR DFCT FOK DETECTOR DIGITAL CLV SUBCODE PROCESSOR SERVO INTERFACE SERVO DSP FOCUS SERVO TRACKING SERVO SLED SERVO PWM GENERATOR FOCUS PWM GENERATOR TRACKING PWM GENERA...

Page 29: ...RROR AMP TRACKING ERROR AMP VC BUFFER VCC 50µA VEE VEE VC VC VC VC VC VC VC VC VC VC VCC VEE VCC VEE VEE VC VCC LC PD LD ON HOLD SW AGC CONT RFTC RF I RF O RFE TE FE RF BOT HOLD AGC VTH LD PD A B C D VEE F E VC 1 2 3 4 5 6 7 8 9 10 11 12 13 14 15 16 17 18 19 20 21 22 23 24 VCC ...

Page 30: ... VCC OUT1 OUT1 18 17 16 15 1 2 3 4 5 6 7 8 9 14 13 12 11 10 VCC W A13 A8 A9 A11 OE A10 SI DQ8 DQ7 DQ6 DQ5 DQ4 A12 A6 A5 A4 A3 A2 A1 A0 DQ1 DQ2 DQ3 GND A7 A14 CLOCK GENERATOR OUTPUT BUFFER SENSE AMP 32768 WORD x 8 BIT RAM 512 x 512 ROW ADDRESS DECODER ROW INPUT BUFFER COLUMN INPUT BUFFER COLUMN ADDRESS DECODER INPUT DATA CONTROL 1 2 3 4 5 6 7 8 9 10 11 12 13 14 15 16 17 18 19 20 21 22 23 24 25 26 2...

Page 31: ... AM30 30 AM31 31 AM32 32 G8 47 G7 48 G9 46 G10 45 G11 44 AA8 G12 43 AA7 G13 42 AA6 G14 41 AA5 G15 40 AA4 G16 39 AA3 38 AA2 37 AA1 36 AM35 35 AM34 34 AM33 33 63 CL 62 CE 64 DI 61 60 VDD 59 OSCI 58 OSCO 57 VSS 56 TEST 55 VFL G1 54 G2 53 G3 52 G4 51 G5 50 G6 49 RES DECODER SHIFT REGISTER DC RAM LATCH CG RAM CG ROM AD RAM LATCH ANODE GRID DRIVER ADDRESS COUNTER BLINK GENERATOR DISPLAY CONTROL DUTY GEN...

Page 32: ...PO O Not used open 20 SCOR O Subcode sync S0 S1 detection signal output to the system controller IC301 21 COUT I O Numbers of track counted signal input output terminal Not used open 22 MIRR I O Mirror signal input output terminal Not used open 23 DFCT I O Defect signal input output terminal Not used open 24 FOK I O Focus OK input output terminal Not used open 25 LOCK I O GFS is sampled by 460 Hz ...

Page 33: ... supply terminal 5V digital system 60 DOUT O Digital audio signal output to the DIGITAL OUT OPTICAL IC303 61 LRCK O L R sampling clock signal 44 1 kHz output terminal Not used open 62 PCMD O D A interface serial data output terminal Not used open 63 BCK O Bit clock signal 2 8224 MHz output terminal Not used open 64 EMPH O De emphasis control signal output terminal Not used open 65 XVDD Power suppl...

Page 34: ...several hundreds msec after the power supply rises L is input then it changes to H 31 EXTAL I Main system clock input terminal 10 MHz 32 XTAL O Main system clock output terminal 10 MHz 33 VSS Ground terminal 34 TX O Sub system clock output terminal Not used open 35 TEX I Sub system clock input terminal Not used fixed at L 36 AVSS Ground terminal for A D converter 37 AVREF I Reference voltage input...

Page 35: ...he CXD2587Q IC101 62 BUSIN I Sircs remote control signal input from the CONTROL A1II 63 NC O Not used open 64 ZMUTE O Muting on off control signal output terminal H active 65 LPH O Laser power control signal output to the CXD2587Q IC101 H active 66 TBLL O Table motor drive signal counterclockwise output to the BA6780 IC11 67 TBLR O Table motor drive signal clockwise output to the BA6780 IC11 68 69...

Page 36: ...arts with no reference num ber in the exploded views are not supplied Accessories and packing materials are given in the last of the electrical parts list NOTE XX and X mean standardized parts so they may have some difference from the original one Color Indication of Appearance Parts Example KNOB BALANCE WHITE RED Parts Color Cabinet s Color Ref No Part No Description Remark Ref No Part No Descrip...

Page 37: ...BUTTON PLAY H X x A OPEN CLOSE EX CHANGE DISC SKIP 59 4 224 862 01 BUTTON DISC 60 4 224 863 01 BUTTON MODE 61 3 931 429 21 BUTTON POWER 62 4 951 620 01 SCREW 2 6X8 BVTP 63 1 676 544 11 POWER SW BOARD 64 1 676 542 11 KEY BOARD 65 A 4725 013 A DISPLAY BOARD COMPLETE 66 1 792 487 11 WIRE FLAT TYPE 19 CORE 67 4 224 865 01 BUTTON MEGA CON 68 4 224 869 01 INDICATOR PLAY 69 1 676 543 11 HEADPHONE BOARD 5...

Page 38: ...3X6 107 3 703 571 11 BUSHING S FBS002 CORD E 107 4 966 267 11 BUSHING FBS001 CORD EXCEPT E 108 7 685 646 79 SCREW BVTP 3X8 TYPE2 N S 109 4 224 879 01 PANEL BACK US 109 4 224 879 11 PANEL BACK CND 109 4 224 879 21 PANEL BACK AEP 109 4 224 879 31 PANEL BACK AUS 109 4 224 879 41 PANEL BACK E 109 4 224 879 51 PANEL BACK SP 109 4 224 879 61 PANEL BACK EA 0110 1 558 943 41 CORD POWER E 0110 1 575 651 21...

Page 39: ... 1 ROLLER ASSY 204 4 224 602 01 TABLE 205 4 224 617 01 GEAR RM E 206 4 985 672 01 SCREW PTPWH M2 6 FLOATING 207 4 224 616 01 GEAR RM M 208 4 224 615 01 GEAR RM B 209 4 225 328 01 BELT ROTARY 210 4 224 603 01 TRAY 211 4 224 619 01 BRACKET GUIDE M11 A 4672 867 A MOTOR ASSY ROTARY TRAY 201 202 202 203 203 205 206 207 208 203 206 209 202 not supplied 204 M11 210 206 211 202 202 211 not supplied ...

Page 40: ...NG C 261 4 224 608 01 COLLAR SWING 262 4 224 611 01 GEAR LOADING B 263 3 016 533 21 WASHER FR STOPPER 264 4 951 619 21 CUSHION A 265 4 224 606 01 GEAR RV 266 4 224 605 01 GEAR U D 267 X 4952 019 1 PULLEY A ASSY CHUCKING 268 1 471 061 11 MAGNET ASSY 269 4 221 688 01 PULLEY B CHUCKING 270 4 224 618 01 LEVER LIFTER 271 1 791 930 11 WIRE FLAT TYPE 6 CORE 272 1 676 246 11 JUNCTION BOARD M10 A 4672 879 ...

Page 41: ...ifié Ref No Part No Description Remark Ref No Part No Description Remark 301 4 951 620 01 SCREW 2 6X8 BVTP 302 A 4724 494 A BD BOARD COMPLETE 303 4 951 940 41 INSULATOR BU 304 4 917 565 01 SHAFT SLED 0305 8 848 379 31 OPTICAL PICK UP KSS 213BA F NP 306 1 769 069 11 WIRE FLAT TYPE 16 CORE 307 3 713 786 51 SCREW P 2X3 308 4 917 567 21 GEAR M 309 4 917 564 01 GEAR P FLATNESS M101 X 4917 523 3 MOTOR A...

Page 42: ...0V C124 1 107 823 11 CERAMIC CHIP 0 47uF 10 16V C125 1 163 038 00 CERAMIC CHIP 0 1uF 25V C126 1 163 038 00 CERAMIC CHIP 0 1uF 25V C127 1 117 681 11 ELECT CHIP 100uF 20 16V C128 1 163 038 00 CERAMIC CHIP 0 1uF 25V C129 1 163 031 11 CERAMIC CHIP 0 01uF 50V C130 1 164 346 11 CERAMIC CHIP 1uF 16V C131 1 124 779 00 ELECT CHIP 10uF 20 16V C133 1 164 346 11 CERAMIC CHIP 1uF 16V C140 1 164 346 11 CERAMIC ...

Page 43: ... 43 LED SEL5421E TP15 X FADE FLUORESCENT INDICATOR FL801 1 517 664 11 INDICATOR TUBE FLUORESCENT IC IC801 8 759 337 52 IC LC75721E IC802 8 759 648 23 IC RPM6940 H4 TRANSISTOR Q801 8 729 900 53 TRANSISTOR DTC114EK Q802 8 729 900 53 TRANSISTOR DTC114EK RESISTOR R801 1 216 073 00 METAL CHIP 10K 5 1 10W R802 1 216 029 00 METAL CHIP 150 5 1 10W R803 1 216 033 00 METAL CHIP 220 5 1 10W R804 1 216 033 00...

Page 44: ...11 CARBON 1 2 5 1 6W SWITCH S11 1 771 836 11 SWITCH LEVER SLIDE OPEN CLOSE DETECT 1 676 542 11 KEY BOARD CONNECTOR CN812 1 750 185 11 CONNECTOR BOARD TO BOARD 4P RESISTOR R861 1 216 045 00 METAL CHIP 680 5 1 10W R862 1 216 049 11 RES CHIP 1K 5 1 10W R863 1 216 053 00 METAL CHIP 1 5K 5 1 10W R864 1 216 057 00 METAL CHIP 2 2K 5 1 10W R865 1 216 061 00 METAL CHIP 3 3K 5 1 10W R866 1 216 069 00 METAL ...

Page 45: ... 719 210 33 DIODE EC10DS2 D606 8 719 977 22 DIODE DTZ9 1 D607 8 719 016 74 DIODE 1SS352 D608 8 719 976 96 DIODE DTZ4 7C D609 8 719 016 74 DIODE 1SS352 GROUND TERMINAL EB601 1 537 770 21 TERMINAL BOARD GROUND IC IC301 8 752 912 67 IC CXP84648 066Q IC302 8 759 463 99 IC M5M5256DFP 70XL IC303 8 749 921 12 IC GP1F32T DIGITAL OUT OPTICAL IC350 8 759 100 96 IC NJM4558M T1 IC351 8 759 636 55 IC M5218AFP ...

Page 46: ...8 1 216 057 00 METAL CHIP 2 2K 5 1 10W R419 1 216 057 00 METAL CHIP 2 2K 5 1 10W R420 1 216 635 11 METAL CHIP 220 0 5 1 10W R421 1 218 768 11 METAL CHIP 470K 0 5 1 10W R422 1 216 057 00 METAL CHIP 2 2K 5 1 10W R451 1 216 061 00 METAL CHIP 3 3K 5 1 10W R452 1 216 073 00 METAL CHIP 10K 5 1 10W R453 1 247 807 31 CARBON 100 5 1 4W R501 1 216 683 11 METAL CHIP 22K 0 5 1 10W R502 1 216 655 11 METAL CHIP...

Page 47: ...IRE FLAT TYPE 16 CORE M10 A 4672 879 A MOTOR ASSY LOADING M11 A 4672 867 A MOTOR ASSY ROTARY TRAY M101 X 4917 523 3 MOTOR ASSY SPINDLE M102 X 4917 504 1 MOTOR ASSY SLED S200 1 418 746 11 ENCODER ROTARY BU TABLE ADDRESS DETECT 0T601 1 435 342 11 TRANSFORMER POWER US CND 0T601 1 435 343 11 TRANSFORMER POWER AEP SP AUS 0T601 1 435 344 11 TRANSFORMER POWER E EA ACCESSORIES PACKING MATERIALS 1 418 857 ...

Page 48: ...48 CDP CE545 Sony Corporation Home Audio Division Company 9 929 205 11 2000C0578 1 Printed in Japan C 2000 3 Published by Quality Assurance Dept ...

Reviews: