background image

12

CDP-CE275/CE375

AGING  MODE

For the aging mode, three modes of all mode, disc table mode, and loading mode are available.

This set has the Aging mode for operation check of the mechanism deck.
• If a failure occurred

The aging operation stops and a faulty status is displayed on the fluorescent indicator tube.

• If no failure occurs

The aging operation continues repeatedly.

Note:

Do not use the test disc when performing aging.
Aging will not be performed properly if discs with tracks shorter than 4 seconds are used.

Procedure:
1. Press the 

[POWER]

 button and turn ON the power.

2. Set discs on all trays.

(More than two discs if five are not available)

3. All mode:

Press the 

[CHECK]

[PLAY MODE]

 and

x

buttons at the same time.

Disc table mode:
Press the 

[CHECK]

[PLAY MODE]

 and 

[SKIP]

 buttons at the same time.

Loading mode:
Press the 

[CHECK]

[PLAY MODE]

 and 

[EX-CHANGE]

 buttons at the same time.

4. Aging starts, and the fluorescent indicator tube will display the following.
5. To exit the mode, press the 

[POWER]

 button to turn OFF the power.

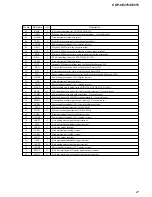
Code No.

Status

All mode

Disc table

Loading

Display in

Display in

mode

mode

Normal operation

case of failure

0

CLOSE (Tray closed)

a

a

A-0

Err 0

1

TOC reading

a

a

a

A-1

Err 1

2

Access to last track

a

A-2

Err 2

3

Play of last track (3 sec)

a

Counter display

Err 3

4

EX OPEN (Tray opened while chucking)

a

a

A-4

Err 4

5

EX SKIP (Disc tray rotated)

a

A-5

Err 5

6

EX CLOSE (Tray closed)

a

a

A-6

Err 6

7

Access to first track

a

A-7

Err 7

8

Play of first track (3 sec)

a

Counter display

Err 8

9

OPEN (tray opened)

a

a

A-9

Err 9

A

DISC SKIP (Disc tray rotated,

a

a

A-A

Err A

a

nd next disc was selected)

The discs are selectie in the order of DISC1 

DISC2 

 DISC3 

 DISC4 

 DISC5 

 DISC1 

 .... Empty trays are skipped.

But the order is random in the disc table mode.

MECHANISM  DECK  CHECK  MODE

For the mechanism deck check mode, two modes of disc table mode and loading mode are available.
In the mechanism deck check mode, the disc table turning time and the loading time in each section are measured and displayed.

Procedure:
Disc table mode:
Press the 

[POWER]

 switch while pressing

H

[    OPEN/CLOSE]

 and  

[REPEAT]

 buttons simultaneously.

Loading mode:
Press the 

[POWER]

 switch while pressing

H

[    OPEN/CLOSE]

 and  

[TIME]

 buttons simultaneously.

A

A

Display contents

Mode

Check command

Display

Disc table mode

0: Right one turn

r 12.5

Table turning

1: Left one Turn

L 10.2

(

 time measurement 

)

2: Measurement end

r 12.5

3: Undefined

4: Star position

Sta

– –.–

5: Open 

 Close

CLo 10.2

6: Close 

 BU up

UP

0.7

Table mode

7: BU up 

 EX open

EoP

6.2

Loading time

8: EX open 

 EX close

ECL 10.3

(

 measurement 

)

9: EX close 

 BU down

don

1.2

A: BU down 

 Open

oPn

9.3

FF: Measurement end

CLo 10.2

Ver 1.1 2001.07

Summary of Contents for CDP-CE275 - Carousel Cd Player 5 Discs

Page 1: ...k Maximum Load type output level impedance ANALOG Phono 2 V Over 10 OUT jacks at 50 kilohms kilohms DIGITAL Optical 18 dBm Wave OUT output length OPTICAL connector 660 nm PHONES Stereo 10 mW 32 ohms CDP CE375 phone only jack General Power requirements 120 V AC 60 Hz Power consumption 11 W Dimensions approx 430 x 110 x 400 mm w h d 17 x 4 3 8 x 15 3 4 in incl projecting parts Mass approx 5 kg 11 lb...

Page 2: ...Y PARTS WHOSE PART NUMBERS APPEAR AS SHOWN IN THIS MANUAL OR IN SUPPLEMENTS PUB LISHED BY SONY SAFETY CHECK OUT After correcting the original service problem perform the follow ing safety check before releasing the set to the customer Check the antenna terminals metal trim metallized knobs screws and all other exposed metal parts for AC leakage Check leakage as described below LEAKAGE TEST The AC ...

Page 3: ...ir pay attention to electrostatic break down and also use the procedure in the printed matter which is included in the repair parts The flexible board is easily damaged and should be handled with care NOTES ON LASER DIODE EMISSION CHECK The laser beam on this model is concentrated so as to be focused on the disc reflective surface by the objective lens in the optical pick up block Therefore when c...

Page 4: ...EX CHANGE button 8 DISC SKIP button 9 l AMS L control 0 A OPEN CLOSE button qa PHONES jack Rear panel 1 DIGITAL OUT OPTICAL connector 2 ANALOG OUT 1 2 1 2 3 4 6 7 9 5 8 qs qd 0 qf qg qh qj qa qk w ql wa ws qs CLEAR button qd CHECK button qf EDIT button qg M button qh m button qj Disc table qk TIME button ql REPEAT button w FADER button wa PEAK SEARCH button ws PLAY MODE button ...

Page 5: ...SASSEMBLY The equipment can be removed using the following procedure Set Case Front Panel Assy Base Unit BU 5BD27 Optical Pick up Tray Table Assy CD Mechanism Block Sensor Board Jnuction Board Loading Motor Board 3 two screws BVTP 3x8 4 case 5 6 2 two screws case 3TP2 1 two screws case 3TP2 7 panel loading ...

Page 6: ...M BLOCK CDM59 5BD27 3 2 FRONT PANEL ASSY 5 three screws BVTP 3x8 6 claw 8 front panel assy 7 claw 1 CN601 4 CN351 3 CN301 2 CN602 3 three screws BVTP 3x8 4 two screws BVTP 3x8 5 tray 6 two screws BVTP 3x8 7 CDM59 5BD27 1 CN302 2 CN311 ...

Page 7: ...g 3 two screws PTPWHM 2 6 floating 2 two screws PTPWHM 2 6 floating 7 base unit BU 5BD27 4 holder BU assy 5 spring 932 compression 6 spring 932 compression 1 two screws M 2 6 BTTP 2 bracket guide 7 table assy 5 4 bracket guide 3 three screws M 2 6 BTTP 6 CN15 8 screw PTPWHM 2 6 floating 9 tray ...

Page 8: ...ADING MOTOR BOARD 3 6 SENSOR BOARD 2 two screws M 2 6 BTTP 4 SENSOR board 3 two screws M 2 6 BTTP 1 belt rotary table assy 3 three screws M 2 6 BTTP 6 two screws M 2 6 BTTP 4 JUNCTION board 7 LOADING MOTOR board 5 belt loading 1 CN14 2 CN13 ...

Page 9: ...9 CDP CE275 CE375 3 8 OPTICAL PICK UP 1 2 shaft sled 3 optical pick up 4 connector ...

Page 10: ...and Sledding EDIT RFCK GFS Error rate display FLUORESCENT INDICATOR TUBE ALL LIT AND KEY CHECK MODE 1 Short circuit the test TP2 AFADJ of the MAIN board and ground with a lead wire 2 Press the POWER button to turn ON the power The whole fluorescent indicator tube lights up 3 All buttons have individual button numbers When a button is pressed the button number is counted up and displayed When remot...

Page 11: ...push 37 AMS turn When rotated clockwise The music calendar numerals light up in ascending order When rotated counterclockwise The music calendar numerals light up in descending order R Light altemately r 1 SEC STEP MIN PEAK TRACK DISC 2 3 4 5 6 7 8 9 10 11 12 13 14 15 16 17 18 19 20 ALL1DISCS PROGRAM SHUFFLE REPEAT 1 EDIT TIME FADE A B All lit SEC MIN TRACK Partial lighting 1 1 STEP PEAK DISC 2 3 ...

Page 12: ...2 Err 2 3 Play of last track 3 sec a Counter display Err 3 4 EX OPEN Tray opened while chucking a a A 4 Err 4 5 EX SKIP Disc tray rotated a A 5 Err 5 6 EX CLOSE Tray closed a a A 6 Err 6 7 Access to first track a A 7 Err 7 8 Play of first track 3 sec a Counter display Err 8 9 OPEN tray opened a a A 9 Err 9 A DISC SKIP Disc tray rotated a a A A Err A and next disc was selected The discs are selecti...

Page 13: ...B symmetry within 2 1 Vp p BD board TP RFDC TP VC oscilloscope VOLT DIV 200 mV TIME DIV 500 ns level 1 15 0 35 Vp p VC Procedure 1 Set the test disc PATD 012 Disc chucking operation is complete then press the POWER button to turn the power off 2 Connect an oscilloscope to test point TP RFDC and TP VC on the BD board 3 Connect between test point TP ADJ on the MAIN board and GND by lead wire 4 Press...

Page 14: ...tracking servo and the sledding servo are turned OFF 6 Check the level B of the oscilliscope waveform and the A DC voltage of the center of the Traverse waveform Confirm the following A B x 100 less than 22 Traverse Waveform 7 Press the TIME button The tracking servo and sledding servo are turned ON Confirm the C DC voltage is almost equal to the A DC voltage is step 6 Traverse Waveform Checking L...

Page 15: ...riations may be noted due to normal produc tion tolerances Waveforms are taken with a oscilloscope Voltage variations may be noted due to normal produc tion tolerances Circled numbers refer to waveforms Signal path J CD PLAY c DIGITAL OUT A B Line B B Line Note The components identi fied by mark 0 or dotted line with mark 0 are criti cal for safety Replace only with part number specified Note Les ...

Page 16: ... BOARD BD Board See page 15 for Circuit Boards Location Semiconductor Location Ref No Location Q131 C 3 Q132 C 3 Semiconductor Location Ref No Location IC101 C 2 IC131 C 1 IC150 B 1 Page 20 TP VC TP FE1 TP TE1 TP RFDC TP RFAC Ver 1 1 2001 07 ...

Page 17: ... identified by mark 0 or dotted line with mark 0 are critical for safety Replace only with part number specified Les composants identifiés par une marque 0 sont critiques pour la sécurité Ne les remplacer que par une pièce portant le numéro spécifié TP RFAC TP RFDC TP VC TP TE1 TP FE1 TP SE1 Page 21 IC BD IC BD Ver 1 1 2001 07 ...

Page 18: ...4 PRINTED WIRING BOARDS JUNCTION SENSOR LOADING MOTOR Boards See page 15 for Circuit Boards Location Page 20 TO MAIN BOARD Semiconductor Location Ref No Location D10 B 4 D11 E 3 Semiconductor Location Ref No Location IC11 C 2 ...

Page 19: ...19 19 CDP CE275 CE375 6 5 SCHEMATIC DIAGRAM JUNCTION SENSOR LOADING MOTOR Boards See page 25 for IC Block Diagram TO MAIN BOARD Page 21 IC BD ...

Page 20: ...2 Q307 D 5 Q352 E 7 Q353 E 8 Q356 D 11 Q402 D 11 Q405 D 11 Q502 E 11 Q505 E 11 Q601 A 6 Ref No Location Ref No Location D353 D 10 D601 C 7 D602 B 7 D603 C 7 D604 B 7 D605 B 6 D606 A 6 D607 C 7 D608 C 8 D609 C 7 D610 A 6 IC301 C 3 IC303 D 11 IC350 E 10 Semiconductor Location Page 22 Page 22 Page 18 Page 18 Page 22 TP2 AFDJ TP1 ADJ Ver 1 1 2001 07 ...

Page 21: ...nts identified by mark 0 or dotted line with mark 0 are critical for safety Replace only with part number specified Les composants identifiés par une marque 0 sont critiques pour la sécurité Ne les remplacer que par une pièce portant le numéro spécifié Page 23 Page 17 Page 19 Page 23 Page 23 ...

Page 22: ...22 22 CDP CE275 CE375 6 8 PRINTED WIRING BOARDS PANEL Section See page 15 for Circuit Boards Location Semiconductor Location Ref No Location IC802 A 13 Page 20 Page 20 Page 20 ...

Page 23: ... identified by mark 0 or dotted line with mark 0 are critical for safety Replace only with part number specified Les composants identifiés par une marque 0 sont critiques pour la sécurité Ne les remplacer que par une pièce portant le numéro spécifié Page 21 Page 21 Page 21 ...

Page 24: ...2 AVDD2 RMUT LOUT2 LOUT1 BCK LRCK PCMD LMUT AVSS1 AVSS2 CPU INTERFACE SERVO AUTO SEQUENCER SERIAL IN INTERFACE OVER SAMPLING DIGITAL FILTER 3rd ORDER NOISE SHAPER PWM PWM EFM DEMODULATOR TIMING LOGIC DIGITAL OUT D A INTERFACE DIGITAL PLL ASYMMETRY CORRECTION CLOCK GENERATOR MIRR DFCT FOK DETECTOR DIGITAL CLV SUBCODE PROCESSOR SERVO INTERFACE SERVO DSP FOCUS SERVO TRACKING SERVO SLED SERVO PWM GENE...

Page 25: ... DVC APC OFF Hi Z RW ROM H L DVC DVC AVC DVCC VC DVC RW ROM RW ROM RW ROM RW ROM RW ROM RW ROM DVCC VCC VCC VCC VOFST VOFST VOFST B C A D gm gm DVCC JUNCTION Board IC11 BA6780 VIN2 FIN2 RIN2 CT2 VEE FBIN FBIN OUT2 OUT2 VIN1 FIN1 REVERSIBLE DRIVER FWD REV CONTROLLER COVERNER DRIVER FWD REV CONTROLLER COVERNER LOAD CURRENT DETECTION AMPLIFIER COVERNER OUTPUT REFERENCE VOLTAGE OUTPUT LOW VOLTAGE OUTP...

Page 26: ...en 19 C2PO O Not used open 20 SCOR O Subcode sync S0 S1 detection signal output to the system controller IC301 21 COUT I O Numbers of track counted signal input output terminal Not used open 22 MIRR I O Mirror signal input output terminal Not used open 23 DFCT I O Defect signal input output terminal Not used open 24 FOK I O Focus OK input output terminal Not used open 25 LOCK I O GFS is sampled by...

Page 27: ...DD Power supply terminal 5V digital system 60 DOUT O Digital audio signal output to the DIGITAL OUT OPTICAL IC303 61 LRCK O L R sampling clock signal 44 1 kHz output terminal Not used open 62 PCMD O D A interface serial data output terminal Not used open 63 BCK O Bit clock signal 2 8224 MHz output terminal Not used open 64 EMPH O De emphasis control signal output terminal Not used open 65 XVDD Pow...

Page 28: ...l input from the tray address detect switch S200 17 NC I O Not used open 18 TBLL I O Table motor drive signal counterclockwise output to the BA6780 IC11 19 TBLR I O Table motor drive signal clockwise output to the BA6780 IC11 20 LD IN I O Loading motor M11 drive signal output to the BA6780 IC11 1 21 LD OUT I O Loading motor M11 drive signal output to the BA6780 IC11 1 22 NC I O Not used open 23 NC...

Page 29: ...71 VG Power supply terminal 30V for fluorescent indicator tube drive 72 VDD Power supply terminal 5V 73 to 75 NC O Not used open 76 AFADJ I Setting terminal for the test mode L active 77 BUSOUT O Sircs remote control signal output terminal Not used open 78 DSENS I Detect signal input from the disc sensor D11 79 SENS I Internal status SENSE signal input from the CXD2587Q IC101 80 SCOR I Sub code sy...

Page 30: ...4953 448 1 FOOT ASSY 4 4 232 237 01 FOOT DIA 30 5 4 231 683 01 PANEL LOADING BLACK CE275 CE375 US CND AUS AEP UK SP E 5 4 231 683 21 PANEL LOADING SILVER CE375 AEP 6 4 210 291 01 SCREW CASE 3 TP2 BLACK CE275 CE375 US CND AUS AEP UK SP E 6 4 210 291 11 SCREW CASE 3 TP2 SILVER CE375 AEP 7 4 231 686 11 CASE 409538 BLACK CE275 CE375 US CND AUS AEP UK SP E 7 4 231 686 31 CASE 409538 SILVER CE375 AEP 8 ...

Page 31: ... PANEL ASSY FRONT BLACK CE275 AUS 52 3 354 981 11 SPRING SUS RING 53 4 231 928 01 KNOB AMS BLACK CE275 CE375 US CND AUS AEP UK SP E 53 4 231 928 11 KNOB AMS SILVER CE375 AEP 54 4 231 973 01 BUTTON POWER BLACK CE275 CE375 US CND AUS AEP UK SP E 54 4 231 973 11 BUTTON POWER CE375 AEP 55 1 681 141 21 POWER SW BOARD 56 1 681 140 21 KEY BOARD 57 4 951 620 01 SCREW 2 6X8 BVTP 58 4 231 690 01 HOLDER FL A...

Page 32: ...02 4 218 253 31 SCREW M2 6 BTTP 103 4 951 619 01 CUSHION A 104 4 224 602 01 TABLE 105 4 224 617 01 GEAR RM E 106 4 218 252 51 SCREW PTPWH M2 6 FLOATING 107 4 224 616 01 GEAR RM M 108 4 224 615 03 GEAR RM B 109 4 225 328 01 BELT ROTARY 110 4 224 603 01 TRAY 111 1 791 930 11 WIRE FLAT TYPE 6 CORE 112 1 676 245 11 SENSOR BOARD 113 X 4924 457 1 ROLLER ASSY 114 A 4672 867 A MOTOR ASSY ROTARY 115 4 985 ...

Page 33: ...REW M2 6 BTTP 154 4 225 885 01 BELT LOADING 155 4 225 844 01 GEAR LOADING A 156 4 218 252 51 SCREW PTPWH M2 6 FLOATING 157 A 4672 879 A MOTOR ASSY LOADING 158 1 676 244 11 LOADING MOTOR BOARD 159 4 224 613 01 GEAR SHAFT 160 1 418 746 11 ENCODER ROTARY 161 4 224 607 01 GEAR SWING 162 4 224 609 01 GEAR LOADING C 163 4 224 608 01 COLLAR SWING 164 4 224 611 01 GEAR LOADING B 165 3 016 533 01 WASHER FR...

Page 34: ...917 565 01 SHAFT SLED 206 4 917 564 01 GEAR P FLATNESS 207 A 4725 568 A BDMOUNTED PC BOARD A 208 4 951 620 01 SCREW 2 6X8 BVTP 209 4 917 566 01 GEAR S 210 3 713 786 51 SCREW P 2X3 M101 X 4917 523 3 MOTOR ASSY SPINDLE M102 X 4917 504 1 MOTOR ASSY SLED The components identified by mark 0 or dotted line with mark 0 are critical for safety Replace only with part num ber specified Les composants identi...

Page 35: ... CERAMIC CHIP 0 1UF 25V CONNECTOR CN101 1 784 360 11 CONNECTOR FFC LIF NON ZIF 21P CN102 1 777 937 11 CONNECTOR FFC FPC 16P FERRITE BEAD FB191 1 216 864 91 SHORT 0 IC IC101 8 752 386 85 IC CXD2587Q IC131 8 752 089 74 IC CXA2581N T4 IC150 8 759 829 14 IC AN4800SB MOTOR M101 X 4917 523 3 MOTOR ASSY SPINDLE M102 X 4917 504 1 MOTOR ASSY SLED TRANSISTOR Q131 8 729 010 08 TRANSISTOR MSB710 R Q132 8 729 ...

Page 36: ... 01 CUSHION 4 231 690 01 HOLDER FL A CONNECTOR CN810 1 764 700 11 SOCKET CONNECTOR 37P CN811 1 750 194 11 CONNECTOR BOARD TO BOARD 4P FILTER FL801 1 517 946 21 INDICATOR TUBE FLUORESCENT IC IC802 8 759 827 70 IC NJL64H400A 1 RESISTOR R811 1 249 415 11 CARBON 680 5 1 4W F R812 1 249 417 11 CARBON 1K 5 1 4W F R813 1 249 419 11 CARBON 1 5K 5 1 4W F R814 1 249 421 11 CARBON 2 2K 5 1 4W F R815 1 247 84...

Page 37: ...SP A 4725 581 A MAIN BOARD COMPLETE CE375 E 7 685 871 01 SCREW BVTT 3X6 S CAPACITOR C301 1 161 494 00 CERAMIC 0 022UF 25V C302 1 104 665 11 ELECT 100UF 20 00 10V C303 1 161 494 00 CERAMIC 0 022UF 25V C304 1 164 159 11 CERAMIC 0 1UF 50V C325 1 161 494 00 CERAMIC 0 022UF 25V C326 1 104 665 11 ELECT 100UF 20 00 10V C351 1 126 963 11 ELECT 4 7UF 20 00 50V C401 1 126 965 11 ELECT 22UF 20 00 50V C404 1 ...

Page 38: ...3 1 249 427 11 CARBON 6 8K 5 1 4W F R324 1 249 429 11 CARBON 10K 5 1 4W R325 1 249 417 11 CARBON 1K 5 1 4W F R326 1 249 425 11 CARBON 4 7K 5 1 4W F R327 1 249 425 11 CARBON 4 7K 5 1 4W F R329 1 249 425 11 CARBON 4 7K 5 1 4W F R350 1 247 807 31 CARBON 100 5 1 4W R351 1 247 807 31 CARBON 100 5 1 4W R352 1 249 441 11 CARBON 100K 5 1 4W R353 1 249 441 11 CARBON 100K 5 1 4W R356 1 249 441 11 CARBON 100...

Page 39: ...ifiés par une marque 0 sont critiques pour la sécurité Ne les remplacer que par une pièce portant le neméro spécifié SWITCH S11 1 771 836 11 SWITCH LEVER SLIDE MISCELLANEOUS 09 1 575 651 21 CORD POWER CE375 AEP UK SP 09 1 696 845 11 CORD POWER CE275 AUS CE375 AUS 09 1 777 071 41 CORD POWER CE375 AEP UK SP 09 1 783 528 21 CORD POWER TRACKING CE375 E 09 1 783 531 31 CORD POWER CE275 US CND CE375US C...

Page 40: ...ows you to jump to the revised page Also clicking the version at the upper right on the revised page allows you to jump to the next revised page Ver Date Description of Revision 1 1 2001 07 Addition of test mode Addition of electrical adjustments 1 0 2001 04 New ...

Reviews: