4
Quick Start Guide for Tempo Serial ATA
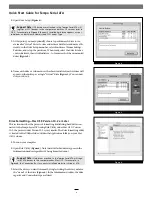
Figure 5
2.
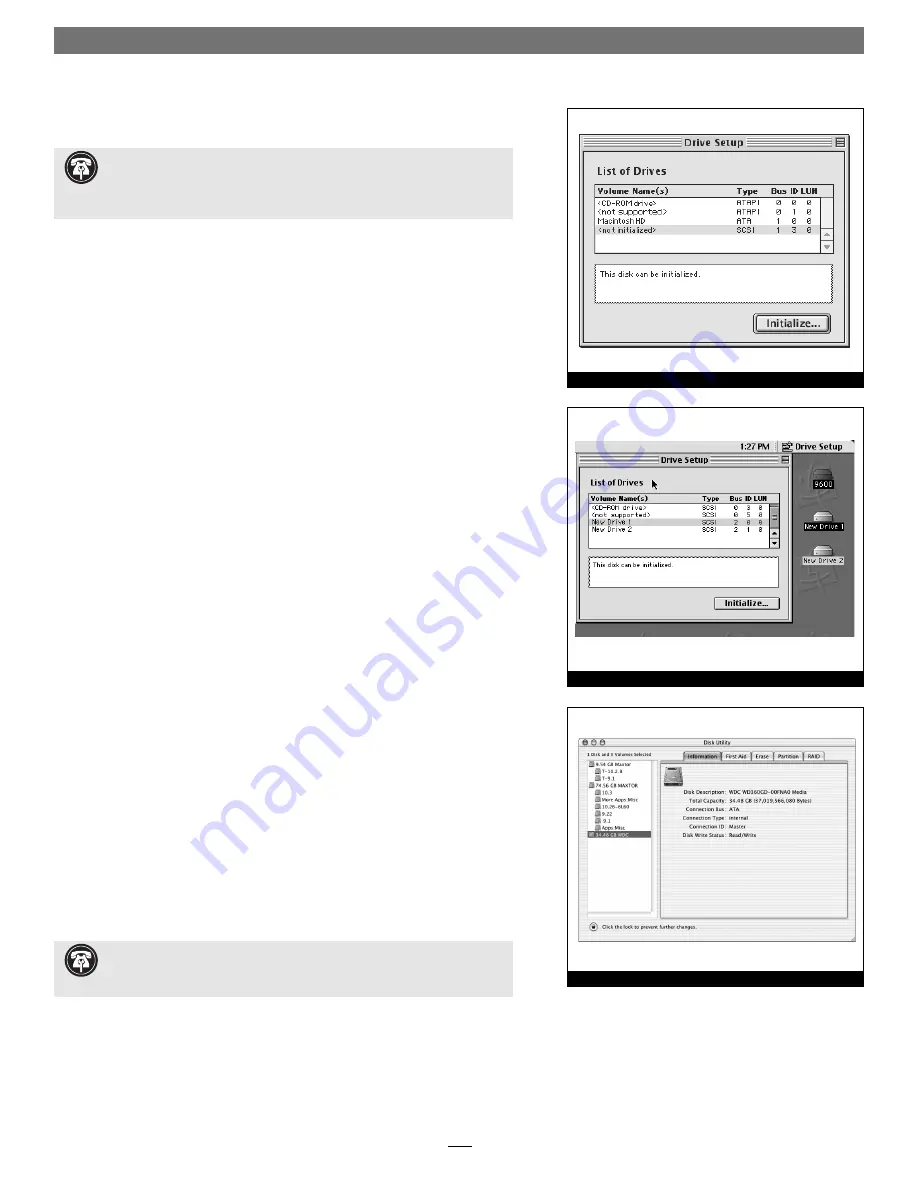
Open Drive Setup
(Figure 4)
.
3.
At this point, you may optionally choose to partition each drive to cre-
ate smaller “virtual” drives to store and retrieve data faster and more effi -
ciently; in the Drive Setup menu bar, select Functions: Volume Settings…
Partition, and set up the partitions. When ready, select the drive listed as
<not initialized>, then click Initialize… to format each of the unmounted
drives
(Figure 4)
.
4.
Name each drive or volume once it has been initialized; each volume will
appear on the desktop as a single “virtual” drive
(Figure 5)
. You can now
use your drive(s).
Drive Formatting—Mac OS X Version 10.2 or Later
This section describes the process of formatting (initializing) hard drives con-
nected to the Tempo Serial ATA using Disk Utility under Mac OS X Version
10.2; the process under Version 10.3 is very similar. The drive formatting utility
is located in the Utilities folder (within the Applications folder) on your Mac
OS X volume.
1.
Turn on your computer.
2.
Open Disk Utility
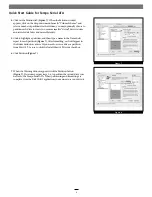
(Figure 6)
. Note that all attached drives appear in the
Information window, regardless of being formatted or not.
3.
Select the drive you want to format by single clicking the drive symbol or
the “name” of the drive
(Figure 6)
. In the Information window, the drive
capacity and Connection type are listed.
Support Note:
IDE hard drives attached to the Tempo Serial ATA will
register as SCSI devices to the computer under Mac OS versions prior to
OS X. For example, in
Figure 4
the newly installed hard drive appears as <not
initialized> under Volume Name(s) and SCSI under Type.
Figure 4
Figure 6
Support Note:
Hard drives attached to the Tempo Serial ATA will regis-
ter as ATA devices to the computer under Mac OS X. For example, in
Figure 6
, the Connection Bus for a newly installed hard drive is listed as ATA.


