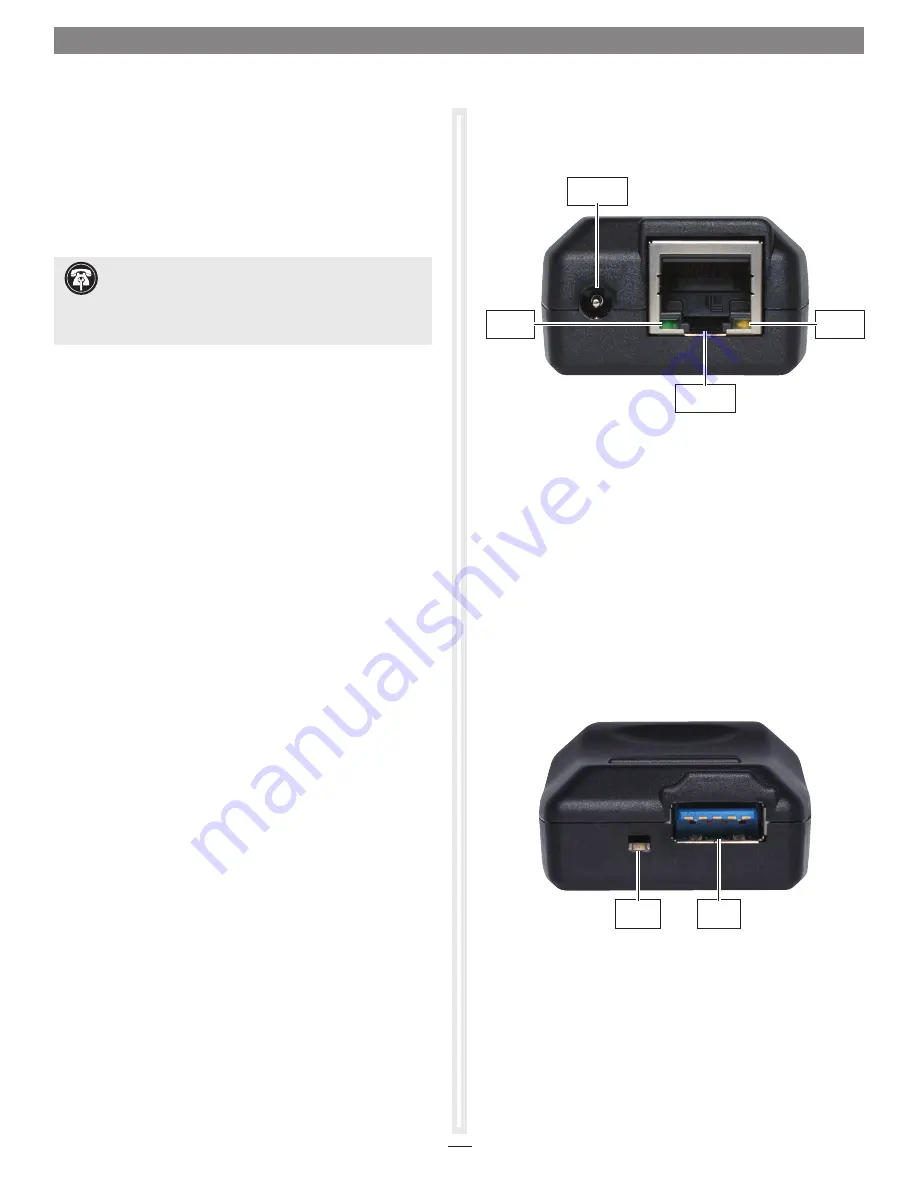
Presto Gigabit USB 3.0 Description
listed below are pictures and descriptions of the Presto adapter’s
ports and indicators.
Ethernet Port
– Plug in any Category 5 or 6 unshielded twisted
pair (UTP) cable with rJ-45 connectors
Link Indicator
– This green lEd displays the link status.
• When the LED is off, there is no link between the Presto
adapter and the network.
• When the LED is on, a link is established between the Presto
adapter and the network.
Activity Indicator
– This yellow lEd displays activity status.
• When the LED is off, there is no network activity.
• When the LED flashes, there is network activity.
USB 3.0 Port
– Connect either the included USB 3.0 cable or
another USB 3.0 cable between the adapter and your computer.
USB 3.0 Indicator
– This lEd lights green when there is a USB 3.0
connection between the computer and adapter.
Installation Steps
System configuration Steps—Windows Users
listed below are the steps necessary to add the Presto Gigabit USB
3.0 for use as one of your computer’s network connections.
1.
Plug in one end of an Ethernet cable to the Presto Gigabit
USB 3.0 adapter’s Ethernet port. Connect the other end to a
cable or dSl modem, or a network.
2.
Connect either the included USB 3.0 cable or another USB
3.0 cable between the Presto adapter and a USB port on your
computer.
3.
With your computer turned on, depending on your setup,
Windows may configure itself automatically to work with
the Presto adapter. launch a Web browser and browse a
Website to verify.
4. If your system did not configure itself, access the network
and Sharing Center to make necessary changes.
4
Support Note:
The Presto Gigabit USB 3.0 adapter
requires a USB 3.0 cable and a USB 3.0 port on your
computer to support Gigabit transfer speeds. Connecting the Presto
adapter to your computer using a USB 2.0 cable, or connecting the
adapter to a USB 2.0 port will result in reduced performance.
Activity
Indicator
Link
Indicator
Power Socket
(not used)
Ethernet Port
(RJ-45 type)
USB 3.0
Port
USB 3.0
Indicator


