


Software Installation and Card Configuration—
Windows XP and Server 2003 (continued)
6.
locate the file you just downloaded, and then double-click
it to launch the software installer. follow the onscreen
instructions, making sure that the “Intel ProSET for
Windows device Manager” and “advanced network
Services” options are selected for installation when the
Setup
Options
window appears.
7.
after the software installation is complete, configure the
Presto card by changing network settings. Click Start, and
then select Control Panel. In the
Control Panel
window,
double-click network Connections. In the
Network
Connections
window, the Presto card’s ports are identified
as “Intel(r) PrO/1000 PT dual Port Server Connection #1”
and “Intel(r) PrO/1000 PT dual Port Server Connection
#2”. double-click one of the icons to bring up the Properties
window to make basic changes; click Configure to access the
card’s advanced features.
Installation Steps
4
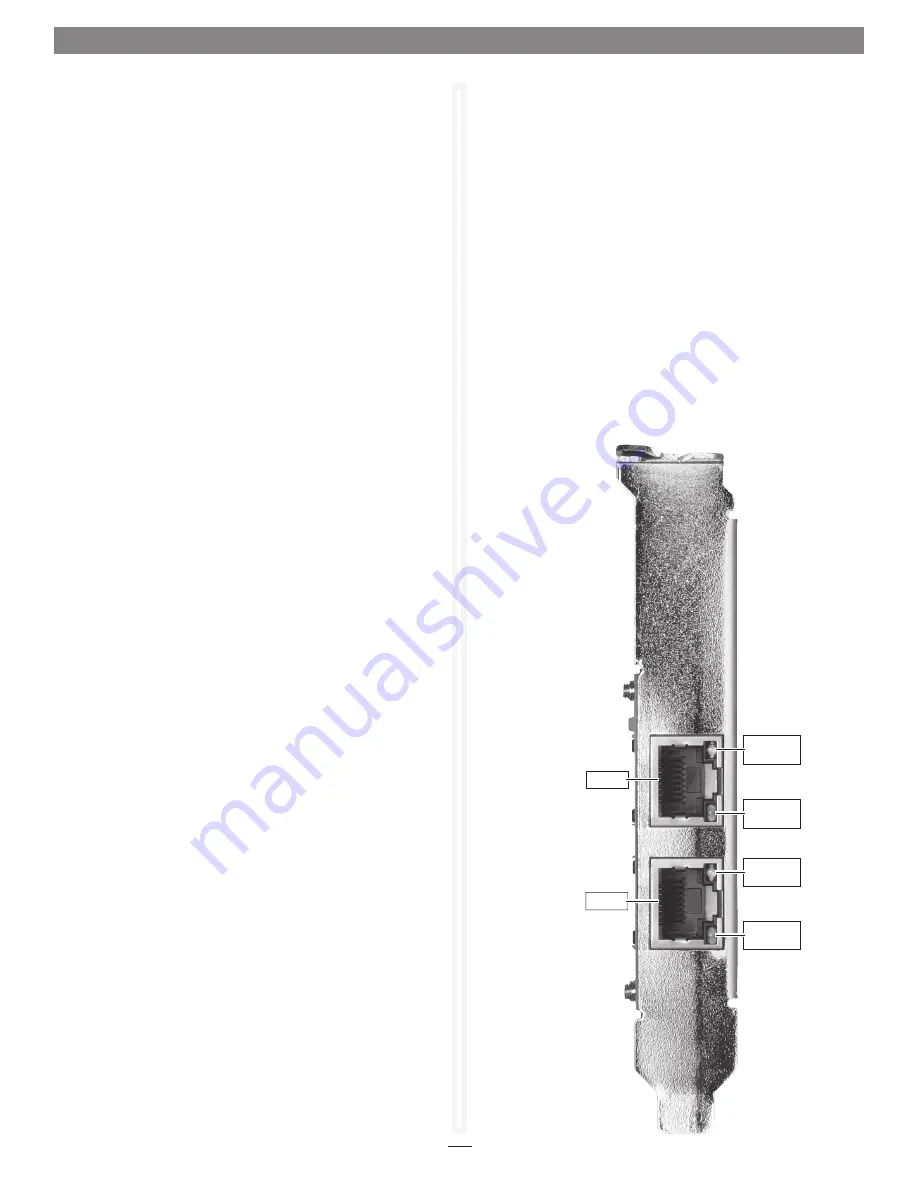
Link/Activity indicator -
This green lEd displays the link status.
• When the
LED is off
, there is
no link
between the Presto card
and the network.
• When the
LED is on
, a
link is established
, but there is
no traffic
on the network.
• When the
LED is flashing
, there is
traffic on the network
to
which the Presto card is connected.
Link Speed indicator -
This lEd displays link speed connection
status.
• When the
LED is lit green
, a
1000BaseT link is established
.
• When the
LED is lit orange
, a
100BaseT link is established
.
• When the
LED is off
, a
10BaseT link is established
.
Ethernet ports
- Plug in any Category 5 or 6 unshielded twisted
pair (UTP) cables with rJ-45 connectors.
• Use standard cables when you are connecting your computer
through a hub.
About the Presto Gigabit Server PCIe Card
Link Speed
indicator
Link Speed
indicator
Link/Activity
indicator
Link/Activity
indicator
Port 2
Port 1


