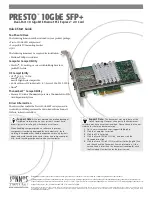
Quick Start Guide for Presto 10GbE SFP+
INSTALLATION STEPS FOR WINDOWS USERS
The following section covers installation and configuration steps
for the Presto card in a Windows computer or a Thunderbolt-to-
PCIe card expansion system connected to a PC.
Installation Preparation
Sonnet strongly recommends that you read the section in your
computer’s user manual that addresses PCI card installation, prior
to installing the Presto 10GbE card into your system.
Card Installation Steps
1.
Shut down your computer or Thunderbolt-to-PCIe card
expansion system and disconnect it from its power source,
and then open it to access the expansion card area (PCIe
slots); refer to the user’s manual for specific information.
2.
Locate an available x8 (8-lane) or x16 (16-lane) PCI Express
slot and remove its access cover.
3.
Remove the Sonnet card from its packaging, and then
install it into the PCI Express slot;
make sure the card is
firmly seated and secured
.
4.
Close your computer or expansion system, and then
reconnect it to its power source. If the card is installed in
an expansion system, also connect the Thunderbolt cable
between the Thunderbolt ports on the system and computer.
5.
If you are using SFP+ terminated Twinax copper cables to
connect the Sonnet card, connect them now, and proceed
to the next section. Otherwise, read the documentation
included with the SFP+ transceivers you purchased, and
then install them into the Sonnet card.
6.
Connect cables between the transceivers in the Sonnet card
and in the switch or device.
Windows Driver Download and Installation
This section describes the download and installation of the
drivers required to support the Presto 10GbE SFP+ adapter card
installed in your Windows computer or Thunderbolt-to-PCIe card
expansion system connected to a PC with Thunderbolt ports.
1.
Launch a Web browser and go to www.sonnettech.com/
support, and then click the Downloads, Manuals, &
Knowledgebase link.
2.
On the Support Categories page, click the Computer Cards
link, and then the PCIe Cards link, and then click the Presto
10GbE SFP+ link.
3.
On the Presto 10GbE SFP+ page, cclick the Driver link, and
then click the Download Now button next to next to driver
software for Windows link; a new window or tab will open.
4.
On the Intel
®
Network Adapter Driver page, locate and
click the PROWin64.exe button; an Intel Software License
Agreement window will open.
5.
Read the license agreement, and then click the “I accept
the terms in this license agreement” button; the Opening
PROWin64.exe window will open.
6.
In the Opening PROWin64.exe window, click Save File; the file
will be saved.
7.
Locate and double-click the PROWin64 application file to
launch the installer. If you haven’t disabled User Access
Control (UAC) on your computer, another window will
appear asking you to allow the program to run; click Allow;
the installer will launch.
8.
Follow the on-screen instructions to complete the driver
installation.
Basic Card Configuration Information
You may configure the Presto 10GbE SFP+ card’s settings using
Windows Device Manager. You may locate the device’s ports in
the Network adapters category, listed as Intel 82599 10 Gigabit
dual port network connections.
3


