Solwise Ltd,
www.solwise.co.uk
5
3
3
.
.
S
S
e
e
t
t
t
t
i
i
n
n
g
g
u
u
p
p
t
t
h
h
e
e
T
T
C
C
P
P
/
/
I
I
P
P
Windows Me / 98
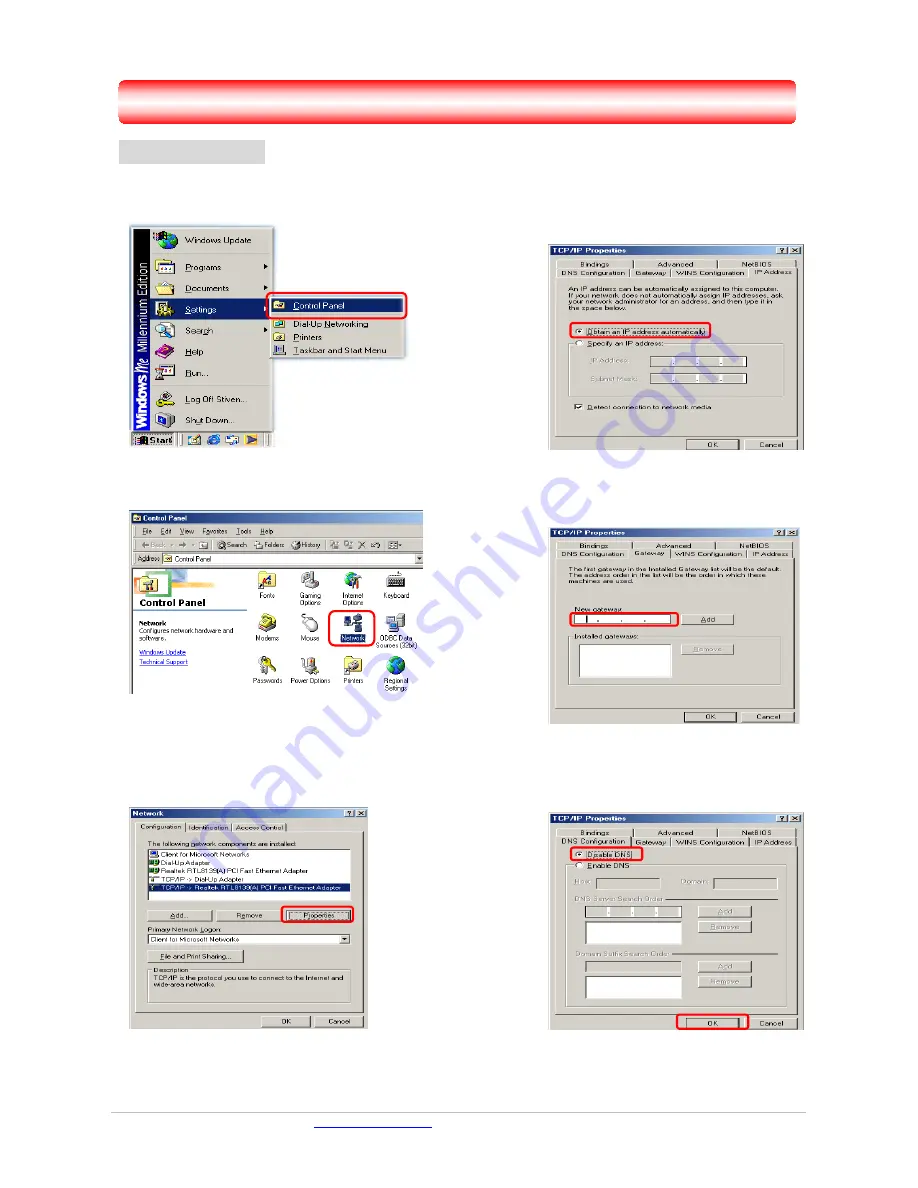
Step 1
: Click
Start
→
Settings
→
Control Panel
.
Step 2
:
Double-click the
Network
icon.
Step 4
: Go to IP Address icon and select
Obtain an IP address
.
Step 3
: Go to Configuration icon, select network
adapter installed and click
Properties
.
Step 5
: Go to Gateway icon and erase all
previous setting.
Step 6
: Go to DNS Configuration icon, select
Disable DNS
and click
OK
.
1
2
1
2