Solt SOLTPEPEATER User Manual Download Page 3

6

7

Rep

eater

Rep

eater

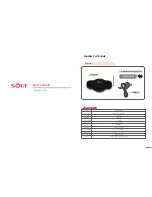
   ② Bracket Installation

   ③ Power Cord 

(Use the adapter provided in the package.)

   ④  Wall Mounting 

(Pull down the unit until clicking sound is heard. )

Install at roof like picture above, it is better if antenna direction go downward.
In the case of cannot be installed to the roof install rear the roof.
Once decided where to install, fix the mount.

Installation guide

   ① Location

※ Transmitter must be installed with in 100% reception area.

※  This product is needed to avoid moisture and water (It can be cause of breakdown)     
     Recommend to install away from water. If needed to install outside of building, install 
     where does net get wet.

It is most appropriate to install  A location which is located within 100% reception area.
(See map a picture above)

Transmitter (Main or Bell) Location.

100% Reception Area.

To assure the finest performance, please read this manual carefully.

Summary of Contents for SOLTPEPEATER

Page 1: ...cy MHz 433 0500 434 7900 Freq Stability 5 ppm Data Rate 1800 bps Channel space 12 5 KHz Modulation FSK 3KHz Output Power 10mW Max Sensitivity 118dBm at 12dB Power Supply DC 12V 1A Adapter Dimension mm...

Page 2: ...an adapter with AC110 22OV input DC12V 1A output is recommended PWR Red led indicates power is on RX Blinking Red led indicates bell model TX Blinking Green led indicates pager model MENU ESC Menu bu...

Page 3: ...install fix the mount Installation guide Location Transmitter must be installed with in 100 reception area This product is needed to avoid moisture and water It can be cause of breakdown Recommend to...

Page 4: ...main transceiver CPr Extends pager receiving range by relaying main transceiver data to pager Cbr or CPr is displayed Repeater setting modes Listed items below can be set by using user setting buttons...

Page 5: ...To set another receiving mode repeat steps 4 to 5 Press MENU button MENU ESC SET PWR ST r5 is displayed and ready for reception P 3FDFJWF e g Call number 200 is set to not receive when No Receive icon...

Page 6: ...Registered call number is displayed Selected call number is displayed ST r5 is displayed and ready for reception Press SET button Press MENU button MENU ESC SET PWR MENU ESC SET PWR Repetition call se...

Page 7: ...the screen and the number stop blinking ST r5 is displayed and ready for reception Call number registering mode Registers new call numbers E6 Breg is displayed Press button 5 times Press SET button Pr...

Page 8: ...n 6 times Press SET button Press buttons Sets the desired number MENU ESC SET PWR MENU ESC SET PWR MENU ESC SET PWR MENU ESC SET PWR 0 is default value transmits as soon as receiving a call ST r5 is d...

Reviews: