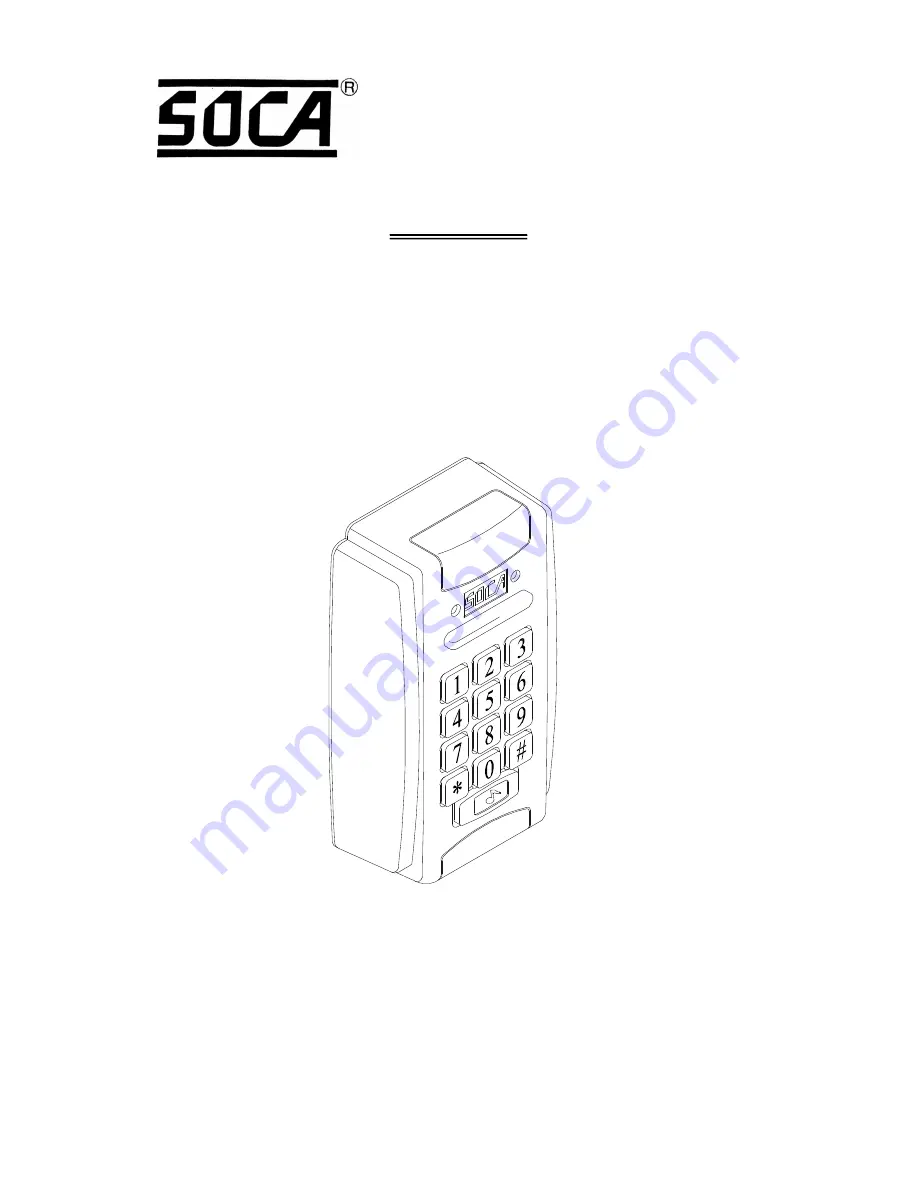
ST320
WATERPROOF PROXIMITY ACCESS
CONTROL SYSTEM OPERATION AND
INSTALLATION MANUAL
SOCA TECHNOLOGY CO., LTD.
COPY RIGHT 2005 Febru ary
Page 1: ...ST 320 WATER PROOF PROXIMITY ACCESS CONTROL SYSTEM OPERATION AND INSTALLATION MANUAL SOCA TECHNOLOGY CO LTD COPYRIGHT 2005 February...
Page 2: ...6 Batch registration add series cards 7 Anti tamper output setting 8 Changing system password command 9 Deletion of 8 sets of user s passwords 10 Deletion of batch registration Delete all cards 11 Doo...
Page 3: ...ss first then enter again when completed Example 4 5 6 7 5 All proximity card or proximity key tag must be registered before 6 Proximity card or proximity key tag has 8 digit number code The card numb...
Page 4: ...es of cards are required to register before use 12345678 SC 10 Thin card thickness 0 8 mm ISO standard card Read range 10 cm It can be printed directly from card printer dimension SC 20 Thick card thi...
Page 5: ...y card or 6 batch registration Then register all the use s proximity cards and key tags When completed press ro escape form the setting mode Refer to appendix Mounting of reader unit Users could insta...
Page 6: ...s The reader will automatically terminate the system setting mode function after 20 seconds 1 Add one card To register user s card and utilize proximity to register ENTER SYSTEM PASSWORD STATUS LIGHT...
Page 7: ...DELETE NEXT ONE ENTER NEXT ONE DELETION COMPLETED COMPLETED DELETION FAILED 1 BEEP SOUND 1 BEEP SOUND 1 BEEP SOUND 1 BEEP SOUND 1 BEEP SOUND BEEP SOUND REPEATED On the above operation if is being pre...
Page 8: ...MINATE TERMINATE COMPLETED COMPLETED TERMINATE TERMINATE 1 BEEP SOUND 1 BEEP SOUND 1 BEEP SOUND 1 BEEP SOUND 5 Setting identification modes There are 4 sets of door opening modes Users could only set...
Page 9: ...to the proximity reader tamper switch 2 Damage to the door must add detection wiring such as reed switch This function can be set whether door detection point is applied to activate the anti tamper ou...
Page 10: ...RESS 9 1 BEEP SOUND 1 BEEP SOUND 2 BEEP SOUND TWICE INCORRECT PASSWORD BEEP SOUND REPEAT 1 BEEP SOUND 1 BEEP SOUND CONFIRM THE NEW PASSWORD ENTER THE NEW 4 DIGIT SYSTEM PASSWORD PRESS PRESS 3 PRESS TE...
Page 11: ...D STATUS LIGHT ON WITH A BEEP SOUND STATUS LIGHT ON WITH A BEEP SOUND STATUS LIGHT ON WITH A BEEP SOUND PRESS 9 PRESS 0 1 BEEP SOUND 1 BEEP SOUND 1 BEEP SOUND 1 BEEP SOUND 1 BEEP SOUND STATUS LIGHT FL...
Page 12: ...e alarm output Anti Duress alarm output Door detection sensor point 1 Door detection sensor point 2 GND DC 12V GND Door control relay Dry contact N O Door control relay Dry contact N C Door control re...
Page 13: ...purple blue 12 A Electric lock fail secure type and reader B Electric lock fail safe type and reader C SOCA SL 100 AP 10 DC 12V AP 10 DC 12V ELECTRIC LOCK A EL PT EXIT PUSH BUTTON YELLOW PURPLE BLUE G...
Page 14: ...point 8P orange connecting point B Duress alarm output connecting point 8P yellow connecting point 13 SIREN SIREN REED N C N C COM N C N O COM AP 10 DC 12V DC12V EXTERNAL RELAY DC12V EXTERNAL RELAY A...
Page 15: ...DC 12V 500 800mA 6 Power consumption standby 90mA active 110mA 7 Dimensions 125mm L X 33mm W X 70mm H DO NOT SHARE THE SAME POWER SUPPLY OF BOTH ELECTRIC LOCK AND PROXIMITY READER TOGETHER USERS SHOUL...
Page 16: ...avoid pressing against the PC board which may cause short circuit or poor connection 3 How to use the duress code setting Solution 1 Users should change door opening mode to 4 digit password door open...
Page 17: ...pen the covers of screws at the top and bottom of the reader unit Use enclosed special L shape spanner to unscrew and remove the special acrews anti clockwise direction Please make sure all four O rin...
Page 18: ...with base cover tightly onto the wall Link connectors through water proof pad and base cover to connect to the reader unit Screw the front cover with base cover tightly with four screws make sure all...
Page 19: ...top and bottom firmly Attention When mounting onto rough wall Use appropriate size of flat acrylic or wood piece Do not use metal piece to mount onto rough wall with silicon glue Screw or fit the base...