background image

2 Product Specification

SmartDrive MX

6

Version 1.1 - May 2014

Installation and operating instructions

2.2

Dimensions

2.3

Display

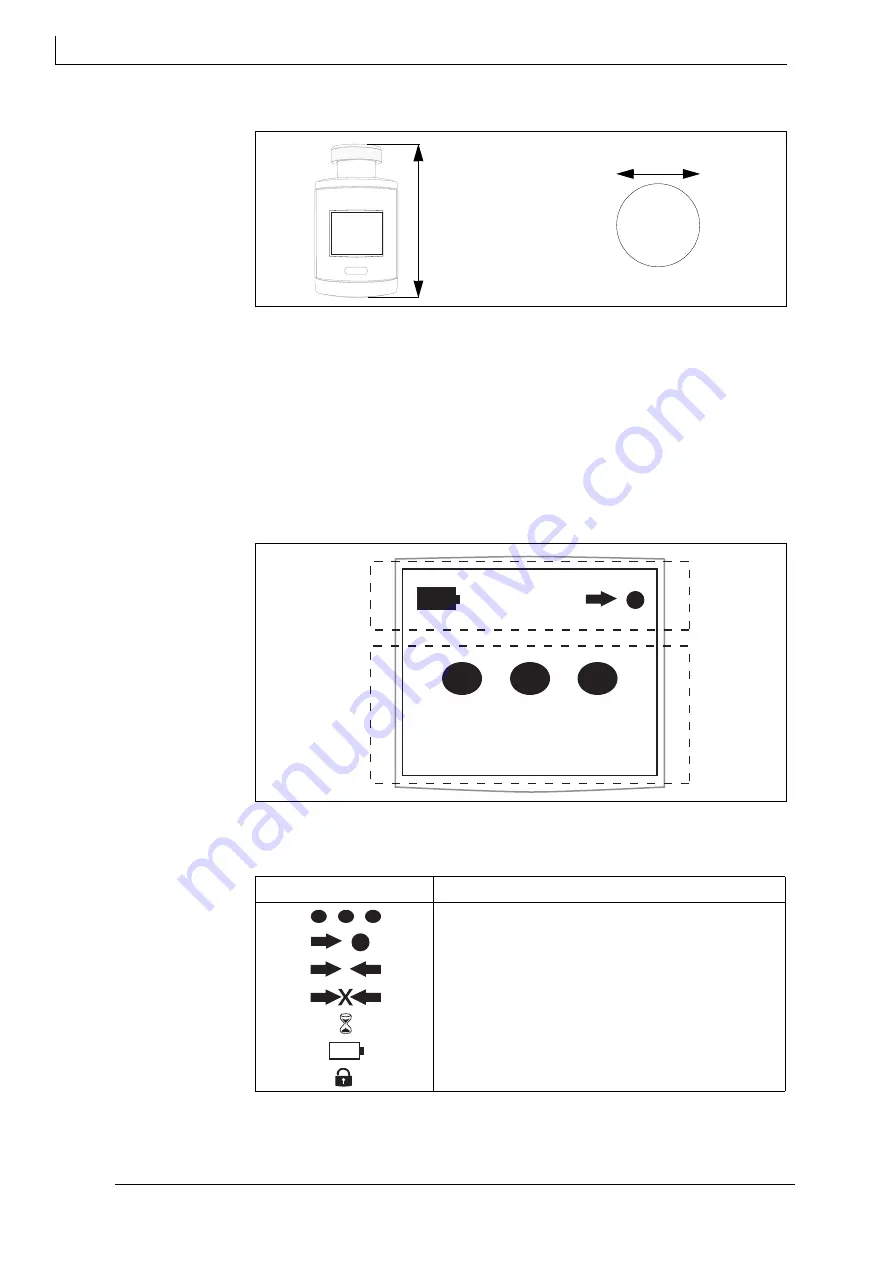
The display screen acts as user interface and is sub-divided into two areas.
The upper, narrower area shows the battery, teaching and adapting status. The 
lower area shows the target temperature and the error message in large 
characters and numbers, as well as the event symbols.

table 1 Symbol explanation

 on page 6

For energy saving reasons, display periods are kept short but additional readings 
can be taken by pressing the key.

diagram 2

Dimensions

101.00 mm

57.00 mm

diagram 3

Display

Symbol

Explication

Moving to installation position

Adapting 

Teaching 

Reset to default setting

Waiting for symbol display

Empty battery

Keyboard lock

table 1

Symbol explanation 

Summary of Contents for SmartDrive MX

Page 1: ...May 2014 270746 EN driven by excellence INSTALLATION AND OPERATING INSTRUCTIONS SmartDrive MX Snugr is a product of 4INCH sa...

Page 2: ...information SmartDrive MX 2 Version 1 1 May 2014 Installation and operating instructions General information Proof of amendment Version Date Changes 1 0 April 2014 Initial preparation 1 1 May 2014 Re...

Page 3: ...parts 5 2 2 Dimensions 6 2 3 Display 6 2 4 Functions 7 2 5 Data Transfer 9 2 6 Technical data 10 2 7 Environmental conditions 11 3 Transportation Storage 11 4 Assembly 11 4 1 Checking the scope of de...

Page 4: ...thermostat SmartDrive MX described in this document has been designed for room temperature control and adapts the heat supply to the requirements of the individual rooms It is designed exclusively for...

Page 5: ...tocol and boasts a large display screen as well as a dial for conventional manual control Energy supply is provided by two lithium batteries type AA 1 5 V 2 1 Component parts Pos Denomination Explicat...

Page 6: ...ws the target temperature and the error message in large characters and numbers as well as the event symbols table 1 Symbol explanation on page 6 For energy saving reasons display periods are kept sho...

Page 7: ...MX uses the reclaim telegrams to check the availability of the controller at every wake up The centre will reassume control as soon as connection has been re established Radio interface The SmartDriv...

Page 8: ...greater part of its operating time in deep sleep mode so as to keep energy consumption as low as possible You can select the periods for deep sleep mode by using a radio telegram from a selection of...

Page 9: ...rding to EnOcean Smart Acknowledge Standard in order to connect the SmartDrive MX to a controller The following data can be received by the SmartDrive MX Target valve position The target valve positio...

Page 10: ...terface telegram structure Bi directional EnOcean Equipment Profile A5 20 04 Range 30 m inside building dependent on building material Wake up time process and time controlled variable adjustable Tran...

Page 11: ...includes 2 batteries type AA Before you install the SmartDrive MX 4 1 Checking the scope of delivery on page 11 The following sequence of operations is part of the SmartDrive MX 4 2 Insert batteries o...

Page 12: ...from the 06 battery compartment 3 Insert the batteries ATTENTION Do not use rechargeable batteries Do not use rechargeable batteries as their voltage is insufficient When inserting the batteries pay a...

Page 13: ...ons Version 1 1 May 2014 13 4 3 Assembling the SmartDrive MX diagram 5 on page 13 How to assemble the SmartDrive MX 1 Screw the SmartDrive MX threaded connection 04 onto the heating valve 2 Tighten th...

Page 14: ...4 Press and hold the key 01 until the teaching symbol on display of SmartDrive MX appears The SmartDrive MX will then send the teaching telegram to the master central unit 5 Optionally you can set a c...

Page 15: ...reached Replace the batteries 20 Frost protection Temperature has dropped below 10 C Insufficient heating performance Close the window or check the heating system as the case may be 33 Problems with...

Page 16: ......

Reviews: