


37
User Manual M70 / M80 / M90
Getting to know
• Assigning a ringtone to the contact
. Twenty (20) ringtones are available and can be set for calls
in general and individually to announce ringing calls from the respective contact. The default
is melody 1. For assigning ringtones to contacts, see "Editing contacts" on page 38. For the
general settings, see "Ring melody" on page 47.
•
Assigning a speed dial key to the contact
. The keys 2 to 9 can be assigned for speed dialing
eight of your contacts. If the contact has more than one phone number, the speed dial function
is assigned to the default number (see table on page 36). For assigning speed dial keys, see
"Editing contacts" on page 38.
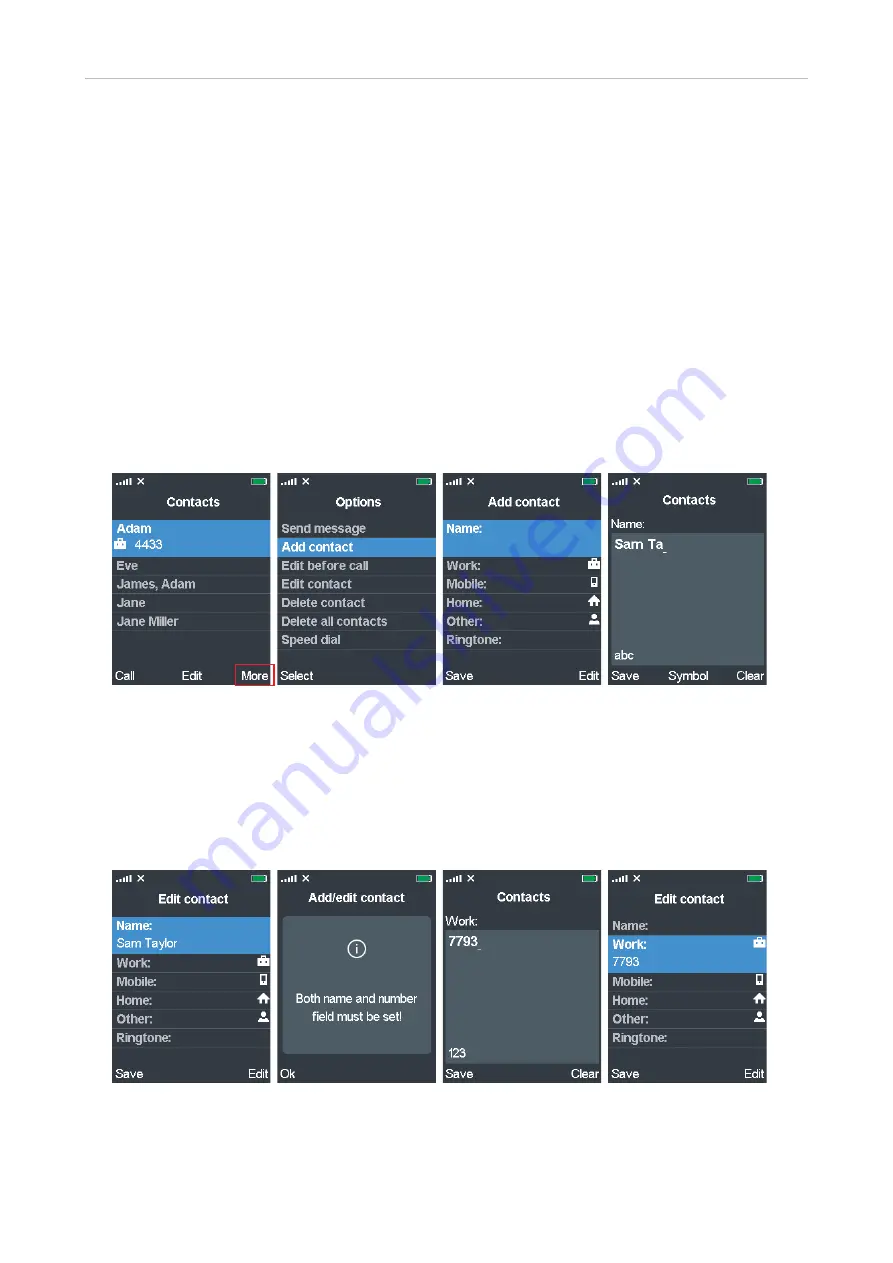
Adding contacts
See "Letter modes" on page 32 and "Entering phone numbers (numeral mode)" on page 31 on
how to enter names and numbers.
1. Open the contacts menu and press the function key underneath
More
" (Fig. 6) to open the
Options
menu (Fig. 7).
Fig. 6
Fig. 7
Fig. 8
Fig. 9
2. Scroll to
Add contact
and press the function key underneath
Select
. The
Add contact
screen
opens (Fig. 8).
3. With
Name
highlighted, press the function key underneath
Edit.
The blank editing field for
Name
appears (Fig. 9).
4. Enter the name and press the function key underneath
Save
. The name has been added to the
Edit contact menu (Fig. 10).
Fig. 10
Fig. 11
Fig. 12
Fig. 13
Note
: The name is stored only temporarily. If you leave the edit menu without adding a
phone number and saving the contact, the name will not be saved. If you try saving the
contact with just a name or a number, you will receive an error message (Fig. 11)


