11
Maintenance
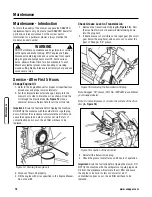
Check Mower Blade
1. Disconnect the spark plug wire and secure the end away
from the plug.
2. Tilt the mower up on its rear wheels for access to the
blade cap screw
(A, Figure 17)
. Do not tilt the mower
with the spark plug or carburetor down.
Important:
Drain the fuel tank before tipping the mower. DO
NOT tip the machine with the carburetor or spark plug down.
Oil from the crankcase will saturate the air filter and cause
the engine to be hard to start or not start at all. If
contamination does occur, the air filter will have to be
replaced.
3. Check the torque of the blade cap screw. Recommended
torque should be 40 ft. lbs.
4. Check the blade for sharpness, wear and damage. Refer
to the Section entitled “Blade Wear Limits”.
Check Engine Drive Belt
1. Visually check the engine drive belt for cracking, fraying,
severed or exposed belt strands. If worn or damaged,
replace the belt before operating the mower.
Check Transmission Poly-V Belt
1. Visually check the poly-v belt for cracking, fraying, sev-
ered or exposed belt strands. If worn or damaged,
replace the belt before operating the mower.
Service - Periodic
Perform all maintenance as described in the “Service
Schedule” section of this manual.
Engine
Service the engine according to the engine owner’s manual.
Air Filter
Refer to the engine owner’s manual for service instructions.
Engine Oil
Refer to the engine owner’s manual for service instructions.
Storage Procedure
Refer to the Engine Owner’s Manual for directions regarding
engine storage preparations. Prepare the mower for “end of
season” storage as follows:
1. Drain the fuel from the fuel tank and let the engine run
until all fuel is out of the carburetor.
2. Disconnect and remove the spark plug wire away from
the spark plug before any other preparations are made!
3. Tape all openings closed to prevent spraying water into
the exhaust or air intakes during washing.
4. Tilt the mower up on its rear wheels and thoroughly
clean the underside of the deck. Do not tilt the mower
with the spark plug or carburetor down. Scrape away
any accumulation of grass with a putty knife and/or
wire brush.
5. Lubricate all exposed metal with a light coating of oil to
prevent corrosion.
6. On self-propelled models, disconnect the transfer rod
clip and remove the ground speed control rod before
folding the handles.
7. Loosen the handle knobs. Carefully fold the handles
forward, “flexing” the control cables to prevent cable
damage.
8. Store the mower in a shed or other dry area, protected
from weather.
WARNING
DO NOT attempt any maintenance, adjustments or service
with engine and blade running. STOP engine and blade.
Disconnect spark plug wire and secure away from spark
plug. Engine and components are HOT. Avoid serious
burns, allow sufficient time for all components to cool.
Wear heavy leather gloves when handling or working
around cutting blades. Blades are extremely sharp and can
cause severe injury.
!
!
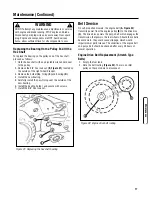
Figure 17: Tightening the blade cap screw
A
Maintenance (Continued)
Summary of Contents for SERIES 20
Page 24: ...www snapper com 22 Notes...
Page 25: ...23...
Page 26: ...www snapper com 24 Notes...
Page 27: ...25 Notes...
Page 52: ...www snapper com 22 Notes...
Page 54: ...www snapper com 24 Notes...
Page 55: ...25 Notes...


