background image


14 

Section 4 - ADJUSTMENTS & REPAIR 


WARNING 

DO NOT attempt any adjustments, maintenance or 
service with the engine and blade running. STOP 
engine and blade. Remove key. Disconnect spark 
plug wire and secure away from spark plug. Engine 
and components are HOT. Avoid serious burns, 
allow sufficient time for all components to cool. DO 
NOT attempt to service or charge the battery while it 
is installed on the machine. 

 
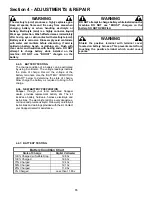
4.4 BATTERY 

4.4.1. BATTERY REMOVAL 
1.  
Loosen bolts that secure battery bracket to the 
deck. See Figure 4.8. 


FIGURE 4.8 


2.  Unplug battery harness from main harness. See 
Figure 4.9. 
3.  Carefully slide battery from battery bracket. 


WARNING 

Cables must be connected to battery terminals in the 
proper position. DO NOT attempt to charge battery 
while installed on the machine.  DO NOT use 
“BOOST” chargers on the battery. 


4.4.2. BATTERY 

INSTALLATION 

1.  Slide battery into battery bracket. Tighten bolts. 
2.  Plug battery harness into main harness. See Figure 
4.9. 


4.4.3. BATTERY SERVICE 
The battery supplied with the electric start model 
mowers is a sealed lead acid type battery. After 
initial activation the battery is sealed. No fluid level 
maintenance is required. DO NOT attempt to check 
or adjust fluid level in battery. 
1. Remove battery. Refer to Section “BATTERY 
REMOVAL”. 
2.  Place battery in a well ventilated area on a level 
surface. 
3.  Slow charge battery at 1 amp for 10 hours. 
4. If battery will not accept charge or is partially 
charged after 10 hours of charging at 1 amp, 
replace with new battery. 


4.4.4. BATTERY STORAGE 
If mower is to be stored, it is recommended the 
battery be removed, charged and stored. 
1.  Remove battery. Refer to Section “BATTERY 
REMOVAL”. 
2.  Perform battery service. 
3.  Bring battery to full charge, if required. 
4.  Store battery in an area away from the machine on 
a wood surface. DO NOT STORE BATTERY ON A 
CONCRETE SURFACE. 


(Continue to next page for Battery Testing) 


POSITIVE 
TERMINAL 

BATTERY 

BATTERY 
BRACKET 

TERMINAL 
COVER 

BATTERY 
HARNESS 

ENGINE 
HARNESS 

NEGATIVE 
TERMINAL 

MAIN 
HARNESS 

Summary of Contents for EMLP21501KWV, EMLP21601, EMLP2

Page 1: ...P Self Propelled Model 1 Series Designation E Electric Start Model 21 21 Cutting Width KW Kawasaki Engine 50 5 0 HP Engine Horse Power V Over Head Valve Engine Thank you for buying a SNAPPER Product B...

Page 2: ...extreme CAUTION when changing directions on slopes DO NOT mow steep slopes or other areas where stability or traction is in doubt 3 Use extra care with crass catchers or other attachments these affect...

Page 3: ...rate engine in enclosed areas Engine exhaust gases contain carbon monoxide a deadly poison MAINTENANCE AND STORAGE 1 DO NOT store mower or fuel container inside where fumes may reach an open flame spa...

Page 4: ...ENANCE INSTRUCTIONS 9 10 Service After First 5 Hours 9 Change Engine Oil 9 Check Transmission Grease 9 Check Wheel Drive Control 9 Check Mower Blade 10 Check Engine to Transmission Drive Belt 10 Servi...

Page 5: ...ENCLATURE The nomenclature information above Figure 1 1 shows the essential parts of the SNAPPER WALK BEHIND MOWERS It is recommended that all operators of the mower become thoroughly familiar with th...

Page 6: ...attery preparation 2 1 6 Add fuel to tank after pushing the mower outside where fumes can safely dissipate Make sure cap is tightened after refueling Refer to Engine Owners Manual for specifications 2...

Page 7: ...by releasing blade control 3 Pull blade control against handle 4 Pull rope start handle to crank engine 5 After engine starts move engine speed control to the FAST Rabbit position and allow a brief w...

Page 8: ...cling results cut up to a maximum of 1 3 of grass blade length and recycle ONLY when grass is dry 1 Set the cutting height at the highest cutting position 2 Move engine speed control to FAST Rabbit po...

Page 9: ...l drain plug 4 Loosen with ratchet and short extension but do not remove oil drain plug Loosen plug until you can turn it with your fingers 5 Lower the mower down and place the piece of wood under lef...

Page 10: ...fore operating mower Refer to Section BELT SERVICE for replacement instructions FIGURE 3 2 3 3 SERVICE ANNUALLY Perform all maintenance as described in the maintenance schedule 3 3 1 Engine Service en...

Page 11: ...BLADE WEAR LIMIT 1 Follow WARNING statement found on this page 2 Inspect blade frequently for signs of excessive wear or damage See Figure 4 1 FIGURE 4 1 WARNING DO NOT use a cutting blade that shows...

Page 12: ...check wheel drive control for correct adjustment hold blade control against upper handle and pull wheel drive control backward slightly to remove any slack in wheel drive control cable The wheel drive...

Page 13: ...mower operation 4 3 1 Engine To Transmission Belt Replacement 1 Follow WARNING statement found on this page 2 Remove the retaining screws that secure the belt cover Remove the belt cover 3 Disconnect...

Page 14: ...Plug battery harness into main harness See Figure 4 9 4 4 3 BATTERY SERVICE The battery supplied with the electric start model mowers is a sealed lead acid type battery After initial activation the b...

Page 15: ...ttery terminals Use the BATTERY CONDITION CHART below to determine the state of charge Slow charge the battery as required to bring to full charge 4 4 6 NEW BATTERY PREPARATION Snapper through your lo...

Page 16: ...e Loses Power 1 Engine air pre cleaner or air cleaner dirty 1 Clean or replace filters 2 Spark plug faulty 2 Service spark plug 3 Water debris or stale fuel in fuel system 3 Drain and clean fuel syste...

Page 17: ...k For Wear Damage Replacement Page 11 12 X Mower Deck Clean Debris Accumulation Page 10 X Transmission Grease Check Grease Level Pages 9 X X Battery Service Battery Pages 14 15 X X Change oil every 25...

Page 18: ...ock from plug while engine is running 6 ENGINE SPEED CONTROL Indicates direction to increase Engine RPM Rabbit decrease Engine RPM Turtle and direction to choke 7 GROUND SPEED Shows direction of movem...

Page 19: ...rt engine and blade Release control to stop engine and blade 12 GROUND DRIVE Pull lever against handle to engage drive Release lever to disengage drive 13 WARNING DO NOT operate without grass catcher...

Page 20: ...ginal purchase date SNAPPER will not be responsible for any installation cost incurred The battery warranty only covers original equipment batteries and does not cover damage to the battery or machine...

Page 21: ...Understand and Follow all warnings and instructions in this manual the engine manual and on the machine engine and attachments If you have any questions about your Snapper product contact your local...

Reviews: