125
Vehicle History Operations
Screen Layout
View
Select
View
to open, edit, add notes, and print a vehicle record.
z
To open and/or modify a vehicle record:
1. Highlight the desired vehicle record from the vehicle records list screen, then double click it,
or select
View
from the toolbar.
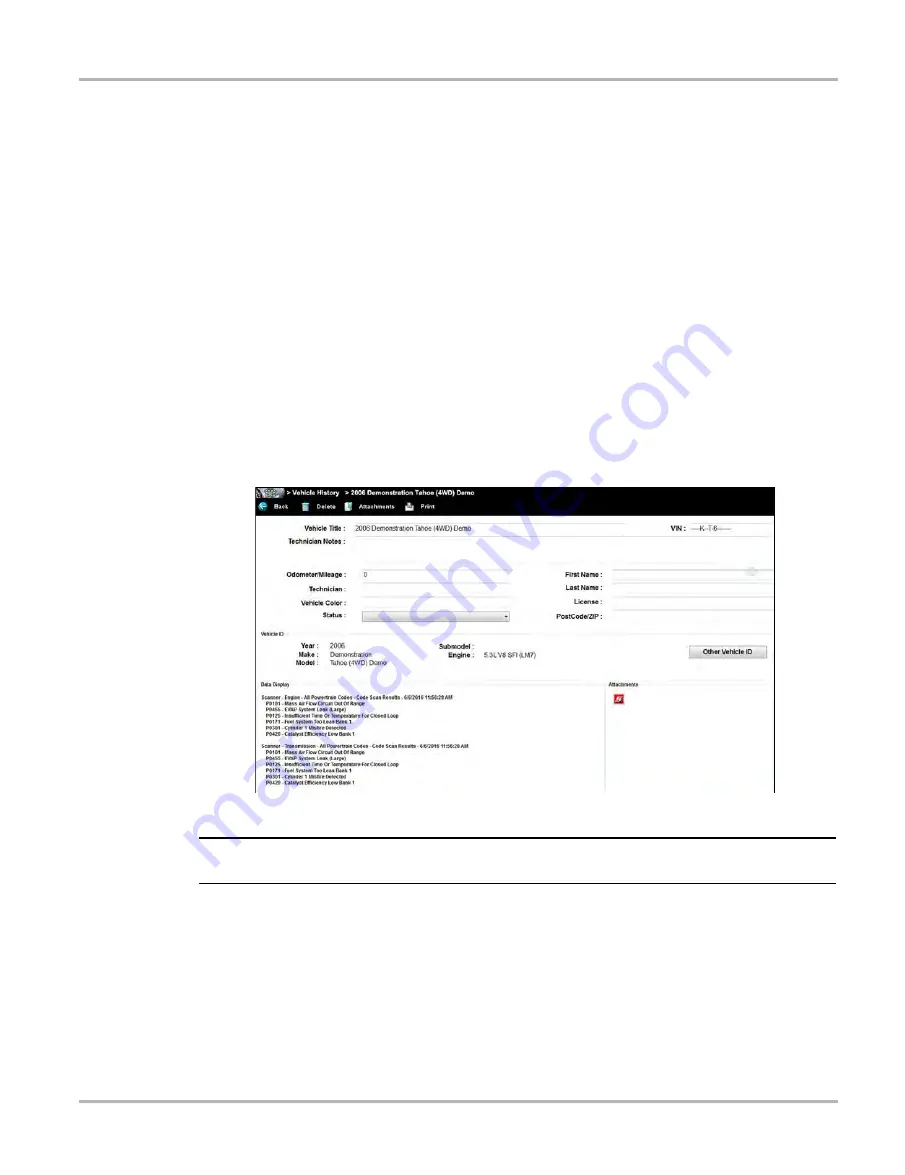
The record for the selected vehicle opens (
).
The vehicle record includes vehicle ID information, DTC data, and other data entry fields for
owner and vehicle information, and technician notes. Depending on the vehicle information
that was used to identify the vehicle, some data may be already entered. The example below
shows, DTC scan results from the last code scan performed, and an attachment “Vehicle
System Report Data” PDF file.
Vehicle ID information is captured slightly different across the different functions
(e.g. Scanner, Guided Component Tests, etc.), as some functions may capture more/less
information during the process. Selecting the
Other Vehicle ID
button, opens a listing of the
captured vehicle ID fields from each applicable function. If more than one function was used
to ID the vehicle, you are given the option to use that vehicle ID set as the default ID for the
vehicle record.
Figure 10-2
Sample vehicle record
NOTE:
i
The virtual keyboard automatically opens the first time you select within one of the data fields.
2. Use the virtual keyboard to enter information in the data fields. The data is automatically
saved.
3. Select
Back
to return to the vehicle records list screen.
Delete
Select
Delete
to remove unwanted items from the vehicle records list. Highlight the record to
remove, then select
Delete
.
Vehicle System Report Data_6_20_16.pdf
Summary of Contents for VERUS
Page 1: ...User Manual EAZ0061B58A Rev E ...
Page 4: ...iv ...


