background image


- 1 -


WO-04 


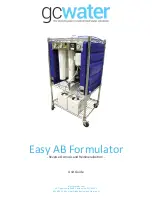
Reverse osmosis equipment for dish/glass washmachines. 


MANUAL 

use and maintenance 


SERIAL N°:   __________________ 


CODE:  

__________________ 


Note:  

_____________________________________________ 


Summary of Contents for WO-04

Page 1: ... 1 WO 04 Reverse osmosis equipment for dish glass washmachines MANUAL use and maintenance SERIAL N __________________ CODE __________________ Note _____________________________________________ ...

Page 2: ...TIVITY 10 4 4 ELECTRONIC BOARD OPERATING 10 5 ROUTINE MAINTENANCE 13 5 1 MAINTENANCE PERSONNEL QUALIFICATIONS 13 5 2 MAINTENANCE PERSONNEL TASKS 13 5 3 REPLACING FILTER CARTRIDGE 14 5 4 PRELOAD EXPANSION TANK 14 5 5 VERIFICATION OF THE SETTING 15 5 6 CLEANING CONDUCTIVITY PROBE CONNECTORS 15 5 7 CLEANING SOLENOID VALVES FILTER 16 5 8 MACHINE SANITATION 16 6 EXTRAORDINARY MAINTENANCE 17 6 1 ELECTRO...

Page 3: ...ll as qualified technicians must carefully read the instructions in this manual Users can only carry out the operations indicated in this manual and must not perform any operations reserved for maintenance personnel or qualified technicians ATTENTION All maintenance operations must be performed by qualified personnel 1 4 CONSERVATION The instruction manual is an integral part of the machine theref...

Page 4: ... phase of the dish glass washmachine cycle ATTENTION The water consuption of the dish glass washmachine installed after the WO 04 must respect the maximum performance of the system All components of the dish glass washmachine in contact with water must be compatible with osmosi trated water It is forbidden to use brass all tanks and pipes in stell AISI 304 must be without weldings It is racommende...

Page 5: ...ted water 2 4 DESCRIPTION The machine has on the rear side no 4 hydraulic connections for inlet water permeated water drain and auxiliary permeate outlet On the rear side there is also the electric socket whit fuse On the front side of the machine there is the electronic board with display the turn rapid filter and the mix valve N DESCRIPTION GENERAL SCHEMATIC REPRESENTATION 1 POWER SOCKET 2 PERME...

Page 6: ...raps the unwanted concentrated impurities The drainage flow is also used to clean the membrane and is directly connected to the drainage system by plastic brackets The mix valve allows the user to choose the hardness or the saltiness of the water produced The mixer should be calibrated during the installation phase WO 04 permits the treated water to retain about 10 to 15 of the original saline pro...

Page 7: ... Voltage V 230 Frequency Hz 50 Absorbed current A 2 5A Power W 250W Fuse type electronic board F5A Fuse type elettrica connector F4A PERMEATE WATER SPECIFICATIONS Maximum capacity at 15 C l h c a 120 Flow with pressure at 3 bar of 15 C l h c a 80 Recovery c a 50 OPERATION UNDER NORMAL WORKING CONDITIONS Filter with active carbon l 22 000 R O Membrane UPON CLOGGING ATTENTION Any use of this device ...

Page 8: ... the air vents are never blocked in order to not compromise motor cooling Instructions and representation to follow are to be considered for typical installations the specific components may vary depending on the accessories that accompany the car and taps derivation and delivery chosen CONTROLS TO BE CARRIED OUT BEFORE INSTALLATION Mains grounding present and efficient Main compatible with the el...

Page 9: ...e in the drain siphon pipe in correspondence with the nut that has just been removed Insert the drainpipe in the nut for about 2 cm and screw the nut on the clamp Fasten the screw nut and install the check valve with the arrow pointing towards the clasp as near as possible to the drain 1 Drain pipe 6mm 2 Check valve 6mm 3 Drain pipe screw nut 4 Drain clasp 5 Washer 6 Bolt 7 Bolt screw nut 8 Sink d...

Page 10: ...achine starts automatically at every rising cycle of the dish wash machine Every six hours the machine automatically opens the inlet solenoid valve in this way the membranes are washed for 2 minutes To adjust the salinity of the water acting on the valve for mixing later If high water consumption occurs the by pass solenoid valve opens and raw water flows to the outlet ATTENTION Absolutely avoid l...

Page 11: ...version of software installed in the card To scroll the next pages press the key the first page displayed enables carryng out the manual flow of the membrane in order to carry out the operation press the key the card displays Flow in progress Pressing the key again moves to the display of the hours minutes of remaining functioning before the filter change from this page pressing the key displays t...

Page 12: ... next page with the key access the selection of the tap type with the key Select the type of tap manual or electric with the and keys and confirm with the key The card therefore indicates Data saved Move to the next page with the key access the selection of the writing in stand by with the key Select the saved names with the and keys and confirm with the key The card therefore indicates Data saved...

Page 13: ...l knowledge in order to understand the contents of this manual Knowledge of the main hygienic accident prevention and technological regulations Complete knowledge of the machine as well as electrical and hydraulic problems that can arise where the machine is installed 5 2 MAINTENANCE PERSONNEL TASKS The routine maintenance program described in this paragraph must be carried out according to the sc...

Page 14: ...corrosive products acids abrasive or steel brushes Do not directly wash the machine with high pressure jets of water 5 3 REPLACING FILTER CARTRIDGE The repleace the prefilter follow these steps Remove the power plug Remove the filter cartridge turning it left Install new cartridge in the machine take caref about the filter o rings Reset the electronic board if used with time limit funciont see 4 4...

Page 15: ...re gauge reaches about 3 5 bar Slowly unscrew the calibration nut of pressure switch until the operation of the machine becomes discontinuous Apply the glue sealant to calibration nut Install a T fitting and a pressure gauge 0 10 bar or similar on the pump outlet line The operating pressure must be between 6 and 7 bar Open the electronic board box Start the machine and deliver water After 2 minute...

Page 16: ...at 130 volumes per 10 liters of permeated water Connect the water pipes of entry drain and permeated by the machine at the tank make a bridge on the low pressure switch connectors Open a bit the mix valve and turn on the machine and let the solution recirculated for at least 10 minutes Wait 10 minutes that the solution acts on the machine Reconnect the drain and permeated pipes Connect the water p...

Page 17: ...ay card Unscrew the screws fastening the electronic board box Remove the electronic board box disconnect the power connector Mount the new electronic board with reverse procedure 6 2 PROTECTION FUSE REPLACEMENT The machine is equipped with two fuses one on the electronic board and one on the power socket 6 2 1 Protection fuse replacement on power socket Remove the fuse compartment under the attack...

Page 18: ... board Replace the burned fuse with a similar Annex V Mount the electronic board with reverse procedure 6 3 PUMP REPLACEMENT Remove the top and right panels of the machine Disconnect the piping from the pump Unscrew the screw of the clamp connecting and disassemble the pump Install the new pump with fittings previously removed Mount the new pump with reverse procedure ...

Page 19: ...e tubes from the fittings of the vessel containing the membrane Dismantle the vessel from the machine and unscrew the caps Dismantle the membranes clogged and replace with new membranes of the same type Clean the vessel on the inside by removing all traces of dirt and scale The new membrane must be removed immediately prior to their installation and handling using protective gloves sterile Before ...

Page 20: ... Incorrect wiring Check the wiring and the fastening of the cables to the terminals Problem The display shows Alarm Leakage Cause Solution Leakage Open the machine and check carefully all hydraulic circuit for leakages Leakage probe in short circuit Check water leakage probe position if directly at contact with metal parts of the machine place in a different position Damaged board Replace the boar...

Page 21: ...e Water leakage Check the permeate hydraulic circuit for leakages install a manometer on permeate line and check water pressure on permeate line Problem With faucet opened the machine doesn t start Cause Solution Defective pressure switch Check pressure switch functioning if damaged replace it Electric connection failure Check electric connections and tight if necessary Problem Witch faucet closed...

Page 22: ... nos lixos minicipais O símbolo da barra no barril lembra ao utilizador de não jogar este producto como um lixo municipal não classificado D Gemäß Richtlinie 2002 96 EC wird diese Produkt als elektrisches elektronisches Gerät eingestuft Dieses Gerät nicht als nicht klassifizierten Stadtmüll beseitigen Diese Gerät an eine dafür vorgesehene Sammelstelle bringen gemäß den vorortigen und auf nationale...

Reviews: