background image

EN

14

Egg tray

• You can install the egg holder to the 

desired door or body shelf.

• Never store the egg holder in the 
freezer compartment.

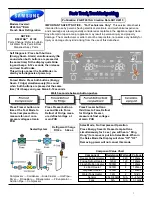
Sliding Body Shelves

Sliding body shelves can be pulled 
by slightly lifting up from the front and 
moved back and forth. They come to 
a stop point when pulled towards front 
to allow you reach the foods placed at 
the back of the shelf; when it is pulled 
after slightly lifting upwards at the 
second stop point, the body shelf will 
be released.
The shelf should be held tightly from 
the bottom as well in order to prevent 
it from tipping over. The body shelf is 
placed on the rails at the sides of the 
refrigerator body by bringing it to one 
lower or one upper level.
The body shelf should be pushed 
backwards to seat it completely.

1

2

3

4

Crisper 

Crisper of your refrigerator is designed 
specially to keep your vegetables 
freshly without loosing their humidity. 
For this purpose, cool air circulation 
occurs around the crisper in general.

Zero temperature 

compartment

This compartment has been designed 

to store frozen food which would be 

thawed slowly (meat, fish, chicken,etc.) 

as required.Zero temperature 

compartment is the coldest place 
of your refrigerator in which dairy 
products (cheese, butter), meat, 
fish or chicken may be kept at ideal 

storage conditions.Vegetables and/

or fruits must not be placed in this 
compartment.

Summary of Contents for FQ60XP

Page 1: ...Manual de instrucciones en it Instruction Manual Manuale di istruzioni pt nl fr sv da es ru de Gebruiksaanwijzing Notice d Utilisation Bruksanvisning Brugsvejledning Bedienungsanleitung FQ60XP...

Page 2: ...d with your product Please note that this manual may be valid for other models as well Symbols and their descriptions This instruction manual contains the following symbols C Important information or...

Page 3: ...zer compartment C Multi Zone 1 Fridge compartment door shelves 2 Fridge compartment adjustable cabinet shelves 3 Diffuser cover 4 Illumination lens 5 Rotating middle section 6 Chiller compartment 7 Cr...

Page 4: ...tric connection 9 Disposing of the packaging 9 Disposing of your old refrigerator 9 Placing and Installation 10 Floor balance adjustment 10 Adjusting the gap between the upper door 11 CONTENTS 4 Using...

Page 5: ...compartment This may cause frostbite in your mouth For products with a freezer compartment Do not put bottled and canned liquid beverages in the freezer compartment Otherwise these may burst Do not to...

Page 6: ...sed for any other purpose Label of technical specifications is located on the left wall inside the refrigerator Never connect your refrigerator to electricity saving systems they may damage the refrig...

Page 7: ...djacent side walls may be humidified For products with a water dispenser Pressure of water mains should be minimum 1 bar Pressure of water mains should be maximum 8 bars Use only potable water Child s...

Page 8: ...washers or radiators Pay attention to keep your food in closed containers For products with a freezer compartment You can store maximum amount of food items in the freezer when you remove the shelf or...

Page 9: ...commended solutions for the problems section Original packaging and foam materials should be kept for future transportations or moving Points to be considered when re transporting your refrigerator 1...

Page 10: ...g of your old refrigerator Dispose of your old machine without giving any harm to the environment You may consult your authorized dealer or waste collection center of your municipality about the dispo...

Page 11: ...stance with the ceiling and at least 5 cm with the wall If the floor is covered with a carpet your product must be elevated 2 5 cm from the floor 4 Place your refrigerator on an even floor surface to...

Page 12: ...height Using a screwdriver remove the screw of upper hinge cover of the door you want to adjust Adjust the door as you desire by loosing the screws Adjusting the gap between the upper door Center Scr...

Page 13: ...on 6 Temperature Setting Button 7 Fridge Compartment Selection Button 8 Multizone Compartment Indicator 9 Freezer Compartment Indicator 10 Economy Mode Indicator 1 2 3 4 5 6 7 8 9 10 4 Using your refr...

Page 14: ...t 5 Eco Extra Vacation Button Press this button briefly to activate the Eco Extra function Press and hold this button for 3 sec to activate the Vacation function Press this button again to deactivate...

Page 15: ...e body shelf is placed on the rails at the sides of the refrigerator body by bringing it to one lower or one upper level The body shelf should be pushed backwards to seat it completely 1 2 3 4 Crisper...

Page 16: ...ge 2 4 6 8 C or freezer 18 20 22 24 temperatures You can keep the compartment in the desired temperature with the Multi Zone Storage Compartment Temperature Setting Button The temperature of the Multi...

Page 17: ...no water enters the lamp housing and other electrical items B If your refrigerator is not going to be used for a long period of time unplug the power cable remove all food clean it and leave the door...

Page 18: ...hermostat to a colder degree Decreasing the time the door left open or using it less frequently Covering the food stored in open containers with a suitable material Wipe the condensation using a dry c...

Page 19: ...to run for a longer period of time in order to maintain the current temperature Freezer temperature is very low while the fridge temperature is sufficient The freezer temperature is adjusted to a ver...

Page 20: ...ly It is normal and not a fault Condensation on the inner walls of refrigerator Hot and humid weather increases icing and condensation It is normal and not a fault The doors are ajar Make sure that th...

Reviews: