background image

Use

83

EN

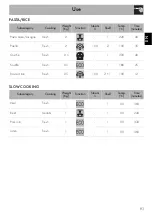
PASTA/RICE

SLOW COOKING

Subcategory

Cooking

Weight

(Kg)

Function

Steam

%

Shelf

Temp.

(°C)

Time

(minutes)

Pasta bake/Lasagne

Fresh

2

-

1

220

40

Paella

Fresh

2

100

2

100

35

Quiche

Fresh

0.5

-

1

200

40

Soufflé

Fresh

0.5

-

1

180

25

Basmati rice

Fresh

0.5

100

2 + 1

100

12

Subcategory

Cooking

Weight

(Kg)

Function

Steam

%

Shelf

Temp.

(°C)

Time

(minutes)

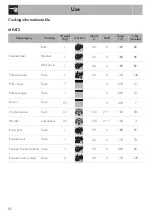
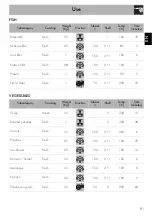
Veal

Fresh

1

-

1

90

360

Beef

medium

1

-

1

90

240

Pork loin

Fresh

1

-

1

90

330

Lamb

Fresh

1

-

1

90

360

Summary of Contents for Cortina SF4750VC

Page 1: ...tions 85 3 7 Cooking advice 88 3 8 Secondary menu 89 4 Cleaning and maintenance 91 4 1 Instructions 91 4 2 Cleaning the surfaces 91 4 3 Ordinary daily cleaning 91 4 4 Food stains or residues 91 4 5 Removing the door 91 4 6 Cleaning the door glazing 92 4 7 Removing the internal glass panes 92 4 8 Cleaning the inside of the oven 94 4 9 Auxiliary cleaning and maintenance functions 96 4 10 Extraordina...

Page 2: ...e appliance immediately after turning it off wait for it to cool down first Have qualified personnel carry out installation and assistance interventions according to the standards in force Do not modify this appliance Do not insert pointed metal objects cutlery or utensils into the slots in the appliance Do not try to repair the appliance yourself or without the intervention of a qualified technic...

Page 3: ...ooking food in the home environment Every other use is considered improper This appliance may be used by children aged at least 8 and by people of reduced physical sensory or mental capacity or lacking in experience in the use of electrical appliances provided that they are supervised or instructed by adults who are responsible for their safety The appliance is not designed to operate with externa...

Page 4: ...the user s reach for the whole working life of the appliance Read this user manual carefully before using the appliance 1 7 How to read the user manual This user manual uses the following reading conventions 1 Sequence of instructions for use Standalone instruction Plastic packaging Danger of suffocation Do not leave the packaging or any part of it unattended Do not let children play with the plas...

Page 5: ...Description 59 EN 2 Description 2 1 General Description 1 Control panel 2 Oven light 3 Seal 4 Door 5 Fan 6 Evaporation tray 7 Water supply tube 8 Rack support frames Frame shelf ...

Page 6: ... is heating up to reach the set temperature Once the temperature has been reached the thermostat light remains lit until the appliance is switched off 3 Clock Displays the current time the selected cooking temperature and any time set 4 Function knob This knob can be used to Turn the appliance on and off Select a function After use always return the function knob to the 0 position ...

Page 7: ...ng The fan causes a steady outflow of air from above the door which may continue for a brief period of time even after the appliance has been turned off Interior lighting The appliance s interior lighting comes on When the door is opened When any function is activated 2 4 Available accessories Rack Useful for supporting containers with food during cooking Perforated tray Useful for steaming fish a...

Page 8: ... a a a a a a a a a a a a a a a a a a a a a a a a a a a a a a a a a a a a a a a a a a a a a a a a a a a a a a a a a a a a a a a a a a a a a a a a a a a a a a a a a a a a a a a a a a a a a a a a a a a a a a a a a a a a a a a a a a a a a a a a a a a a a a a a a a a a a a a a a a a a a a a a a a a a a a a a a a a a a a a a a a a a a a a a a a a a a a a a a a a a a a a a a a a a a a a a a a a a a a a a...

Page 9: ...ur water directly onto very hot trays Do not allow children to approach the appliance when it is in operation Improper use Risk of damage to enamelled surfaces When steaming always place the tray below the perforated tray in order to catch any drips Do not cover the bottom of the oven cavity with aluminium or tin foil sheets The base of the oven and the evaporation tray must always be left free Di...

Page 10: ... guides until they come to a complete stop The mechanical safety locks that prevent the rack from being taken out accidentally have to face downwards and towards the oven back High temperature inside the oven during use Danger of fire or explosion Do not spray any spray products near the appliance Do not use or leave flammable materials near the appliance Do not use plastic cookware or containers ...

Page 11: ...ve it In this way it is possible to collect the liquids separately from the food that is being cooked configuration 2 1 see Cooking information table 3 4 Using the oven Clock Steam indicator light Clock indicator light Minute minder timer indicator light Timed cooking indicator light Delay cooking indicator light A Setting knob B Confirmation knob ...

Page 12: ...ecessary to change the current time for example for daylight saving time 3 To further adjust the clock ensure that there is no function active the temperature knob and the function knob must be in the 0 position 4 Turn the setting knob to the left or right Operating modes Stand by When no function is selected the clock shows the current time ON The function knob must be turned to any position othe...

Page 13: ... or right within 5 seconds to set the duration max 2 hours 9 Press the setting knob or wait 5 seconds from the last setting The steam cooking system cooks any type of food much more delicately It is also ideal for defrosting foods rapidly for heating up foods without hardening or drying them out and for naturally removing salt from foodstuffs preserved with salt Do not place food or any other obje...

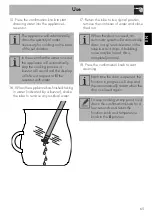
Page 14: ...fficient water for the cooking duration cooking of a maximum duration of 75 minutes will require around 1 5 litres of water 12 Open the oven door 13 Rest the container on the open door 14 Extract the tube from its seat and immerse its end in the container until it reaches all the way to the bottom Use cold tap water which is not too hard softened water or still mineral water Do not use distilled w...

Page 15: ... of the set duration In the event that the water runs out the appliance will automatically stop the cooking process a buzzer will sound and the display will show a request to fill the reservoir with water When the door is closed an automatic system will automatically draw in any residual water in the tube to avoid drips A bubbling noise may be heard this is completely normal Each time the door is ...

Page 16: ...s in the cooking phase press the setting knob the timed cooking indicator light will start flashing 20 Turn the setting knob to the left or right within 5 seconds to set the duration max 2 hours 21 Press the setting knob to confirm the set data If you set a time longer than that previously set meaning that the water in the reservoir is insufficient cooking will proceed regardless When the reservoi...

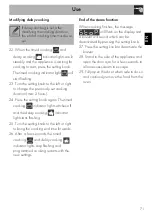
Page 17: ...left or right to bring the cooking end time forwards 26 After a few seconds the timed cooking and delay cooking indicator lights stop flashing and programmed cooking restarts with the new settings End of the steam function When cooking finishes the message will flash on the display and a buzzer will sound which can be deactivated by pressing the setting knob 27 Press the setting knob to deactivate...

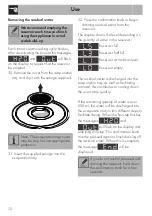
Page 18: ...s discharged into the evaporation tray as well as facilitating removal this contributes to cooling down the oven more quickly If the remaining quantity of water is over 500 ml the water will be discharged into the evaporation tray in two different steps to facilitate drying When the first step finishes the messages and will flash on the display and emptying will stop The confirmation knob must be ...

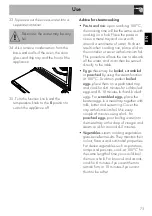
Page 19: ...boiled scrambled or poached by using the steam function at 100 C To obtain perfect boiled eggs place them on a perforated tray and cook for 4 6 minutes for soft boiled eggs and 8 10 minutes for hard boiled eggs For scrambled eggs place the beaten eggs in a metal tray together with milk butter and seasoning Cover the tray with aluminium foil Mix every couple of minutes using a fork For poached eggs...

Page 20: ...cover with a lid or aluminium foil and steam cook at 100 C for the same time you would cook it in a microwave oven Mix midway through cooking for a creamier consistency Reheating using the steam cooking function will not dry foods out and gives a moister result A previously prepared home cooked meal covered with aluminium foil will take around 10 12 minutes to reheat Ready meals will require appro...

Page 21: ...s on the clock and the default delay time hours minutes is shown on the display 7 Turn the setting knob to the left or right within 5 seconds to set the duration max 2 hours Combination cooking functions are ideal for preparing moist cakes and bread and for tender roast meats Steam circulaire fan The combination of the fan the circulaire heating element and the steam is particularly suitable for p...

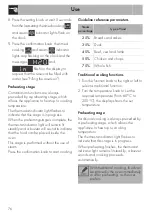
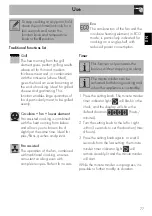
Page 22: ... inside the oven This stage is performed without the use of steam Press the confirmation knob to start cooking Guideline reference parameters Traditional cooking functions 1 Turn the function knob to the right or left to select a traditional function 2 Turn the temperature knob to set the required temperature from 60 C to 250 C the display shows the set temperature Preheating stage Traditional coo...

Page 23: ...grilling results above all for thin and medium thickness meat and in combination with the rotisserie where fitted gives the food an even browning at the end of cooking Ideal for grilled cheese and gratinating This function enables large quantities of food particularly meat to be grilled evenly Circulaire fan lower element Fan assisted cooking is combined with the heat coming from below and allows ...

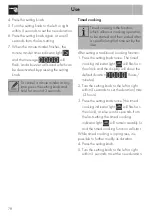
Page 24: ...ours minutes 2 Turn the setting knob to the left or right within 5 seconds to set the duration max 13 hours 3 Press the setting knob twice the timed cooking indicator light will flash on the clock or else wait 5 seconds from the last setting the timed cooking indicator light will remain steadily lit and the timed cooking function will start While timed cooking is in progress it is possible to furt...

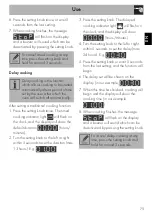
Page 25: ...inutes 4 Turn the setting knob to the left or right within 5 seconds to set the delay max 24 hours E g 5 Press the setting knob or wait 5 seconds from the last setting and the function will begin 6 The delay set will be shown on the display in our example 7 When this time has finished cooking will begin and the display will show the cooking time in our example 8 When cooking finishes the message w...

Page 26: ...Well done 1 40 2 180 80 Pork spare ribs Fresh 1 50 2 150 140 Pork chops Fresh 1 3 250 15 Pork sausages Fresh 1 3 250 12 Bacon Fresh 0 5 3 250 7 Chicken breast Fresh 0 5 100 2 1 100 18 Wurstel precooked 0 5 100 2 1 100 3 Roast pork Fresh 1 50 2 180 95 Roasted veal Fresh 1 40 2 170 70 Roasted chicken whole Fresh 1 50 2 200 40 Roasted duck whole Fresh 2 30 2 150 120 ...

Page 27: ...awns Fresh 1 100 2 1 90 5 Fish whole Fresh 1 70 2 1 200 25 Subcategory Cooking Weight Kg Function Steam Shelf Temp C Time minutes Chips frozen 0 5 2 220 13 Roasted potatoes Fresh 1 2 220 40 Carrots Fresh 0 5 100 2 1 220 6 Potatoes Fresh 0 5 100 2 1 100 25 Cauliflower Fresh 0 5 100 2 1 100 12 Broccoli Fennel Fresh 0 5 100 2 1 100 6 Asparagus Fresh 0 5 100 2 1 100 6 Spinach Fresh 0 3 100 2 1 100 2 P...

Page 28: ... 1 170 40 Croissants Fresh 0 6 1 160 30 Apple compote Fresh 0 5 100 2 1 100 8 Syrup pudding Fresh 0 2 100 1 100 50 Strudel Fresh 1 25 1 200 40 Sponge cake Fresh 1 25 1 165 35 Subcategory Cooking Weight Kg Function Steam Shelf Temp C Time minutes Focaccia Fresh 0 5 25 2 190 20 White leavened bread Fresh 2 25 2 180 30 Subcategory Cooking Weight Kg Function Steam Shelf Temp C Time minutes Pan baked p...

Page 29: ...bake Lasagne Fresh 2 1 220 40 Paella Fresh 2 100 2 100 35 Quiche Fresh 0 5 1 200 40 Soufflé Fresh 0 5 1 180 25 Basmati rice Fresh 0 5 100 2 1 100 12 Subcategory Cooking Weight Kg Function Steam Shelf Temp C Time minutes Veal Fresh 1 1 90 360 Beef medium 1 1 90 240 Pork loin Fresh 1 1 90 330 Lamb Fresh 1 1 90 360 ...

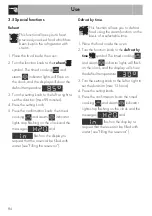
Page 30: ...oir Defrost by time 1 Place the food inside the oven 2 Turn the function knob to the defrost by time symbol The timed cooking and steam indicator lights will flash on the clock and the display will show the default temperature 3 Turn the setting knob to the left or right to set the duration max 13 hours 4 Press the setting knob 5 Press the confirmation knob the timed cooking and steam indicator li...

Page 31: ... right to set the duration max 13 hours 6 Press the setting knob At this point it is possible to set delay proving Type Weight g Time min Meat 500 20 Fish 400 17 Fruit 300 15 Bread 300 5 The function knob provides access to the appliance s auxiliary functions in this position When using the proving function the temperature cannot be altered Delay proving is the function which allows proving to be ...

Page 32: ...firmation knob the timed cooking and steam indicator lights stop flashing on the clock and the messages and flash on the display to request that the reservoir be filled with water see Filling the reservoir H2O Out Forced removal of residual water This function drains the reservoir when this operation has not been performed normally after steam or combined cooking 1 Turn the function knob to the au...

Page 33: ...cilitate drying When the first step finishes the messages and will flash on the display and emptying will stop The confirmation knob must be pressed again to finish draining off the residual water When this is complete the message will be displayed 6 Squeeze out the excess water into a separate container 7 Also remove condensation from the base and walls of the oven the door glass and drip tray an...

Page 34: ...r from the reservoir Advice for cooking desserts pastries and biscuits Use dark metal moulds They help to absorb the heat better Advice for steam cooking Cooking times depend on the density of foods and not their quantity For example one piece of broccoli will take the same time as 20 florets Increasing the quantity of a casserole also increases its density and so the cooking time will also increa...

Page 35: ... the left or right to change the setting ON OFF 3 Press the setting knob to switch to the next mode P1 Child Lock This mode allows the appliance to lock the controls automatically after one minute of normal operation without any intervention from the user One minute after the last setting the lock will become active again To temporarily release the lock during cooking press and hold the setting kn...

Page 36: ...tion has been set if this is not manually interrupted P5 Water hardness This mode allows you to set the water hardness value in order to optimise the descaling process It is possible to modify the water hardness setting from a minimum of to a maximum of If this mode is active will be shown on the display for 3 seconds every minute Activating eco logic mode means that preheating and cooking times m...

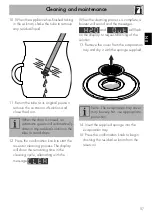
Page 37: ...dues of sugary foods such as jam to set inside the oven If left to set for too long they might damage the enamel lining of the oven 4 5 Removing the door For easier cleaning it is recommended to remove the door and place it on a tea towel To remove the door proceed as follows 1 Open the door completely and insert two pins into the holes on the hinges indicated in the figure Improper use Risk of da...

Page 38: ... in the door should always be kept thoroughly clean Use absorbent kitchen roll In case of stubborn dirt wash with a damp sponge and an ordinary detergent 4 7 Removing the internal glass panes For easier cleaning the internal glass panes of the door can be removed 1 Open the door 2 Remove the internal glass pane by pulling the rear part gently upwards following the movement indicated by the arrows ...

Page 39: ...reviously Use absorbent kitchen roll In case of stubborn dirt wash with a damp sponge and neutral detergent 6 Reposition the intermediate glass unit 7 The rubber strips A B and C of the intermediate glass unit must face the outer glass 8 Centre and insert the 4 pins into their housings in the oven door by applying slight pressure ...

Page 40: ...ames Removing the guide frames enables the sides to be cleaned more easily To remove the guide frames 1 Unscrew the frame fastening pins 2 Pull the frame towards the inside of the oven to free it from the fastening pins 3 When cleaning is complete repeat the above procedures to put the guide frames back in The appliance should be operated at the maximum temperature for about 15 20 minutes after th...

Page 41: ...ith the supplied sponge 5 Use a dish sponge on softened encrustations in order to remove the largest possible quantity of scale 6 When you have finished cleaning close the door again The presence of scale due to lack of descaling can compromise correct operation of the appliance in the long term We recommend performing descaling every time this is indicated on the display in order to keep the boil...

Page 42: ...ven door 7 Rest the container on the open door 8 Extract the tube from its seat and immerse its end in the container until it reaches all the way to the bottom 9 Press the confirmation knob to start drawing the solution into the appliance s reservoir The function knob provides access to the appliance s auxiliary functions in this position To guarantee optimum performance of your appliance we recom...

Page 43: ...ith the message When the cleaning process is complete a buzzer will sound and the messages and will flash on the display to request draining of the solution 13 Remove the cover from the evaporation tray and dry it with the sponge supplied 14 Insert the supplied sponge into the evaporation tray 15 Press the confirmation knob to begin draining the residual solution from the reservoir When the door i...

Page 44: ...anual descaling When you wish to perform descaling in advance you can run the function manually 1 Open the door completely 2 Pour approximately 250 ml of white vinegar into the evaporation tray thus also covering part of the base of the oven 3 Turn the setting knob to select DEC 4 Press the confirmation knob to confirm the selected function the display will show the message alternating with the re...

Page 45: ...lls upwards downwards and towards the deflector Close the door Vapor Clean is an assisted cleaning procedure which facilitates the removal of dirt Thanks to this process it is possible to clean the inside of the oven very easily The dirt residues are softened by the heat and water vapour for easier removal afterwards Improper use Risk of damage to surfaces Remove any food residues or large spills ...

Page 46: ...ith a microfibre cloth 9 Use a non scratch sponge with brass filaments on hard to remove deposits 10 In case of grease residues use specific oven cleaning products 11 Remove the residual water inside the oven 12 For improved hygiene and to avoid food being affected by any unpleasant odours we recommend that the oven is dried using a fan assisted function at 160 C for approximately 10 minutes If th...

Page 47: ...de out and remove the light bulb 5 Replace the light bulb with one of the same type 40W 6 Refit the cover Ensure the moulded part of the glass A is facing the door 7 Press the cover completely down so that it attaches perfectly to the bulb support Live parts Danger of electrocution Unplug the appliance Pay attention not to scratch the oven cavity enamel Do not touch the halogen light bulb directly...

Page 48: ... located near the appliance and in an easily reachable position according to applicable electrical codes Connection with plug and socket Make sure that the plug and socket are of the same type Avoid using adapters and shunts as these could cause overheating and a risk of burns 5 2 Cable replacement 1 Unscrew the rear casing screws and remove the casing to access the terminal board 2 Replace the ca...

Page 49: ...utout with the help of a second person Pressure on the open door Risk of damage to the appliance Never use the oven door to lever the appliance into place when fitting Avoid exerting too much pressure on the oven door when open Heat production during appliance operation Risk of fire Check that the carcase material is heat resistant Check that the carcase has the required openings Do not install th...

Page 50: ...ve the bushing covers on the front of the oven Mount the appliance into the recess Secure the appliance to the carcase using the screws Cover the bushings with the previously removed covers Appliance overall dimensions mm front view top view ...

Page 51: ...Installation 105 EN side view Mounting under worktops mm Make sure that the carcase rear bottom section has an opening of approx 60 mm ...

Page 52: ...Installation 106 Mounting into a column mm Make sure that the carcase top rear section has an opening approx 35 40 mm deep ...

Reviews: