background image

Camfire DCi User's Guide

13

Adjusting the Camfire DCi System at a Control Unit

While working at the whiteboard, you can:

  adjust the brightness of the control unit screen (page 13)

  refine image alignment (page 13)

Adjusting Screen Brightness

If you’re having problems reading the information on the control unit screen, try adjusting the
screen brightness.

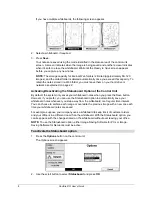
To adjust screen brightness

1.  Press the 

Options

 button on the control unit.

The 

Options 

screen appears.

2.  Use the scroll button to select 

Screen Brightness

 and press 

OK

.

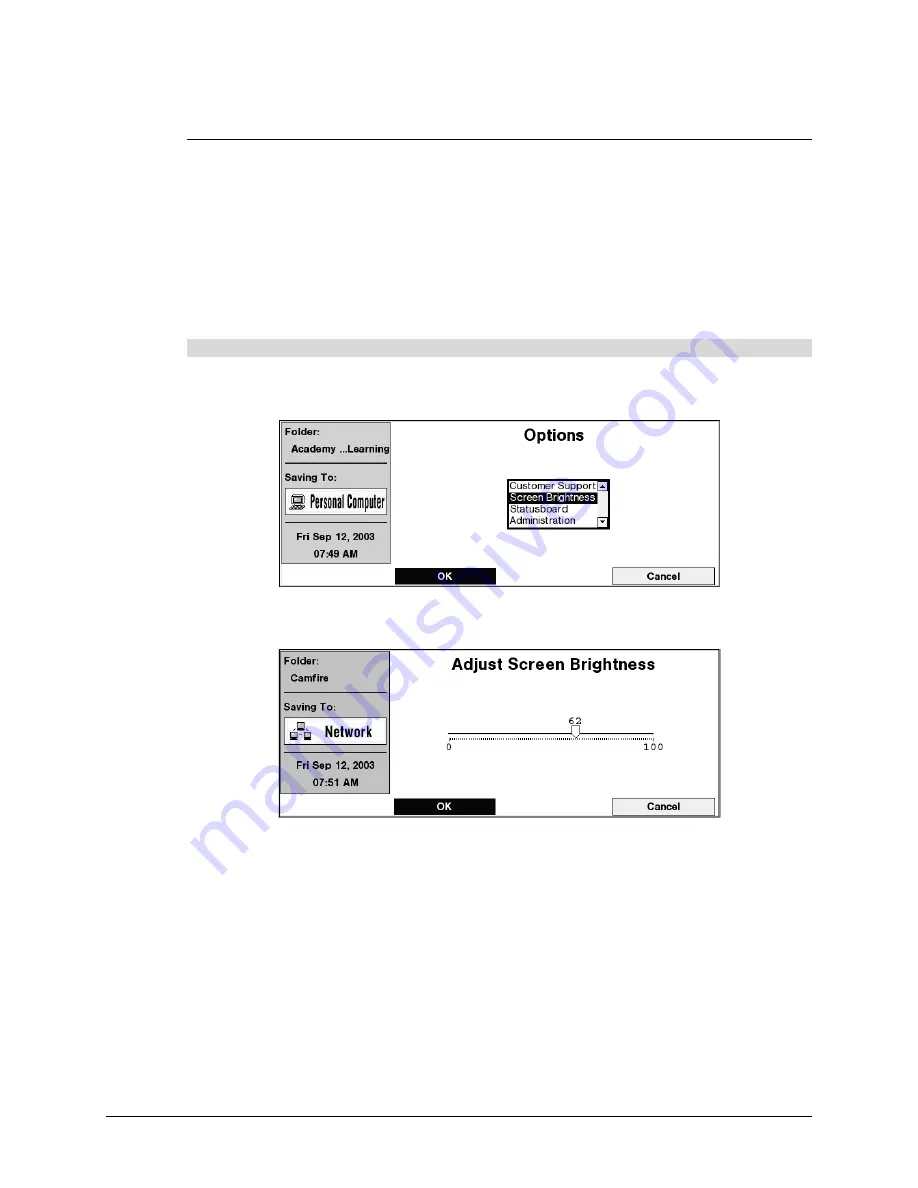
The following screen appears.

3.  Use the left and right functions of the scroll button to adjust the brightness of the display

and press 

OK

.

Refining the Image Alignment

The camera boom houses two digital cameras and each camera photographs a portion of the
notes on your whiteboard. Before the notes are saved, built-in image-enhancing software
stitches the two photographs into a single snapshot and crops any excess wall surface from
the image. This software also corrects the perspective, whitens the background, sharpens the
writing, and improves the color.

All you must do is refine the image alignment. Under most circumstances, you only need to
do this once before you save whiteboard notes for the first time. However, if you move the
camera boom or whiteboard, you may have to repeat the process.

Summary of Contents for Camfire DCi

Page 1: ...Whiteboard Camera Camfire DCi TM User s Guide ...

Page 2: ... the U S and or other countries Netscape and Netscape Communicator are registered trademarks of Netscape Communications Corporation in the U S and other countries All other third party product and company names may be trademarks of their respective owners U S Patent No 5 528 290 Other U S Canadian and foreign patents pending 2000 2003 SMART Technologies Inc All rights reserved No part of this publ...

Page 3: ...excessive levels of dust humidity or cigarette smoke 3 As you install the Camfire DCi system make sure you tighten all of the security hex screws There are two security hex screws at the bottom corners of the control unit and one in the camera boom base These screws ensure the equipment can t be accidentally knocked free from the wall brackets The screws also help prevent unauthorized individuals ...

Page 4: ... soft cloth and wipe the surface clean Never use solvents or abrasive cleansers as these may damage the surface of the control unit Cleaning the Camera Boom Only clean the lens with a cloth designed specifically for that purpose Lens cleaning cloths are available from most photography stores ...

Page 5: ...6 Changing the Save Mode 6 Saving Whiteboard Notes 7 Activating Deactivating the Statusboard Option at the Control Unit 8 Printing Whiteboard Notes 10 Deleting Whiteboard Notes 10 Initiating Sleep Mode 11 Reactivating the Camfire DCi System 12 Adjusting the Camfire DCi System at a Control Unit 13 Adjusting Screen Brightness 13 Refining Image Alignment 13 Working with Whiteboard Notes on a Computer...

Page 6: ...Contents ...

Page 7: ...mputer within Same Network as Control Unit Camfire DCi System for Saving Whiteboard Notes Camera Boom You can mount the camera boom above any standard whiteboard This boom includes two digital cameras each with fixed focus and auto exposure The two cameras together can capture the notes on a whiteboard as large as 4 ft x 8 ft 1 22 m x 2 44 m Each camera takes a color photograph of a portion of the...

Page 8: ...inter Port Bottom View of Control Unit USB Port Serial Port Currently Not Used Control Unit Ports Stand Alone Control Unit Not Networked You don t need a network connection to use the Camfire DCi system although we recommend it All you need is a camera boom and control unit plus a removable USB storage device or a printer To save whiteboard notes to a USB storage device simply insert the device in...

Page 9: ...stribute whiteboard notes in an organization with fewer than three control units NOTE To use this software your control unit must be connected to a network Image Saving Software for PCs stores your whiteboard notes in folders named by the date and time at which they were created and it generates an HTML index of the notes in each folder You can post this index to your intranet or simply open it us...

Page 10: ...The control unit has built in flash memory If you have a networked control unit you can use this flash memory to temporarily store your whiteboard notes in an internal Web folder Once they have been stored in a Web folder remote users with access to the same network can view your notes in a Web browser by opening the Web address displayed on the control unit screen However Web folders are temporar...

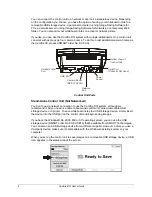
Page 11: ...r Button Scroll Button Command Buttons Functions of Command Buttons Control Unit Screen Sleep Button Save Button Save Current Mode Options Button For best results when writing on the whiteboard Use regular dry erase markers and not fine point markers Although the Camfire DCi system successfully captures a full range of colors you may prefer using darker colors because they are easier to read Do no...

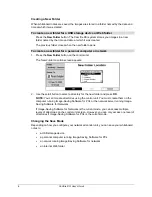
Page 12: ...scroll button to select a directory for the new folder and press OK NOTE You can t create directories using the control unit You must create them on the computer running Image Saving Software for PCs or the network server running Image Saving Software for Networks If Image Saving Software for Networks is the current mode you can access multiple levels of directories on the control unit screen Howe...

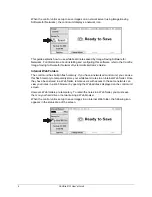
Page 13: ...button is disabled Also whenever you insert a USB storage device into the control unit the mode automatically changes to USB Storage Device Saving Whiteboard Notes 1 Press the Save button on the control unit Stand away from the whiteboard and clear of the cameras while your whiteboard notes are being saved to avoid being included in the image Then stand clear of the cameras Press the Save button S...

Page 14: ... the Control Unit By default the system only saves your whiteboard notes when you press the Save button However if you prefer you can use the Statusboard option to automatically save your whiteboard notes whenever you step away from the whiteboard or at regular time interval You can choose to archive each image or overwrite the previous image with a new one each time your whiteboard notes are save...

Page 15: ...creen appears 4 To archive each saved image select Yes and press OK OR To update a single image of your whiteboard without retaining the previous versions select No and press OK To deactivate the Statusboard option To begin saving to a new folder after you deactivate the Statusboard option press the New Folders button on the control unit OR To continue saving to the same folder after you deactivat...

Page 16: ... the scroll button to navigate to the image you want and press the Current Image button OR To print all of the images within the current folder press the All Images button Deleting Whiteboard Notes While working at the computer you can delete one or all of the images in the current folder To delete whiteboard notes 1 Press the Delete button on the control unit ...

Page 17: ...utton A confirmation message appears 3 Press OK If you re using Image Saving Software for PCs or Networks the image on the computer or network server is also deleted Initiating Sleep Mode After an extended period of inactivity the Camfire DCi system automatically goes into sleep mode You can also initiate sleep mode at any time To initiate sleep mode 1 Press the Sleep button Sleep Button New Folde...

Page 18: ...ress any button If you assigned a control unit password you ll also need to enter it as explained in the next procedure To enter a control unit password If you assigned a control unit password the following screen appears whenever the control unit is reactivated 1 Use the scroll button to move up or down to select each character 2 Scroll right to advance one space The maximum number of characters ...

Page 19: ...e left and right functions of the scroll button to adjust the brightness of the display and press OK Refining the Image Alignment The camera boom houses two digital cameras and each camera photographs a portion of the notes on your whiteboard Before the notes are saved built in image enhancing software stitches the two photographs into a single snapshot and crops any excess wall surface from the i...

Page 20: ...top and bottom of the writing surface 2 Align the top and bottom image targets to the marks you just made NOTE An electronic version of these targets is available at www smarttech com products camfire specs asp should you misplace the ones shipped with your system Align the top and bottom image targets 3 Align the corner image targets to the corners of the whiteboard Align the corner image targets...

Page 21: ...istrator password the Enter Administrator Password screen appears 7 Enter the Administrator Password if required a Scroll up or down to select each character b Scroll right to advance one space NOTE To delete the previous character scroll left c When you finish entering the password press OK The Administration screen appears 8 Use the scroll button to select Image Alignment and press OK ...

Page 22: ...control unit screen 13 If you configured a printer press the Print button on the control unit Otherwise access the saved image at your desk using Image Saving Software or the USB storage device page 17 14 If the horizontal lines are unbroken in the saved image the alignment was successful and you can remove the image targets Some jaggedness in the lines is normal even for a well aligned system Do ...

Page 23: ...s Explorer to navigate to the image you want Using Image Saving Software for PCs When it s the current save mode on your control unit Image Saving Software for PCs saves images of your whiteboard notes in folders on a specified computer that s within the same network as the control unit Each folder contains an HTML index and JPEG files for each image To access thumbnail images of all the whiteboar...

Page 24: ...resh Indexes button 3 Click OK in the message box that appears 4 Click OK again To access whiteboard notes saved by Image Saving Software for PCs 1 Use Windows Explorer to navigate to the folder you want OR On the computer with Image Saving Software for PCs double click the Camfire Image Saving Software for PCs icon in the system tray and click the Open Folder button in the dialog box that appears...

Page 25: ...n image click the Printer Friendly Version PDF link below its thumbnail Then select Print from the File menu Using Image Saving Software for Networks Image Saving Software for Networks stores your whiteboard notes on a network server A system administrator must install and activate this software as explained in the Camfire Image Saving Software for Networks System Administrator s Guide To access w...

Page 26: ...20 Camfire DCi User s Guide An intranet page with links to the whiteboard notes appears 3 Select a folder A calendar appears for the folder you selected 4 Click the day that you want ...

Page 27: ...ser saves the notes in JPEG format 8 To copy the image in Internet Explorer right click on its thumbnail and select Copy You can paste the image in JPEG format into any open application that uses the Windows operating system Using Internal Web Folders By default images are saved in a Web folder in the control unit s flash memory If you re not using a USB storage device or running Image Saving Soft...

Page 28: ...rk If a Web folders password has been assigned a password dialog box appears 3 Enter guest as the User Name and the Web folders password in the Password box 4 Click OK The Web Folders page appears 5 Navigate to the folder you want An index of images appears If you don t see the images you want click the Refresh button 6 To view an image in greater detail click its thumbnail 7 To save an image in I...

Page 29: ... control unit plus config in the Address bar of the Web browser The IP address appears at the top of the control unit screen when the Web folder mode is active A password dialog box appears 3 Enter admin as the User Name If you previously assigned an administrator password enter it in the Password box Otherwise leave it blank 4 Click OK The Configuration page appears 5 Click Delete Web Folders The...

Page 30: ...0333 all other countries Fax 24 hours 1 403 228 2500 E mail info smarttech com Address SMART Technologies Inc Suite 600 1177 11th Avenue SW Calgary AB CANADA T2R 1K9 Warranty A one year limited equipment warranty covers your Camfire DCi system To return defective merchandise call Technical Support to receive the appropriate Return of Merchandise Authorization as well as shipping instructions so yo...

Page 31: ...lder 6 Customer Support 24 D Deleting Whiteboard Notes 10 11 I Image Saving Software for PCs 17 19 Images of Whiteboard Notes Accessing in an Internal Web Folder 21 23 Accessing on a Network Server 19 21 Accessing on a Personal Computer 18 19 Accessing on a USB Storage Device 17 Activating the Statusboard Option 8 9 Automatic Processing 13 Changing the Save Mode 6 7 Creating a New Folder 6 Deletin...

Page 32: ...de 11 12 SMART Web Site 24 Stand Alone Control Unit 2 Statusboard Option 8 9 T Technical Support 24 U USB Storage Device 17 Saving Whiteboard Notes 2 6 8 W Warranty 24 Web Folders Accessing Whiteboard Notes 21 23 Deleting 23 Saving 4 Saving 6 8 Whiteboard Size 1 Whiteboard Notes Accessing in Internal Web Folders 21 23 Accessing on a Personal Computer 18 19 Accessing on a USB Storage Device 17 Acce...

Page 33: ... Calgary AB CANADA T2R 1K9 Main Switchboard 1 888 42 SMART Canada U S or 1 403 245 0333 all other countries Support Tel 1 866 518 6791 Canada U S or 1 403 228 5940 all other countries Support Fax 1 403 245 0366 support smarttech com www smarttech com ...

Reviews: