SMART-AVI QKVMPro User Manual Download Page 6


4x2 Multiviewer KVM switch  


 6 

Installation (continued)


EDID Learn:  

The QuadKVMPro has 3 preset EDIDs that can be triggered from the front panel. The EDIDs are 
labeled as follows: 

 

IPG - DVI (EDID for DVI) 

 

IPG - HDMI (EDID for HDMI without Audio Support) 

 

IPG - HDMI+ (EDID for HDMI with Audio Support) 

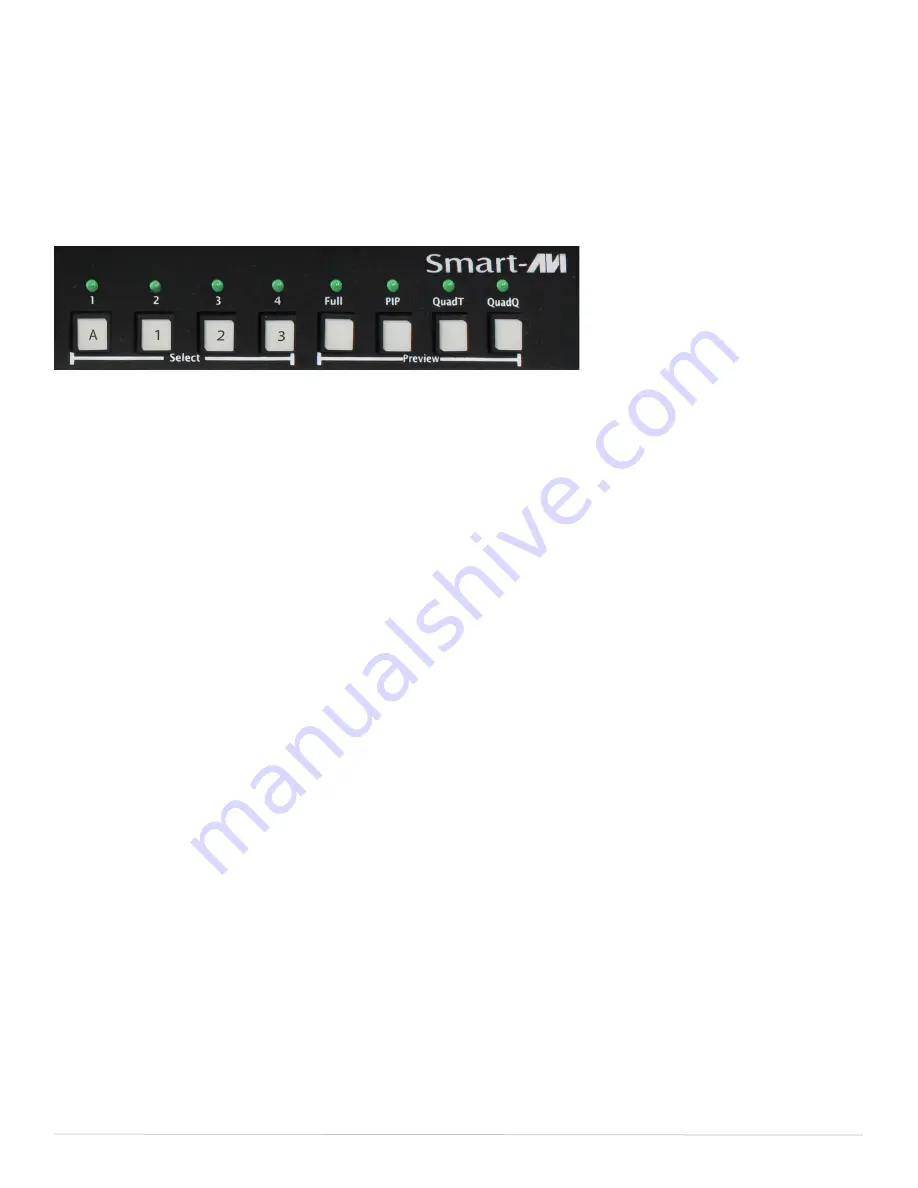
The EDIDs can be invoked using the following commands on the front panel: 

 

Pressing buttons 

A

 and then 

1

 for 2 seconds will invoke IPG - DVI 

 

Pressing buttons 

A

 and then 

2

 for 2 seconds will invoke IPG - HDMI 

 

Pressing buttons 

A

 and then 

3

 for 2 seconds will invoke IPG - HDMI+ 

System operation


There are four ways to control the QuadKVMpro: Keyboard Hotkeys, RS-232 Serial Commands, OSD Menu, 
and Front Panel Buttons. All modes of control will allow the user the set their desired configurations.   
 
The QuadKVMPro may also be controlled via RS-232 commands. To use these commands, you must use 
HyperTerminal or an alternate terminal application. The settings for the connection are as follows: Baudrate 
115200; Data Bits 8; Parity None; Stop Bits 1; Flow Control None. Once you have connected to the 
QuadKVMPro via Serial, you will see the QuadKVMPro information when the device starts up.  

Summary of Contents for QKVMPro

Page 1: ...4x2 Multiviewer KVM switch 1 1 800 284 2131 www smartavi com USER MANUAL 4x2 Multiviewer KVM switch QKVMPro 4x2 Multiviewer KVM switch QKVMPro ...

Page 2: ..._________________________________________________________________6 FRONT PANEL CONTROL_________________________________________________________________ 7 HOTKEY AND RS 232 SERIAL CONTROL___________________________________________________8 OSD MENU_______________________________________________________________________________ 9 TROUBLESHOOTING________________________________________________________...

Page 3: ...ace 4 USB Type B Output Interface 2 USB 1 1 Type A for KVM Devices 2 USB 2 0 Type A Transparent AUDIO Input 4 Connector Stereo 3 5mm Female Output 1 Connector Stereo 3 5mm Female POWER Power Requirements 12V DC 3A power adapter with center pin positive polarity ENVIRONMENT Operating Temp 32 to 104 F 0 to 40 C Storage Temp 4 to 140 F 20 to 60 C Humidity 0 80 RH non condensing CONTROL Front Panel Pu...

Page 4: ...h 4 SM QKVMPRO 4 Port DVI D USB 2 0 KVM Switch with Multiview Preview Screen and Audio Support PS12VDC3A 12V DC 3A minimum power adapter with center pin positive polarity User Manual What s in the box QKVMPro rear QKVMPro front ...

Page 5: ...pective USB ports of the unit 4 Optionally connect a stereo audio cable 3 5mm to 3 5mm to connect the audio output of the computers to the AUDIO IN ports of the unit 5 Connect a monitor to the DVI I OUT console port of the unit using a DVI cable 6 Connect a USB keyboard and mouse in the two USB console ports 7 Optionally connect stereo speakers to the AUDIO OUT port of the unit 8 Finally power on ...

Page 6: ...oke IPG HDMI Pressing buttons A and then 3 for 2 seconds will invoke IPG HDMI System operation There are four ways to control the QuadKVMpro Keyboard Hotkeys RS 232 Serial Commands OSD Menu and Front Panel Buttons All modes of control will allow the user the set their desired configurations The QuadKVMPro may also be controlled via RS 232 commands To use these commands you must use HyperTerminal o...

Page 7: ...Preview Screen Name Description Full Screen Mode In the Full Screen mode one of the four computers is displayed in full screen size and maximum resolution PIP Mode PIP mode is fixed in size and position the full screen displays one of the four video sources and a smaller image thumbnail containing another video source on the right hand margin of the screen allows for simultaneous monitoring DualT ...

Page 8: ...Quad mode with argument being primary CTRL CTRL t port ENTER t port ENTER Switch to Quad Mode CTRL CTRL q ENTER q ENTER Switch to Dual Mode CTRL CTRL d port port ENTER d port port ENTER Switch Audio Only CTRL CTRL a port ENTER a port ENTER Switch KVM Only CTRL CTRL c port ENTER c port ENTER Switch USB Only CTRL CTRL u port ENTER u port ENTER Reset Software CTRL CTRL r r ENTER Status Query N A ENTE...

Page 9: ...ouse functionality will be restored NOTE When entering one of the Function commands the Enter Key must be pressed for the function to take effect Command Description HotKey Commands Enable Disable OSD menu CTRL CTRL o ENTER Moves pointer UP on OSD Menu UP arrow Moves pointer DOWN on OSD Menu DOWN arrow Moves pointer LEFT on OSD Menu LEFT arrow Moves pointer RIGHT on OSD Menu RIGHT arrow Enter Sele...

Page 10: ...ters are properly connected Try connecting the USB on the computer to a different port Make sure that the keyboard works when directly connected to the computer Replace the keyboard Mouse is not working Check if the mouse is properly connected to the unit Try connecting the USB on the computer to a different port Make sure that the mouse works when directly connected to the computer Replace the mo...

Page 11: ...to SmartAVI Any replacement product could be new or like new provided that it has functionality at least equal to that of the product being replaced SmartAVI limited warranty is valid in any country where the covered product is distributed by SmartAVI B Limitations of warranty To the extant allowed by local law neither SmartAVI nor its third party suppliers make any other warranty or condition of ...

Page 12: ...and fitness for particular purpose SmartAVI will not be liable for errors contained herein or for incidental or consequential damages in connection with the furnishing performance or use of this material No part of this document may be photocopied reproduced or translated into another language without prior written consent from SmartAVI Inc 20180109 Tel 800 AVI 2131 702 800 0005 2455 W Cheyenne Av...

Reviews: