

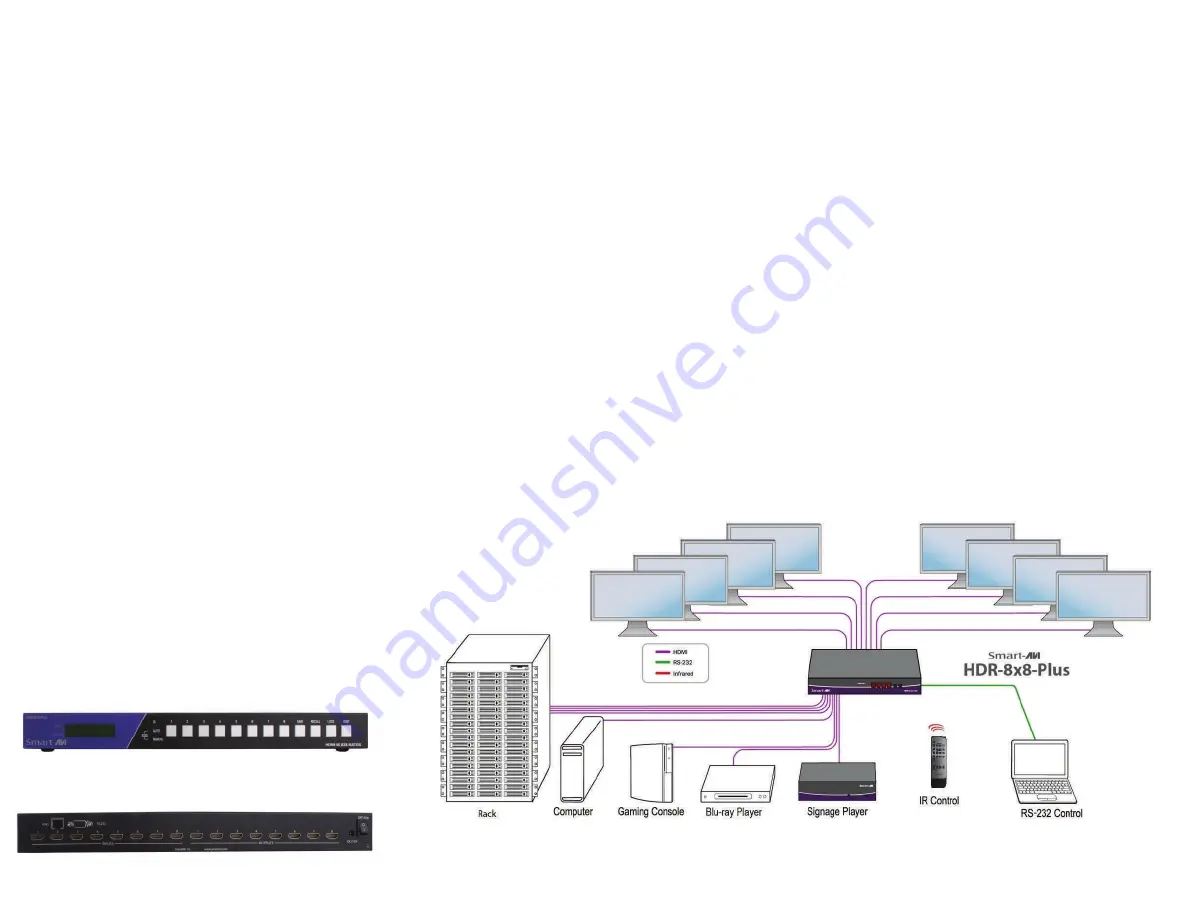
CONNECTING THE HDR-8X8-PLUS
Connect
HDR
‐
8X8
‐
PLUS
HDMI
input
to
signal
sources.
Connect
the
HDR
‐
8X8
‐
PLUS
HDMI
outputs
to
displays,
monitors,
or
projectors.
Connect
HDR
‐
8X8
‐
PLUS
to
power
supply.
Press
the
On/Off
switch
to
activate
the
HDR
‐
8X8
‐
PLUS.
Switch
between
signals
with
either
front
‐
panel
controls,
IR
Remote
Control
or
via
PC
with
RS232
and
TCP/IP
web
support
TCP/IP and RS232 Control
TCP/IP:
Plug
a
network
‐
connected
Ethernet
cable
to
the
HDR
‐
8X8
‐
Plus.
By
default,
the
device
will
connect
to
the
network
via
DHCP.
Input
your
connected
IP
address
info,
and
enter
your
browser
to
access
the
control
website.
RS232:
Plug
an
RS232
cable
into
the
corresponding
connectors
on
your
PC
and
HDR
‐
8X8
‐
Plus.
A
SmartPRO
RS232
control
window
will
auto
‐
run
on
your
PC,
from
which
you
can
control
the
device
with
ease.
EDID Learning
Press
the
EDID
learning
front
‐
panel
button
to
acquire
information
about
output
port
signals.
Once
pressed,
the
EDID
button
will
illuminate
LED
indicators.
Pressing
buttons
1
or
2
illuminates
the
AUTO
or
MANUAL
LEDs.
CONTROLLING THE HDR-8X8-PLUS
Front Panel Control
Switch between input signals easily with corre-
sponding numeric buttons. Backlit SAVE, RECALL,
LOCK, and EDID function buttons enhance control,
as well.
Lock
The LOCK button restricts switching with front-panel
buttons. It can be deactivated by pressing the LOCK
button again.
Save
Assign and store routed signals (ex: signal 1, 2, etc).
Recall
Switch between recently used signal configurations.
EDID
Learn and automatically switch between signals
with the EDID learning button
.
Back Panel Control
Activate the HDR-8X8-Plus with the On/Off switch,
and control the device with RS232 connections or
TCP/IP web controls via Ethernet.
IR Remote Control
Switch inputs to outputs with ease.
Save
Assign and store routed signals (ex: signal 1, 2, etc).
Recall
Switch between recently used signal configurations.
NOTE: Activate the HDR-8X8-Plus with the On/Off
switch on the back. The power on, off button on the
remote is not functional at this time.
INSTALLATION DIAGRAM
HDR-8X8-PLUS FRONT
HDR-8X8-PLUS REAR


