

INTRODUCTION
The FVX-3000 consists of a transmitter and receiver that
extend KVM, VGA, audio and RS-232 signals. It is a profes-
sional quality KVM capable of extending signals up to
1,400 feet over a single multimode fiber optic cable.
FEATURES
•Top Signal Quality at Maximum Extension Over Multi-
mode Fiber (1,400 ft.)
•Superior Image Quality at all Resolutions
•Video Resolutions up to 1920 x 1200 at 60Hz
(1280 x 1024 at 75Hz)
•Customizable/Programmable DDC Table
•Supports USB Keyboard/Mouse
•Supports Stereo Audio
•Supports VGA Input
•Supports VGA or DVI output
•Supports RS-232 Control from 300bps to 115200bps
•Fiber Plug Type LC
•Compatible With all Operating Systems
•Compact Metal Casing
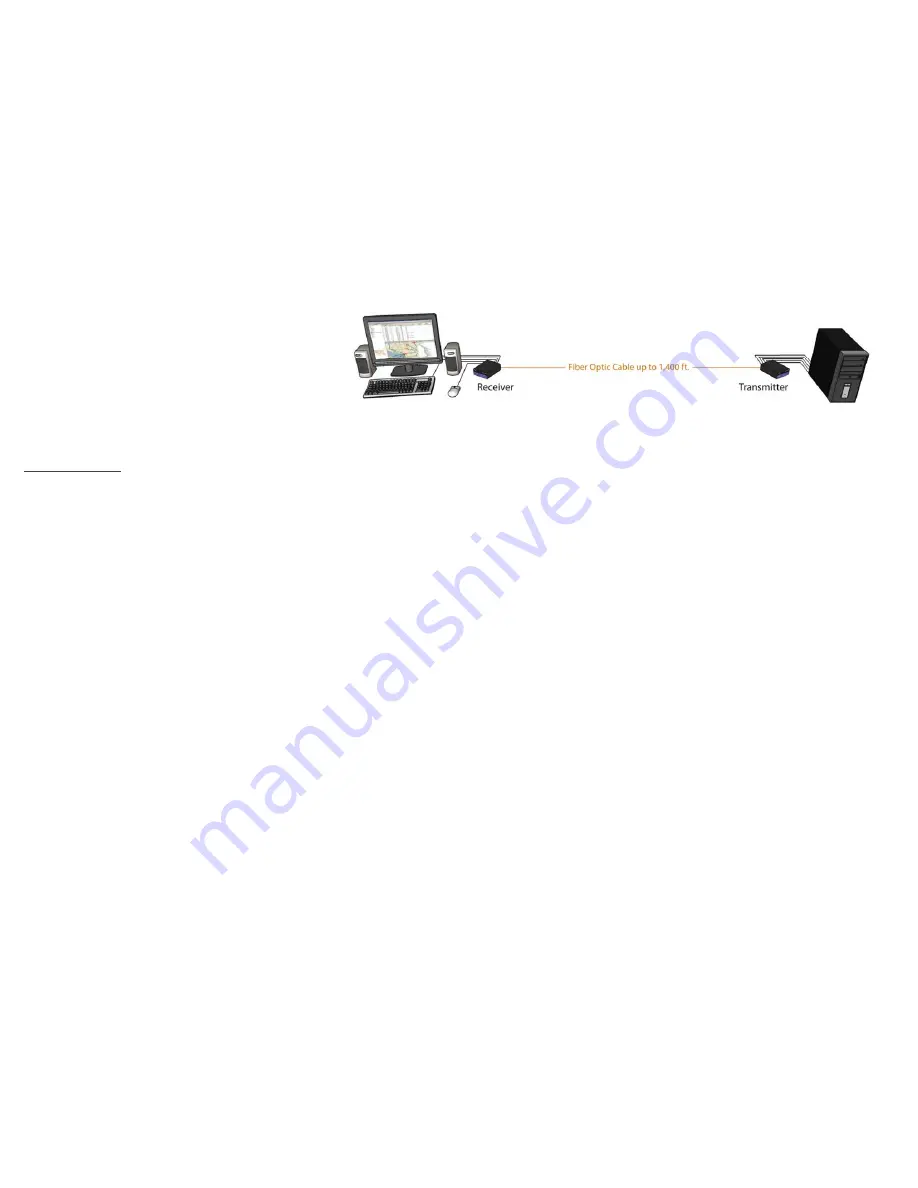
APPLICATION DIAGRAM
CONNECTING THE FVX-3000
1. Turn off all devices.
2. Connect the VGA cable, USB cable, and audio cable (not included) to their appropriate ports on the FVX
FVX--3
30
00
00
0
r
s i
TX
Transmitter (TX).
3. Connect the monitor/display to the DVI out of the V
FVX-
3
c v R
3000 Receiver (RX). If using a VGA monitor, use a VGA-to-
DVI adapter to connect it to the monitor.
4. Connects the USB keyboard and Mouse ONLY to the USB ports on the RX.
5. Connect speakers to the audio port on the RX.
6. Connect a multimode fiber optic cable between the TX and RX (maximum cable length is 1,400 ft.).
7. Connect the 5V power supply to both the TX and RX.
8. Power on all devices.
EDID LEARNING
The factory video settings of the FVX-3000 has a native resolution of 1920x1080 @ 60Hz, which is standard for most
HD monitors. FVX-3000 is also fully capable of “learning” and remembering what type of display monitor is con-
nected to it. If the monitor you are using does not support the factory default video resolution, learning the EDID of
your monitor is necessary:
1.
Ensure that the units (TX and RX) are both powered off.
2.
Power on the display being learned and connect it to the RX using a DVI cable (or VGA).
3.
Connect a multimode fiber optic cable between the TX and RX.
O
DO NOT connect the computer to the transmitter.
4.
Power on the TX and the RX.
5.
Wait for approximately 30 seconds. Then
Data
and
Video
LEDs on both the TX and RX should blink on and off
continuously for about 10 seconds. Then the
Video
LED will turn on (solid) for a few seconds and then turn off,
indicating that the EDID of your monitor has been learned.
Note:
If the LEDs do not stop blinking on and off, then
the EDID is not learned properly; thus, re-learning is required.
6.
Plug the computer into the transmitter. If the computer did not automatically detect the TX, go to the
Screen
Resolution Settings
on your computer and click
Detect
.
7.
Once the DDC of the monitor is learned, the DDC information will be stored in the internal memory of the trans-
mitter. Therefore, learning the monitor’s DDC again is not required. However, when using
another
monitor that
has a different native resolution or DDC information than the first monitor, then learning is required.
WHY FIBER OPTIC?
SmartAVI has created a full line of fiber optic extender
products, understanding that this technology is superior to
traditional cabling.
Fiber optic cables are:
•Capable of transmitting over very long distances with no
signal loss.
•Immune to electromagnetic interference. In situations
where there is considerable interference, fiber
optic cabling is the only solution.
•Much more secure because they cannot be easily
tapped. For this reason, military and law enforcement
agencies use fiber optic cables for the transmission of
sensitive data.
•Relatively inexpensive and small enough to be routed
through small spaces.


