3
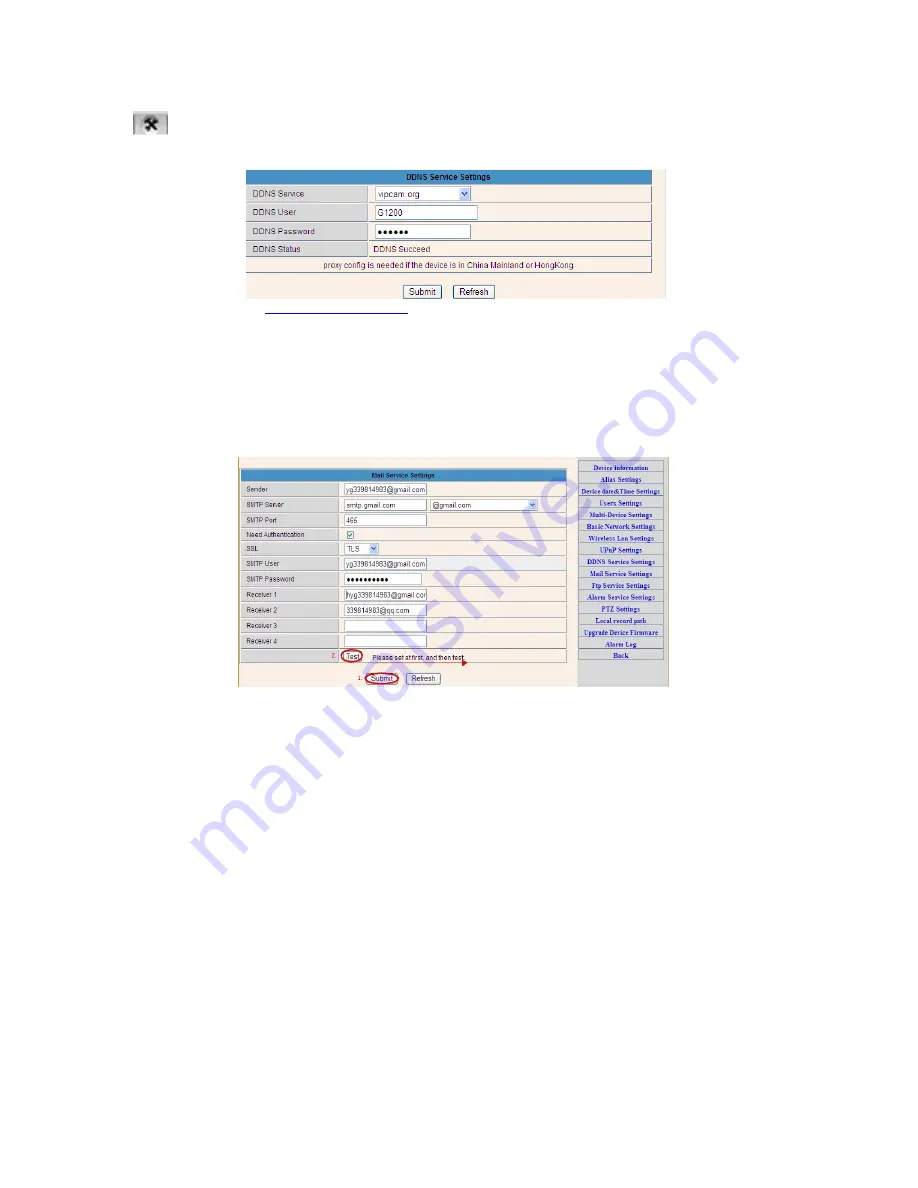
Step 5: DDNS Service Settings
1).Click
, go to “DDNS Service Settings”.
2).Choose the DDNS server , input the DDNS user and password.
3).Submit, refresh, then DDNS status will show “DDNS Succeed”.
Thus the remote address is
http://demo.p2pipc.com
To make it work, you have to do port
Forwarding In your router . That is, create a virtual server; put your camera IP address and port in
.
Step 6: Mail Service Settings and Alarm Service Settings
1). Mail service is a preparation for the alarm function. When your camera is triggered, it will send
You email attached with photo. As Premise, you should set mail service right, and test ok.
Take Gmail as example.


