GB 11
5. Configuration and Operation
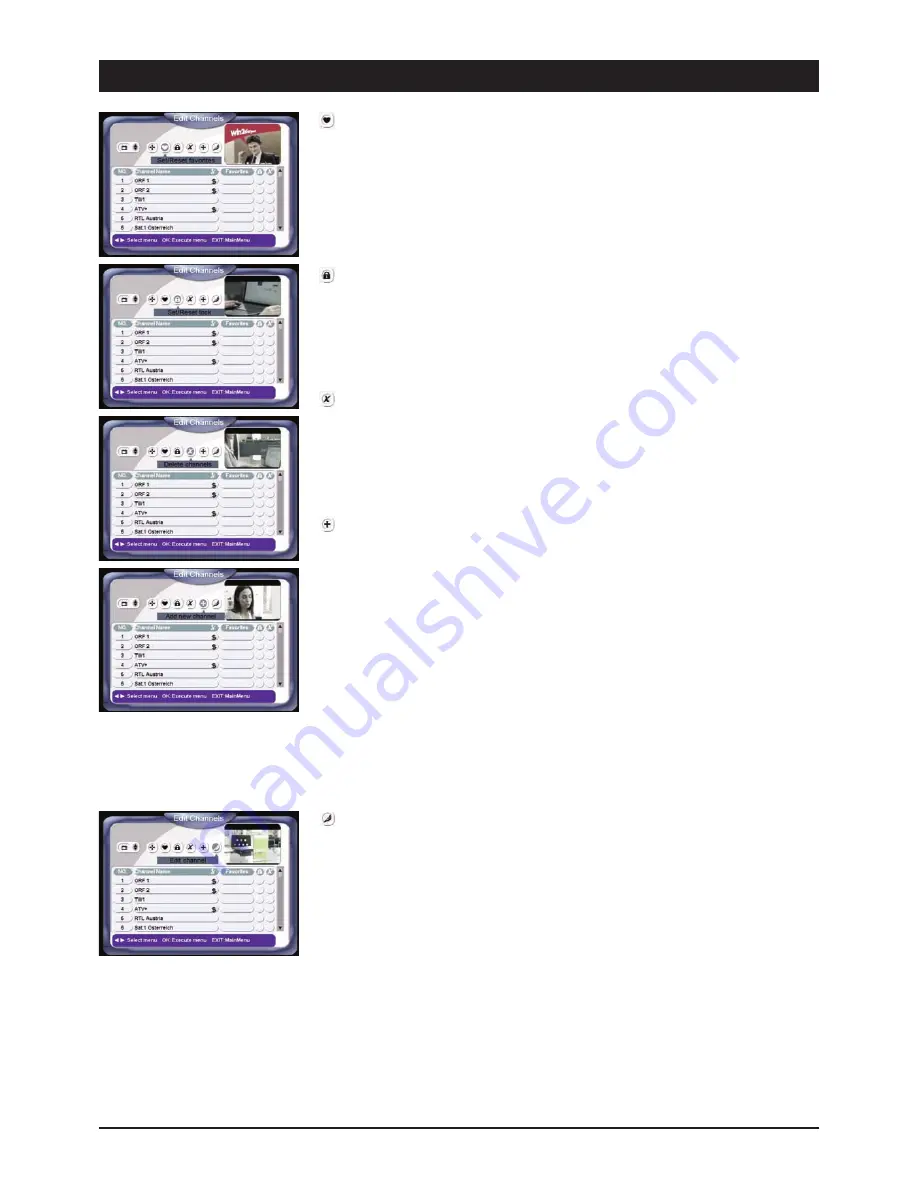
Select favourites
Use the CH
왖
/
왔
, Vol
왗
/
왘
buttons and the OK button to select the respective channel in the
favourite column. Then use the CH
왖
/
왔
buttons and the OK button to allocate the channel in the
category overview which has just appeared. The following categories are available:
[1] Movies, [2] Music, [3] Cartoons, [4] News und [5] Sports.
Select point [0] “Unselect” to delete a channel from a favourite category. Please observe the point
“Edit Favourite Lists” in order to sort the favourite lists.
Lock channels
Use the CH
왖
/
왔
, Vol
왗
/
왘
buttons and the OK button to select the channel which you wish to lock
in the column with the lock symbol. Press the OK button to lock the channel. Successful locking is
indicated by a “√” in the respective column. The channel can now only be viewed after entering a PIN
(factory setting “1234”). Reselect the channel and press the OK button to unlock the channel.
Delete channels
Use the CH
왖
/
왔
and Vol
왗
/
왘
buttons to select the channel which you wish to delete in the column
with the “X” symbol and press the OK button. The channel will be deleted as soon as you exit the
“Edit Channels” menu. If, before exiting the menu, you decide not to delete the channel, reselect the
channel and press the OK button. The channel will not be deleted when you exit the menu.
Add channels
Only access this menu if you are familiar with digital satellite technology.
To add a channel as described below it is necessary to have the exact data to ensure reception of the
desired channel after data input. If you do not have all the required data, we recommend adding the
desired channel to your program list via the menu item “Setup Menu”
앶앸
“Channel Search”.
Select the symbol in the upper menu bar.
Use the CH
왖
/
왔
and Vol
왗
/
왘
buttons and the OK button to enter the respective parameters.
The following parameters can be set:
Satellite:
Select the channel's satellite here.
Transponder, Frequency, Symbolrate, Polarity, FEC:
Enter the exact data of the channel which you wish to add.
Channel Name:
Enter the name of the channel via the keypad which appears on
the screen. (See below for keypad explanation.)
Audio PID; Video PID; PCR PID:
Enter the exact PIDs (ID rates) for the audio, video and data
packet of a channel.
As soon as you have entered all the settings correctly, press the EXIT button to auto-matically add
the new channel to the end of the program list.
Edit channel data
Select the symbol in the upper menu bar and press the OK button.
The following settings can be changed in this menu item:
Change channel name, change audio PID, change video PID, change PCR PID
Change channel name:
Use the CH
왖
/
왔
buttons to select the channel whose name you wish to
change and confirm your selection via the OK button.
A keypad appears. Use the CH
왖
/
왔
and Vol
왗
/
왘
buttons to move the cursor over the keypad and
enter the selected letters via the OK button.
The keypad has the following special keys:
왗
Moves back one position in the line
왘
Moves forward one position in the line
Ins
Inserts a letter at the selected position
Del
Deletes the selected position
Caps
Switches from upper to lower case letters and vice versa
Special
Changes keypad to numbers and special symbols
Space
Enters spaces and automatically overwrites the existing symbol
Save
Saves changes
Cancel
Cancels the process without saving changes
Summary of Contents for DCX 10 CI
Page 1: ...Digital Satellite Receiver DCX 10 CI 39615 OPERATING INSTRUCTIONS...
Page 3: ......
Page 19: ...GB 17...
Page 20: ...99039615 BDA GB 10 2006...


