

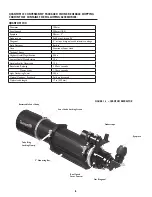


FigUrE 1-5
Dovetail
mount
FigUrE 1-4
Focuser Draw
tube Locking
screw
Focuser
adapter ring
5
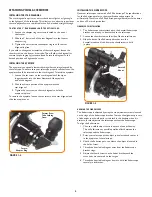
attaChing visUaL aCCEssoriEs
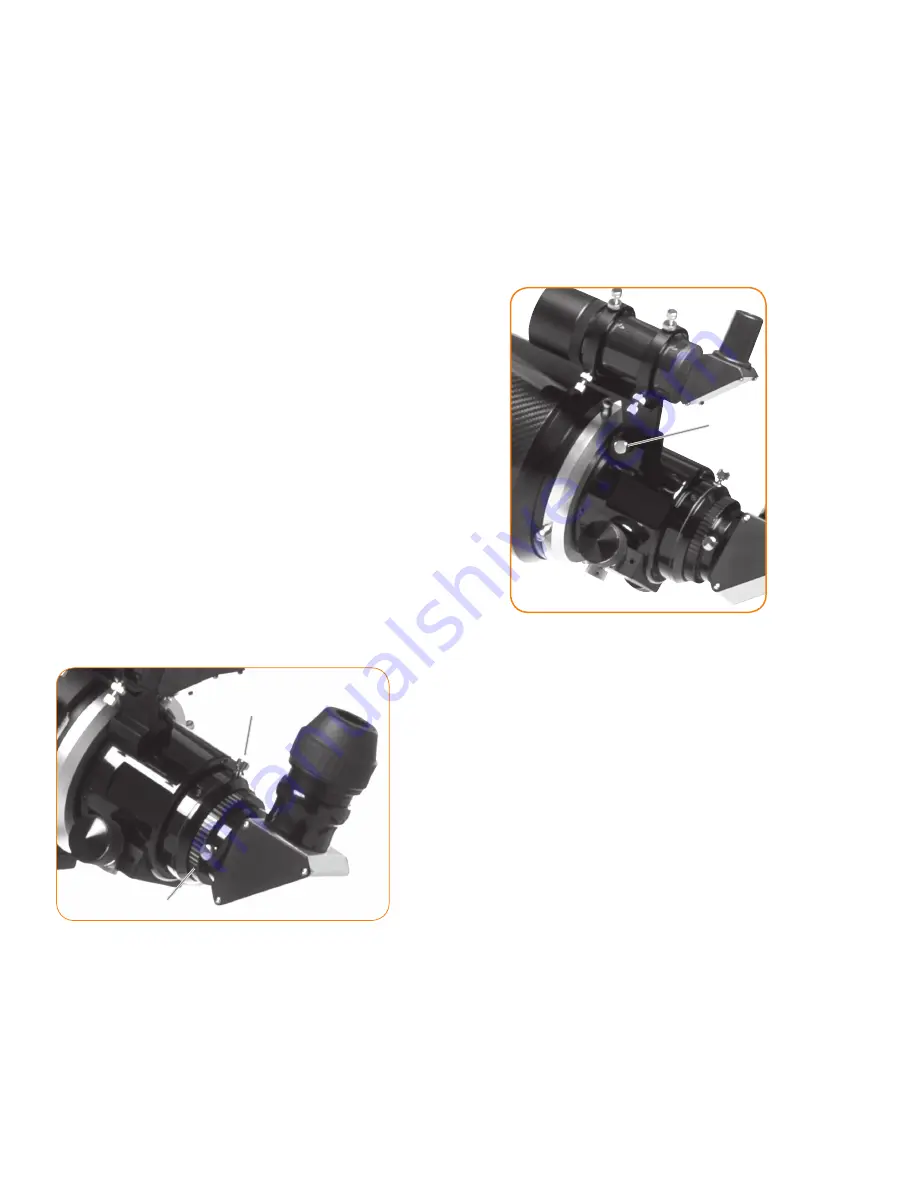
instaLLing thE star DiagonaL
The star diagonal is a prism or mirror that diverts light at a right angle
to the light path of the telescope. This allows you to observe in positions
that are physically more comfortable than if you looked straight through.
to attaCh thE 2” star DiagonaL onto thE optiCaL tUbE:
1. Loosen the adapter ring set screws located on the end of
the
focuser.
2. Slide the 2” barrel end of the star diagonal into the focuser
adapter
ring.
3. Tighten the set screw on the adapter ring to hold the star
diagonal in place.
If you wish to change the orientation of the star diagonal, loosen the
thumb screw on the focuser draw tube. This will allow the diagonal (or
camera for photography) to rotate freely. Rotate the diagonal to the
desired position and tighten the screw.
instaLLing thE EyEpiECE
The eyepiece is an optical element that magnifies the image focused by
the telescope. To ensure that your telescope properly reaches focus, the
eyepiece should be inserted into the star diagonal. To install an eyepiece:
1. Loosen the set screw on the star diagonal until the tip no
longer extends into the inner diameter of the eyepiece
end of the diagonal.
2. Slide the chrome portion of the eyepiece into the
star
diagonal.
3. Tighten the set screw on the star diagonal to hold the
eyepiece in place.
To remove the eyepiece, loosen the set screw on the star diagonal and
slide the eyepiece out.
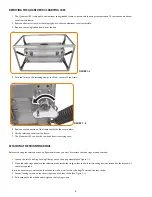
instaLLing thE FinDErsCopE
Quantum telescopes come with a 9x50 finderscope. The specifications
for the finderscope refer to the magnification and aperture (in
millimeters). Therefore, a 9x50 finderscope magnifies objects nine times
and has a 50 mm objective lens.
FinDErsCopE instaLLation
1. The finderscope comes attached to the dovetail finderscope
bracket and is ready to be attached to the telescope.
2. Loosen the thumbscrew on the side of the dovetail mount.
3. Slide the base of the finderscope bracket into the
dovetail mount and lock down the thumbscrew to hold
in
place.
aLigning thE FinDErsCopE
The finderscope is adjusted by using the six adjustment screws located
on the rings of the finderscope bracket. To make the alignment process
a little easier, you should perform this task in the daytime when it is
easier to locate objects in the telescope without the finderscope.
To align the finderscope:
1. Choose a visible object that is in excess of one mile away.
This will eliminate any possible parallax effect between the
telescope and the finderscope.
2. Point your telescope at the object you selected and center it
in the eyepiece of the telescope.
3. Check the finderscope to see where the object is located in
the field of view.
4. Thread the knurled locking nut away from the finderscope
bracket
rings.
5. Adjust the thumb screws on the finder bracket until the
cross hairs are centered on the target.
6. Thread the knurled locking nut down to hold the finderscope
securely in its bracket.


