11
Step 1
Power ON the craft and place it on a flat
surface. This is necessary for the craft’s
gyroscopes to properly align. The lights on
the craft will blink as it searches for a signal
from the remote.
Be sure the craft and yourself are facing
the same forward direction, this will help
with orientation while flying.
Step 2
Power ON the remote control to connect to the craft. A chime will sound and the lights on
the craft will turn solid when it has linked to the remote.
Gyroscope calibration is now complete and the craft is ready to fly.
Step 3
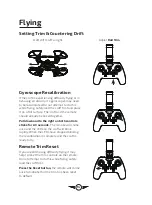
Pull both control sticks down and outwards until the
rotors start spinning. This starts the craft and the
Auto-Hover feature.
To take off, push up on the
Left Control Stick.
When
you release the throttle, the craft will hover in place.
To land, pull down on the
Left Control Stick.
The
craft will descend until it detects it has landed and
the rotors will stop.
If you are finished flying, pull both control sticks
down and outwards again. This stops the craft
and Auto-Hover.
Power OFF the remote BEFORE
powering OFF the craft
to ensure no signals are
accidentally sent by the remote.
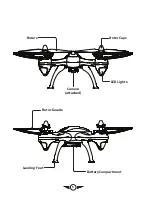
Front
Flying
Flying & Auto-Hover Mode
Before flying, the craft and the remote must be linked together and the gyroscopes on the
craft must be allowed to calibrate.
Begin with the battery installed, the battery compartment closed, and the craft and
remote powered OFF.


