background image

G

E

R

M

A

N

Y

Mounting the COMPIT/E and COMPIT/E+ on and removing them from the bicycle’s handlebar

21

Mounting the COMPIT/E and COMPIT/E+ on and removing them 
from the bicycle’s handlebar

Requirement

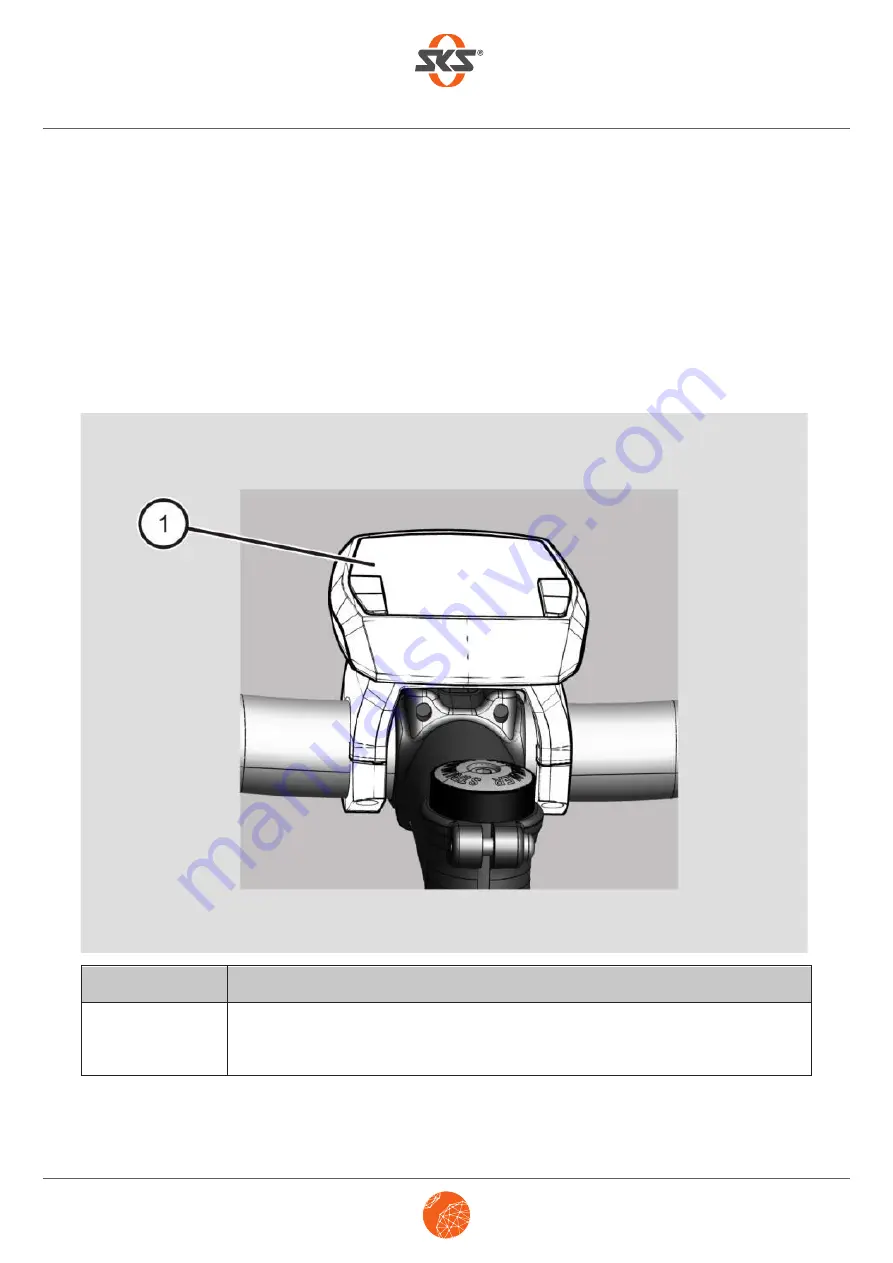
You can affix the COMPIT/E and COMPIT/E+ on your bicycle if it meets the following requirements:

1

On-board computer
Type: Bosch Intuvia or Bosch Nyon

Nr.

Explanation

Summary of Contents for COMPIT/E

Page 1: ...G E R M A N Y COMPIT E COMPIT E INSTRUCTIONS FOR USE LAST UPDATED 03 2019 ...

Page 2: ......

Page 3: ...iew 16 LED status indicator 17 Task and Function 18 COMPIT E 18 COMPIT E 18 Technical Data 19 Unpacking and Checking the Scope of Delivery 20 Mounting the COMPIT E and COMPIT E on and removing them from the bicycle s handlebar 21 Requirement 21 Disassembling the on board computer from the bicycle 22 Without COM LIGHT 23 With COM LIGHT 26 Mounting your smartphone on the COMPIT E or COMPIT E and rem...

Page 4: ...d the COM UNIT are hereafter referred to as the product as long as it is not necessary to differentiate between different product functions Keep the instructions at hand These instructions are a constituent part of the product Always keep these instructions Please pass these instructions on if you sell the product or pass it on in another form Design characteristics of these instructions Various e...

Page 5: ... filmed processed duplicated or distributed in any form whatsoever whether in part or in its entirety without prior written approval of SKS metaplast Scheffer Klute GmbH 2019 SKS metaplast Scheffer Klute GmbH All rights reserved Address of the Manufacturer SKS metaplast Scheffer Klute GmbH Zur Huberstushalle 4 59846 Sundern Germany Tel 49 2933 8310 Website www sks germany com G E R M A N Y 5 ...

Page 6: ...s included in the COMPIT E s scope of delivery The COM UNIT is intended for charging your smartphone with or without a Qi charging function and can be mounted on the COMPIT E The smartphone can only be used on the COMPIT E and the COM UNIT with a cover not included in the scope of delivery Please refer to the section entitled Accessories page 45 Intended use also includes observing and following a...

Page 7: ...f they are damaged Never open the COM UNIT s housing Always have repair work carried out by qualified specialists Do not stick metal labels or other objects on the COM UNIT Do not use the COM UNIT in the vicinity of heated surfaces Do not use extension cables or overloaded power strips Ensure that children and persons with reduced mental capabilities only use the COM UNIT when supervised Avoid a c...

Page 8: ... CAUTION warn of a situation that could result in slight or moderate injuries G E R M A N Y Safety Design characteristics of the warning instructions 8 CAUTION Design characteristics of tips Tips provide additional information i ...

Page 9: ...ing arms for COMPIT E with adapter R right L left 2x Docking station for mounting the smartphone with cover or the COM UNIT 3 mm Allen key Screws for mounting the front light M4 x 8 2x Screws for mounting the COM LIGHT adapter M5 x 16 COM LIGHT adapter Designation Nr 1 2 3 6 5 4 ...

Page 10: ... E R M A N Y Description 10 The cover and the front light are not included in the scope of delivery i Locking washers for mounting the front light 2x Shaft for affixing the front light Designation Nr 7 8 ...

Page 11: ...h adapter R right L left 2x Docking station for mounting the smartphone with cover or the COM UNIT COM LIGHT adapter 3 mm Allen key Screws for mounting the COM LIGHT adapter M5 x 16 2x COM UNIT Screws for mounting the front light M4 x 8 2x USB cable for charging the COM UNIT 1 2 6 3 7 4 8 5 Designation Nr ...

Page 12: ...E R M A N Y Description 12 The cover and the front light are not included in the scope of delivery i Locking washers for mounting the front light 2x Shaft for affixing the front light Designation Nr 9 10 ...

Page 13: ...board computer not included in the scope of delivery Docking station for mounting the smartphone with cover or the COM UNIT Safety lever for locking the smartphone with cover or the COM UNIT Clamping arms Rubber adapter on both sides Levelling screw on both sides 1 2 3 4 5 6 Designation Nr ...

Page 14: ...of delivery USB cable for the power supplied by the e bike battery Docking station for mounting the smartphone with cover or the COM UNIT with cover Safety lever for locking the smartphone with cover or the COM UNIT Levelling screw on both sides Clamping arms Rubber adapter on both sides COM LIGHT 1 2 3 4 5 6 7 8 Designation Nr ...

Page 15: ...ription 15 COM LIGHT overview Locking washer for mounting the front light Screws for mounting the front light M4x8 Shaft for mounting the front light Screws for mounting the COM LIGHT adapter M5x16 1 2 3 4 Designation Nr ...

Page 16: ...cableless charging for mounting the smartphone with cover Button for switching on and off Docking station for mounting on the COMPIT Housing input two contact pins in the housing USB input USB output LED status indicator NFC reading area Designation Nr 1 2 3 4 5 6 7 8 ...

Page 17: ...EDs illuminated 3 LEDs illuminated 4 LEDs illuminated Blue Blue flashing approx 1 x per second Blue flashes fast approx 5x per second Indicator for cableless charging COM UNIT is being charged 0 25 battery capacity 25 50 battery capacity 50 75 battery capacity 75 100 battery capacity Blue Standby or charging completed Charging in process Charging error ...

Page 18: ...ed to the COMPIT E COMPIT E The COM UNIT is included in the COMPIT E s scope of delivery The COM UNIT is used to charge and connect the smartphone while cycling It can be affixed to the COMPIT E Smartphones that have a wireless charging function are charged by affixing the smartphone to the Qi docking station Smartphones that do not have a Qi charging function can be charged using an optional USB ...

Page 19: ...ng input DC 5 15 V 2 A Wireless transmission power 5 W Wireless efficiency 70 Operating frequency 110 KHz 205 KHz Wireless output DC 5 V 1 A Battery type Rechargeable lithium polymer battery Battery capacity 5000 mAh NFC chip NTAG 216 924 Byte Type of protection IP54 Discharging temperature 15 60 C Charging temperature 0 45 C COM UNIT ...

Page 20: ... from the packaging Keep the original packaging in case you need to return the product to Customer Service Check the scope of delivery to ensure it is correct and complete refer to page 9 onwards Check all parts to ensure that they are undamaged If there are any deviations please contact the manufacturer or dealer immediately ...

Page 21: ...icycle s handlebar 21 Mounting the COMPIT E and COMPIT E on and removing them from the bicycle s handlebar Requirement You can affix the COMPIT E and COMPIT E on your bicycle if it meets the following requirements 1 On board computer Type Bosch Intuvia or Bosch Nyon Nr Explanation ...

Page 22: ...s follows to disassemble the on board computer Loosen the screws 2 on the clamping arms 3 of the on board computer 1 Set the four screws 2 aside for reuse Remove the clamping arms 3 Remove the rubber adapters from the clamping arms 3 and set them aside for reuse Mount the COMPIT E or COMPIT E and the on board computer 1 on the bicycle as described on page 23 onwards We have provided a description ...

Page 23: ...ng the COMPIT E and COMPIT E on and removing them from the bicycle s handlebar 23 Without COM LIGHT Insert the rubber adapters 1 of the on board computer into the clamping arms in the direction of the arrows as shown below ...

Page 24: ...G E R M A N Y Mounting the COMPIT E and COMPIT E on and removing them from the bicycle s handlebar 24 Affix the e bike s on board computer 2 and the COMPIT E s clamping arms 3 on the bicycle s handlebar ...

Page 25: ... cause injury When mounting the COMPIT E tighten the screws evenly alternating between them CAUTION Mount the COMPIT E on the handlebar with a torque wrench To do so tighten the screws 4 evenly alternating between them using the torque 1 Nm indicated on the clamping arms Proceed as follows to remove the COMPIT E from the bicycle s handlebar Loosen the screws Remove the COMPIT E from the bicycle s ...

Page 26: ...cle s handlebar 26 With COM LIGHT To mount the COMPIT E with COM LIGHT on the bicycle s handlebar you must first remove the do cking station from the clamping arms without the COM LIGHT adapter Proceed as follows to do so Loosen the levelling screw s 1 Now remove the docking station 2 ...

Page 27: ... M A N Y Mounting the COMPIT E and COMPIT E on and removing them from the bicycle s handlebar 27 Now affix the clamping arms 5 for the COM LIGHT adapter on the docking station 4 Tighten the screws 3 slightly ...

Page 28: ... Y Mounting the COMPIT E and COMPIT E on and removing them from the bicycle s handlebar 28 Insert the rubber adapters 6 of the on board computer into the clamping arms in the direction of the arrows as shown below ...

Page 29: ...G E R M A N Y Mounting the COMPIT E and COMPIT E on and removing them from the bicycle s handlebar 29 Now affix the on board computer 7 and the COMPIT E s clamping arms 8 on the bicycle s handlebar ...

Page 30: ...nting the COMPIT E on the bicycle the COMPIT E may come loose from the bicycle and cause injury When mounting the COMPIT E tighten the screws evenly alternating between them CAUTION Mount the COMPIT E on the handlebar with a torque wrench To do so tighten the screws 9 evenly alternating between them using the torque 1 Nm indicated on the clamping arms ...

Page 31: ...COMPIT E on and removing them from the bicycle s handlebar 31 Now affix the COM LIGHT 12 on the COMPIT E 10 Tighten the screws 11 slightly The optional COM CAM adapter can be mounted using the clamping arms in the same way as the COM LIGHT i ...

Page 32: ... the COM LIGHT holder along with the locking washers 15 on each side of the lamp base and align all the holes Insert the shaft 13 through the COM LIGHT and the lamp base Tighten the two screws 14 with the supplied Allen key You must observe the maximum width of the lamp base 12 mm and the minimum hole diameter 6 mm i Proceed as follows to remove the COMPIT E from the bicycle s handlebar Loosen the...

Page 33: ...and removing it Proceed as follows to mount your smartphone on the COMPIT E or COMPIT E Insert your smartphone into the corresponding cover according to the relevant instructions Place your smartphone on the COMPIT E or COMPIT E as shown in 1 or 2 and turn it about 45 either to the right or left above the docking station until you hear it click into place ...

Page 34: ...on how you turn it your smartphone is mounted vertically 3 or horizontally 4 The safety lever 5 is locked Proceed as follows to remove your smartphone from the COMPIT E or COMPIT E Push the safety lever 5 downwards Remove your smartphone from the COMPIT E or COMPIT E by turning it about 45 off the docking station ...

Page 35: ...one into the desired position by adjusting the tilt on the COMPIT E or COMPIT E Proceed as follows to adjust the tilt Press the smartphone 1 on the COMPIT E or COMPIT E downwards or upwards until you have reached the desired position To fix the desired tilt setting tighten the levelling screw 2 ...

Page 36: ...ficiently charged min 50 Affix the COM UNIT on the COMPIT E in the same way as the smartphone please refer to page 33 regarding this matter Press the button on the COM UNIT to switch it on The bottom LED lights up blue and the battery indicator LEDs light up orange The COM UNIT is now swit ched on Place your smartphone on the COM UNIT s Qi docking station as shown in 1 or 2 and turn it about 45 ei...

Page 37: ...ontally 4 The bottom LED flashes blue The smartphone is charging To manually stop the charging process and switch off the COM UNIT without removing the smartphone from the COM UNIT press the button for approx 2 seconds If a smartphone is not connected for charging after 30 seconds at the latest the COM UNIT switches off automatically i ...

Page 38: ...IT 2 Now connect it to your smartphone 1 Proceed as described in the section entitled Charging your smartphone without a cable to charge your smartphone Please refer to page 36 regarding this matter Proceed as follows once your smartphone is charged Remove the USB cable from your smartphone and from the COM UNIT Remove your smartphone from the COM UNIT by turning it approx 45 above the Qi docking ...

Page 39: ...applications that are genera ted using an app for the writing of NFC chips This enables numerous smartphone settings to be changed at the same time when scanning the NFC chip of the COM UNIT in addition to it being possible to automatically start apps such as the SKS MYBIKE app You can use the NFC NEAR FIELD COMMUNICATION as follows Activate the NFC NEAR FIELD COMMUNICATION on your smartphone Hold...

Page 40: ... computer while cycling Proceed as follows to charge Open the connection socket 1 of the e bike s on board computer Insert the plug 2 of the COMPIT E s cable into the connection socket 1 of the e bike s on board computer The COM UNIT charging process starts straight after the e bike has been switched on The orange LEDs flash one after the other To charge the smartphone proceed as described on page...

Page 41: ...smartphone cannot be continuously navigated with the e bike if the COM UNIT is out of charge The energy provided by the e bike is too low to be able to navigate with the smartphone The COM UNIT s battery indicator should show at least 50 charge to support the smartphone sufficiently during navigation i ...

Page 42: ... Insert the plug of the USB cable that is included in the scope of delivery in the USB input port 1 and connect it with a suitable charger All four of the orange LEDs are illuminated if the COM UNIT battery is fully charged The anticipated charging duration is approx 6 hours depending on the charger ...

Page 43: ...The blue LED on the COM UNIT is flashing fast Error when charging the smartphone Remove your smartphone from the COM UNIT and alter its position When doing so ensure that your smartphone is positioned in the centre on the SKS logo Sympton Cause Remedy ...

Page 44: ...G E R M A N Y Caring for the Product 44 Caring for the Product Care for the product as follows If necessary clean the exterior of the product using a moistened cloth ...

Page 45: ...x 4 mm 11538 11542 11545 11582 11541 Cover iPhone 6 7 8 11539 Cover iPhone X 11540 Cover SAMSUNG S7 11576 Cover SAMSUNG S8 11577 Cover SAMSUNG S9 Kabel Micro USB 11578 11543 Cover HUAWEI P20 PRO Kabel Typ C 11579 11544 Designation Designation Designation Designation Designation Order number Order number Order number Order number Order number ...

Page 46: ...he collection of paper cardboard and lightweight packaging The product and the accessories are not to be disposed of in the household waste You can obtain information on collection points that accept old products free of charge from your local authority Outside Germany Dispose of the product and the packaging conform with the provisions that have validity for the place of use ...

Page 47: ...he date of purchase in the scope of the legal provisions for all parts that are included in the scope of delivery proof with the purchase receipt Wearing parts are excluded this especially being the COM UNIT battery unit This is covered by a 6 months SKS GERMANY warranty An incorrect handling or wrong use excludes a liability for defects ...

Page 48: ... take the following action as soon as you detect damage on the product Please return the product to the following address in the original packaging and enclose a precise description of the damage SKS metaplast Scheffer Klute GmbH Zur Huberstushalle 4 59846 Sundern Tel 49 2933 8310 ...

Page 49: ......

Page 50: ......

Page 51: ......

Page 52: ...G E R M A N Y ...

Reviews: