12
MAINTENANCE….cont
1. Set the jack in its normal operation position.
2. Turn the release knob anti-clockwise to open the release valve.
3. Connect the airline to the air inlet of the jack.
4. Press and hold the lever on the air inlet for 10 to 15 seconds.
If air gets into the hydraulic system the jack will not operate correctly and will need to
be bled. To bleed air from the hydraulic system, follow the instructions below.
BLEEDING
Note:
Contact your local authority on how / where to dispose of the waste
oil.
4. Return the jack to an upright position.
5. Fill with hydraulic oil until the oil reaches the bottom of the oil fill hole.
6. Wipe away any excess oil.
7. Refit the oil fill bung.
PRIMING THE PUMP
The air / hydraulic pump may lose its prime during shipment, or after long periods with-
out use; To prime the pump:
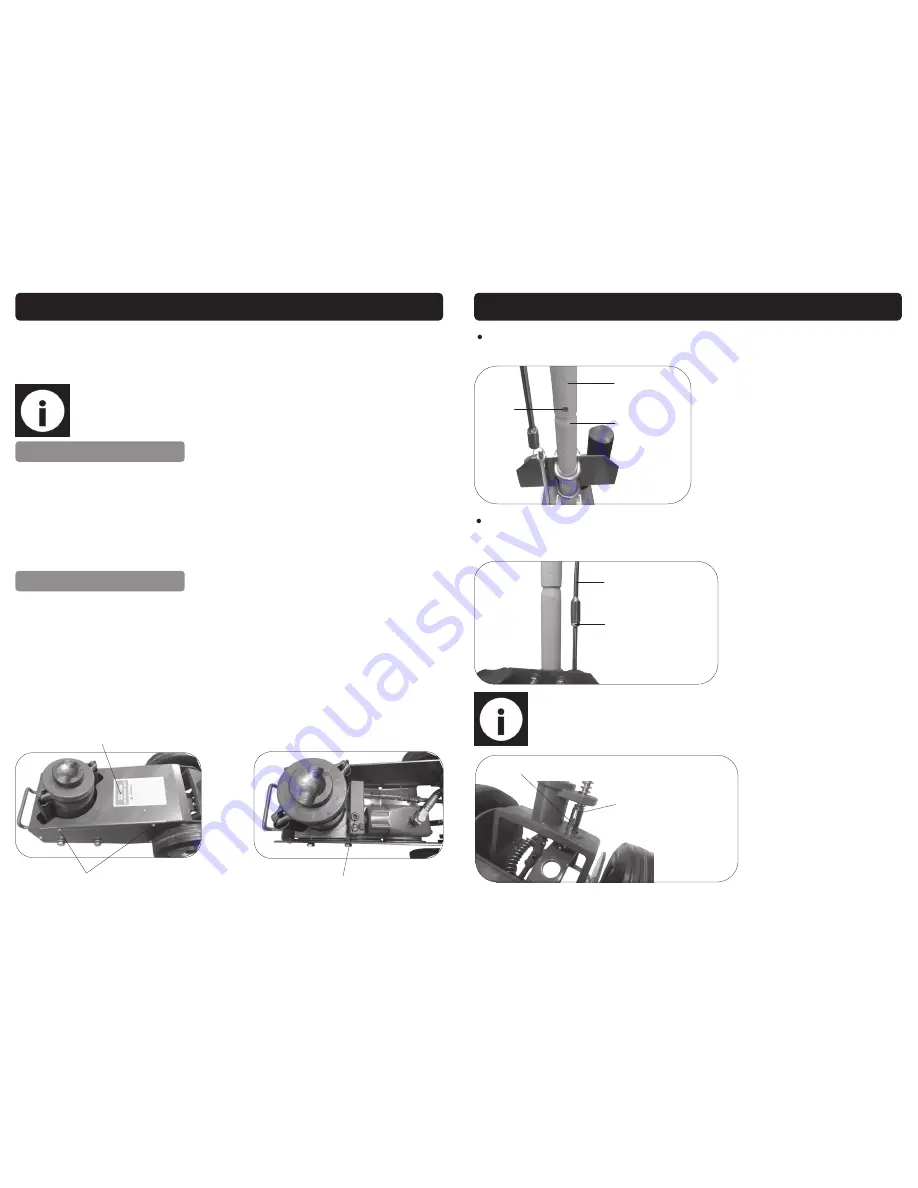
1. Remove the upper cover; unscrew the 2 screws on each side (see below, left).
2. Loosen the cap head bolt (see picture below, right) by half a turn.
3. Close the release valve.
4. Operate the air pump whilst repeatedly tightening and loosening the bolt.
5. When the piston begins to rise fully tighten the bolt and ensure that the piston can
rise to its maximum height.
Cover
Screws
Cap-head bolt
9
ASSEMBLY INSTRUCTIONS….cont
Note:
There are 2 flat sections towards the bottom of the lock / release
control to allow a 13mm spanner (not supplied) to turn the bottom section
(Fig. 5).
Join the 2 parts of the handle lock / release control; turn the bottom part of the
handle lock / release control to connect the parts together. Tighten the locking
nut to fully secure (Fig. 4).
Slide the upper handle over the lower handle and secure in place with the han-
dle screw (Fig 3).
Upper Handle
Lower Handle
Screw
Fig. 3
Handle lock / release
control
Lock Nut
Fig. 4
Handle lock / release control
Flat Section
Fig. 5


