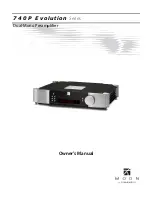
Simaudio 740P evolution series Owner'S Manual Download Page 10

740P Evolution 

Series


10 

7.


Press the “Setup” button and the label you’ve just 
assigned to the B1 input will appear in the display. 


8.


At this point you can (i) continue configuring other 
options for the B1 input (see the next step), (ii) 
configure another input such as B2 (rotate the 
volume control clockwise to access the B2 input), or 
(iii) leave the Setup mode  (press the “Setup” button 
once and “INPUTS” appears in the display; the press 
it again and “EXITING” will appear in the display) 


9.


The next option to configure for the B1 input is the 
maximum volume setting.  Press “OK” and “LABEL” 
will appear in the display.  Then slowly rotate the 
volume control clockwise until “MAX VOL” appears 
in the display.  Press “OK” and the factory default of 
“80.0dB” will appear in the display; this is the 
maximum volume level. 


10.


The maximum setting can be changed by rotating 
the volume control. A slow rotation makes 0.1dB 
adjustments and a faster rotation results in 1.0dB 
adjustments.  Once you’ve found a desired setting, 
press “OK” and  “SAVED” will briefly appear in the 
display followed by “MAX VOL”.  The lowest 
possible setting is 40.0dB. 


11.


The next option to configure for the B1 input is 
volume offset. This allows you to compensate for 
the different output levels amongst your various 
source components you will be connecting to the 

740P

.  Slowly rotate the volume control clockwise 

and “OFFSET” will appear in the display.  Press “OK” 
and the factory default of “+6.0dB” will appear in 
the display. 


12.


You can adjust the volume offset in either 0.1dB 
(slow rotation) or 1.0dB (faster rotation) increments 
to 10.0dB by rotating the volume control 
clockwise or –10.0dB rotating the volume control 
counter-clockwise. Once you’ve found the 
appropriate setting, press “OK” and  “SAVED” will 
briefly appear in the display the “OFFSET”. 


13.


The fourth configurable option is the volume 
bypass feature for use with home-theater 
processors and source components that have their 
own volume control.  When activated, the volume 
control of the 

740P

 is bypassed and the volume 

level is adjusted using the component connected 
to the input.  Slowly rotate the volume control 

clockwise and “BYPASS” will appear in the display.  
Press “OK”.   


14.


The factory default of “BYPASS N” will appear in the 
display.  Use the volume control to alternate 
between “BYPASS N” and “BYPASS Y” and then 
press “OK”.  Next you will be asked to confirm your 
selection as “SURE ? N” will appear in the display. 
Rotate the volume control until “SURE ? Y” appears 
in the display.  Press “OK” and “SAVED” will briefly 
appear in the display followed by “BYPASS”.  When 
you set the volume bypass to “Y”, the volume 
setting you saved for the input with “OFFSET” will 
be maintained. 

 
15.


The fifth and final configurable option for the B1 
input is to disable it when it won’t be used.  Slowly 
rotate the volume control clockwise and “ENABLE” 
will appear in the display.  Press “OK”. 


16.


The factory default is “ENABLE Y” which will appear 
in the display. Use the volume control to alternate 
between “ENABLE N” and “ENABLE Y”.  Press “OK” 
and  “SAVED” will briefly appear in the display 
followed by “ENABLE”. When an input has been 
disabled it will appear only in the Setup menu as 
“B1 N/A”. 


17.


You have now passed through all five configuration 
options for the B1 input. At this point, you can (i) 
repeat the above process for the another input by 
pressing the “Setup” button and then use the 
volume control to select the next input to 
configure,  (ii) exit from the Setup procedure by 
pressing the “Setup” button three times or  (iii) 
continue with the Setup procedure and either 
assign the 12 Volt trigger outputs or reset the 

740P


back to factory default status  (see the following 
examples). 


The 

MOON 740P

 is equipped with software that allows 

the MiND app to control various features of this 
preamplifier. With the MiND app you will be able to 
adjust the volume level, mute the output, place the 
preamplifier into ‘Standby’ mode and then place it back 
into operational mode. As well, when you begin playing 
a music track from the MiND app, the 

740P

 will 

automatically switch to the input configured for the 
MiND. With the MiND app, you are essentially 

Summary of Contents for 740P evolution series

Page 1: ...Dual Mono Preamplifier Owner s Manual 740P Evolution Series...

Page 2: ...740P Evolution Series...

Page 3: ...or pinched particularly at plugs convenience receptacles and the point where they exit from the apparatus Unplug mains cord during transportation 11 Only use attachments and accessories specified by...

Page 4: ...er voltage Both the shipping box and rear panel serial number label will indicate the correct voltage Use of any other voltage will likely damage the unit and void the warranty 3 AC extension cords ar...

Page 5: ...l Controls 8 Software Setup 9 Rear Panel Connections 14 SimLink 15 Operating the 740P 15 Remote Control Operation 16 Balanced Operation 18 Specifications 19 Quick Reference Setup Menus Appendix www si...

Page 6: ...ier incorporates many significant design features to achieve its world class level of performance This is an abbreviated list of the more important features An oversized dual mono power supply using 2...

Page 7: ...signed to protect the 740P from any potential damage during transit Please write the serial number of your new MOON 740P in the space provided below for future reference Serial Number Installation The...

Page 8: ...ing of medium If you want to turn the display off press and hold the Display button for 2 seconds When the display is turned off it will still come back on for a short period of time whenever you pres...

Page 9: ...etely when it s not in use As well you can assign any and all inputs to activate the 740P s 12 Volt trigger Finally there s a facility to reset all software settings back to their factory defaults Ple...

Page 10: ...rol When activated the volume control of the 740P is bypassed and the volume level is adjusted using the component connected to the input Slowly rotate the volume control clockwise and BYPASS will app...

Page 11: ...iguring an input repeat steps 1 through 5 2 When CUSTOM appears in the display press the OK button The display will show 3 Rotate the volume control clockwise to scroll through the 26 letters of the E...

Page 12: ...menu The MOON 740P is equipped with a rear mounted IR input for use with aftermarket wired infrared remote control receivers In the event that you want control the MOON 740P with a universal remote c...

Page 13: ...rotating the volume control until RESET appears in the display 2 Press OK and RESET N will appear in the display 3 Rotate the volume control until RESET Y appears in the display 4 Press OK and SURE N...

Page 14: ...ils As well there s a 1 8 mini jack input for use with aftermarket infrared remote control receivers Further to the right there s a 12V trigger output on a 1 8 mini jack The bottom row contains all ba...

Page 15: ...master component in a SimLink chain no one particular component operates as the main communications controller If you are using your MOON 740P with an older MOON product such as a SuperNova you will n...

Page 16: ...decrease in the volume level of the left channel The balance adjustment operates in 1 increments When the balance is equal for both channels 00 will briefly appear in the front panel display The rang...

Page 17: ...de press and hold the AMP button for three 3 seconds The backlight will illuminate twice very briefly for confirmation Off Mode 3 The backlight feature is completely disabled To activate the Off Mode...

Page 18: ...se picked up by this interconnect ie nearby magnetic fields such as an AC power cord will be reproduced by the integrated amplifier then heard through the loudspeakers Conversely a balanced interconne...

Page 19: ...03 THD 20Hz 20kHz 0 001 Remote Control All Aluminum Full Function FRM 3 Display Type 8 character dot matrix LED Power Consumption idle 20 Watts AC Power Requirements 120V 60Hz or 240V 50Hz Shipping We...

Page 20: ...B1 MiND S2 S2 Y SYS 15 B2 MiND S3 S3 Y SYS 19 SURE N S1 IR N SURE Y S2 S3 LABEL MAX VOL OFFSET BYPASS ENABLE AUX MAX 80 0dB 10 0dB BYPASS N ENABLE Y CD MAX 79 9dB 9 9dB BYPASS Y ENABLE N DVD PHONO SAC...

Reviews: