


User Manual VS-HD14 HDMI distribution amplifier Installation and Operation
6
Rear Panel dip switch settings
IR Address Dip switches
You can operate multiple VS-HD14
distribution amplifiers
via IR remote control using the IR IN and
OUT jacks located on the rear panel. The units can be connected by using a 1/8” male to male
stereo cord. Connect the cord from the IR OUT jack of unit # 1 to the IR IN jack of Unit #2. To add a
third unit, connect the IR OUT jack of unit #2 to the IR IN jack of unit #3 and so on up to 4 units.
Once connected, the units will respond to IR commands from the remote control according to the IR
address set for each unit. All units set to address #1 will respond to commands sent to address #1
from the remote. To customize commands for individual units, press the unit 3 after the command.
For example, to power off unit #2, press the Power button followed by the #2.
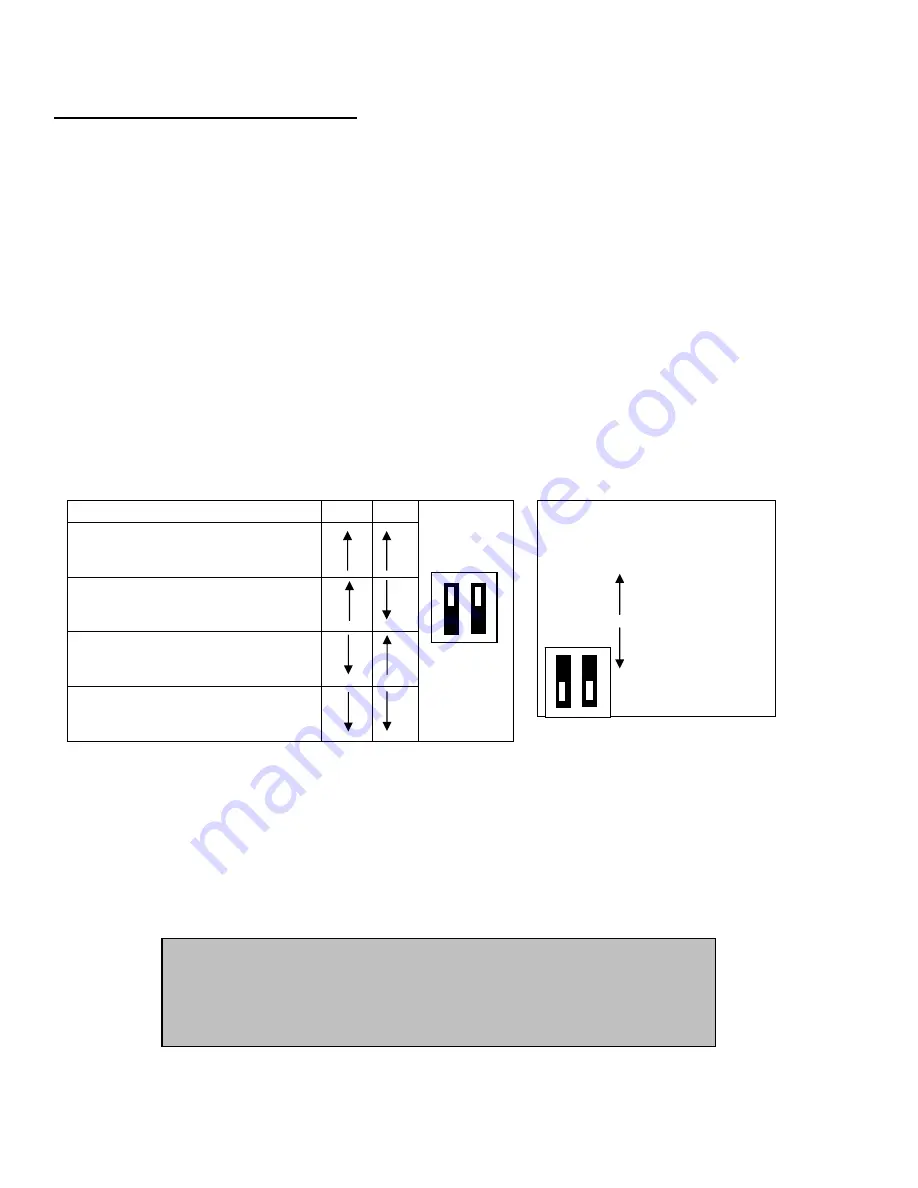
You can connect up to 4 VS-HD14 units together and control them using the remote control. To do
so, you must designate the IR address for each unit. The IR address factory default (as shown in Fig.
1 below) is set to location 1. All units with an IR address of 1 will respond to the commands for Unit 1
from the remote control. Set IR addresses for other units by aligning the dip switches as shown on the
chart in Fig.1.
IR addresses
1
2
3 = Ft. IR
1
Front panel locks
To eliminate changing
distribution amplifier
settings by using the front panel, you can lock the front
panel controls by setting the Front Panel Lock dip switches located on the rear panel. Use switch #3
to lock the front IR window. Use switch #4 to lock the front panel buttons. The front panel lock factory
default is for both locks to be turned OFF as shown in Fig. 2 above.
4 = Ft. buttons
2
=
ON (Locked)
3
1 2
3 4
=
OFF (Unlocked)
4
Fig. 2
Note:
for dip switch settings to take effect, you must cycle
power on the VS-HD14. Unplug the AC adapter from the
outlet. Wait 5 seconds and plug it in again. Press the Power
button to turn on.
Fig. 1


