Luxury Traditional Basin Stand
FITTING INSTRUCTIONS
Your new luxury basin stand is specifically designed to perfectly suit your premium
quality Silverdale Bathrooms basin.
THE FRAME IS EASILY ASSEMBLED AND FIXED IN PLACE BY FOLLOWING THESE
SIMPLE INSTRUCTIONS:-
If you follow the care instructions overleaf, the stands life can be prolonged for many years of use.
PLEASE CHECK THE CONTENTS PRIOR TO ASSEMBLY/INSTALLATION.
This pack includes the following:
2 x SOLID WOOD LEGS (A)
1 x PLATED FRAME (B)
2 x PLATED SQUARE FEET (C)
2 x 1 ¾ SCREWS (D)
2 x 1 ½ SCREWS (E)
2 x WALL PLUGS (F)
2 x 3m x 10mm MACHINE SCREWS (G)
2 x 6m x 20mm MACHINE SCREWS (H)
2 x WALL FIXING BRACKETS (I)
IF THERE ARE ANY COMPONENTS MISSING,
PLEASE CONTACT OUR CUSTOMER SERVICES TEAM ON
01782 717175.
INSTALLATION
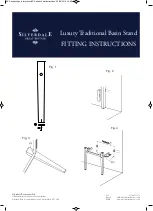
1. Screw the 2 x square feet to the bottom of each leg, using the 2 x 1½ screws. (see diagram overleaf - Fig.1)
2. Offer the legs to the wall and mark the wall to align with the cut outs in the back of the legs (see diagram overleaf - Fig. 2)
3. Lay the legs face down on a clean surface that will not scratch the wood. With the slots uppermost,
(be aware there is a left and right hand leg) you will see that each leg has a single captive nut. (see diagram overleaf - Fig.3).
4. Position the frame into the slots on the legs and fix into position with the 2 x 6m x 20mm machine screws.
DO NOT over tighten as this will deform the frame.
5. Fix the 2 x Wall fixing brackets to the wall (marked earlier), using the 2 x wall plugs and 2 x 1¾ screws.
The distance between the centre of the wall brackets should be 740mm (see diagram overleaf - Fig.4).
6. Carefully lift the assembled frame into the upright position and slide the side arms of the frame over the wall brackets and
secure using the 2 x 3m x 10mm machine screws. (see diagram overleaf - Fig.4).
Your basin stand is now ready to accept your Silverdale Bathrooms basin. The top of the legs will
locate within the hollow discs in the underside of the basin.
BC Sanitan Legs Instructions:BC Sanitan Seat Instructions 02/06/2014 19:39 Page 2


