background image

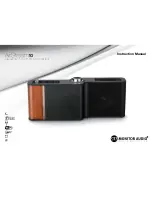
SRW 250 A1 Alarm Clock Radio  

English  -  115 

Overview 


Summary of Contents for SRW 250 A1

Page 1: ......

Page 2: ......

Page 3: ...V 1 25 Deutsch 2 Français 28 Italiano 54 Nederlands 80 English 106 ...

Page 4: ...l 9 Batterien 9 Kinder 10 Urheberrecht 10 Übersicht 11 Display 13 Vor der Inbetriebnahme 13 Inbetriebnahme 14 Das Gerät ein und ausschalten 14 Die Uhrzeit einstellen 14 Einen Sender einstellen 16 Automatischer Sendersuchlauf 17 Einen gespeicherten Sender auswählen 17 Eine Weckzeit einstellen 18 Die Weckfunktion aktivieren 19 Weckruf abschalten 20 Die Einschlaffunktion 20 Displaybeleuchtung 21 ...

Page 5: ...dukt von SilverCrest entschieden haben Der SilverCrest SRW 250 A1 Radiowecker ist mit einer digitalen Uhr ausgerüstet die Sie als Wecker programmieren können Weiterhin können Sie mit dem Gerät Radioprogramme hören Lesen Sie auf den folgenden Seiten wie Sie das Gerät einsetzen können Dieses Symbol kennzeichnet wichtige Hinweise für den sicheren Betrieb des Gerätes und zum Schutz des Anwenders Diese...

Page 6: ... und in tropischen Klimaregionen genutzt werden Bei eigenmächtigen Umbauten des Gerätes und hieraus resultierenden Schäden oder Störungen ist jegliche Haftung seitens des Herstellers ausgeschlossen Bitte beachten Sie die Landesvorschriften bzw Gesetze des Einsatzlandes Beachten Sie dass in verschiedenen Ländern abweichende nationale Regelungen bestehen können welche Frequenzbereiche frei empfangen...

Page 7: ...Radiowecker SRW 250 A1 Deutsch 5 Lieferumfang SilverCrest SRW 250 A1 Radiowecker Dieses Benutzerhandbuch ohne Abbildung ...

Page 8: ...9 x 92 x 85 mm B x H x T Gewicht ca 435 g ohne Batterien Betriebstemperatur 5 C bis 35 C Betriebsluftfeuchtigkeit max 85 rel Feuchte Die Leistungsaufnahme im Standby Betrieb ist abhängig von der eingestellten Displayhelligkeit Diese Angaben beschreiben nur die technischen Möglichkeiten des Gerätes Die verschiedenen Länder können davon abweichende gesetzliche Regelungen über den frei empfangbaren F...

Page 9: ...sumgebung Das Gerät ist nicht für den Betrieb in Räumen mit hoher Temperatur oder Luftfeuchtigkeit z B Badezimmer oder übermäßigem Staubaufkommen ausgelegt Betriebstemperatur und Betriebsluftfeuchtigkeit 5 C bis 35 C max 85 rel Feuchte Achten Sie darauf dass immer eine ausreichende Belüftung gewährleistet ist stellen Sie das Gerät nicht in Regale auf einen Teppich auf ein Bett oder dorthin wo Belü...

Page 10: ...dringen das Gerät keinen übermäßigen Temperaturschwankungen ausgesetzt wird da sonst Luftfeuchtigkeit kondensieren und zu elektrischen Kurzschlüssen führen kann das Gerät keinen übermäßigen Erschütterungen und Vibrationen ausgesetzt wird Hinweis zur Netztrennung Die Taste ON OFF 2 auf der Oberseite des Gerätes trennt das Gerät nicht vollständig vom Stromnetz Außerdem nimmt das Gerät im Standby Bet...

Page 11: ...a dies einen Kurzschluss oder elektrischen Schlag verursachen kann Stellen Sie weder das Gerät Möbelstücke o ä auf das Netzkabel und achten Sie darauf dass es nicht eingeklemmt wird Machen Sie niemals einen Knoten in das Netzkabel und binden Sie es nicht mit anderen Kabeln zusammen Das Netzkabel sollte so gelegt werden dass niemand darauf tritt Ein beschädigtes Netzkabel kann einen Brand oder elek...

Page 12: ...ahren nicht immer richtig erkennen Kleinteile können bei Verschlucken lebensgefährlich sein Wurde eine Batterie verschluckt muss sofort medizinische Hilfe in Anspruch genommen werden Halten Sie auch die Verpackungsfolien von Kindern fern Es besteht Erstickungsgefahr Urheberrecht Alle Inhalte dieser Bedienungsanleitung unterliegen dem Urheberrecht und werden dem Leser ausschließlich als Information...

Page 13: ...Radiowecker SRW 250 A1 Deutsch 11 Übersicht ...

Page 14: ...requenz einstellen 5 ALARM2 ALARM2 einstellen bzw aktivieren deaktivieren 6 PRESET Sender abspeichern aufrufen Sendersuchlauf durchführen 7 Lautstärke verringern bzw Auswahl vornehmen 8 Lautstärke erhöhen bzw Auswahl vornehmen 9 SNOOZE SLEEP Weckruf für ungefähr 6 Minuten auszusetzen Einschlaffunktion einschalten 10 Display 11 Lichtsensor 12 Wurfantenne 13 Netzkabel 14 Batteriefach 15 Lautsprecher...

Page 15: ...mton aktiviert 20 AL2 Weckzeit mit Radio aktiviert 21 AL1 Weckzeit mit Radio aktiviert 22 AL1 Weckzeit mit Alarmton aktiviert 23 FM Empfang 24 AM Empfang Vor der Inbetriebnahme Stellen Sie das Gerät auf eine feste ebene Oberfläche und stellen Sie keine schweren Gegenstände auf das Gerät Stecken Sie nun den Netzstecker des Netzkabels 13 in eine leicht erreichbare Netzsteckdose ...

Page 16: ...teten Zustand leuchtet die LED FM 23 bzw die LED AM 24 und das Gerät zeigt im Display 10 kurz die eingestellte Frequenz und danach die aktuell eingestellte Uhrzeit an Um das Gerät auszuschalten drücken Sie erneut auf die Taste ON OFF 2 Im ausgeschalteten Zustand zeigt das Display 10 die aktuell eingestellte Uhrzeit an Die Uhrzeit einstellen Die Uhrzeit lässt sich nur im ausgeschalteten Zustand ein...

Page 17: ...ellen Drücken Sie kurz die Taste TIME DIMMER 1 um zwischen der 12 bzw 24 Stunden Anzeige umzuschalten Im Display 10 wird 24 bzw 12 eingeblendet Mit der Tasten 7 oder 8 können Sie nun zwischen der 12 bzw 24 Stunden Anzeige umschalten Um bei der 12 Stunden Anzeige zwischen Vor und Nachmittagsstunden unterscheiden zu können leuchtet für Nachmittagsstunden die LED PM 17 auf dem Display 10 Warten Sie n...

Page 18: ...und AM 24 angezeigt Drücken Sie kurz auf die Taste TUNE BAND 4 und dann kurz bzw mehrfach die Taste 7 oder 8 um die gewünschte Frequenz manuell einzustellen Um automatisch nach einem Sender suchen zu lassen drücken Sie die Taste 7 oder 8 etwas länger Die Frequenz wird auf dem Display in MHz FM Empfang bzw in kHz AM Empfang angezeigt Beim FM Empfang werden Frequenzen mit 0 05 MHz im Display mit der...

Page 19: ...t ein indem Sie auf die Taste ON OFF 2 drücken Halten Sie die Taste PRESET 6 ca 4 Sekunden gedrückt Der Suchlauf wird nun gestartet und die gefundenen Sender werden automatisch abgespeichert Den Sendersuchlauf können Sie durch kurzes Drücken der Taste PRESET 6 wieder abbrechen Bitte beachten Sie dass maximal 20 Sender gespeichert werden können Werden mehr als 20 Sender gefunden werden nur die erst...

Page 20: ... ON OFF 2 aus falls es eingeschaltet ist Drücken Sie die Taste ALARM1 3 bzw die Taste ALARM2 5 und halten Sie diese solange gedrückt bis die Stundenanzeige im Display 10 blinkt Stellen Sie die Stunden mit der Taste 7 oder 8 ein Sie können die Taste 7 oder 8 auch gedrückt halten Drücken Sie erneut kurz die Taste ALARM1 3 bzw die Taste ALARM2 5 um die Minuten der Uhrzeit einzustellen Im Display 10 b...

Page 21: ...ie Weckfunktion ist nun mit Alarmton für die eingestellte Uhrzeit aktiviert Drücken Sie erneut kurz die Taste ALARM1 3 bzw die Taste ALARM2 5 Im Display 10 leuchtet nun die AL1 Radio LED 21 bzw die AL2 Radio LED 20 Die Weckfunktion ist nun mit Radio für die eingestellte Uhrzeit aktiviert Um die Weckfunktion zu deaktivieren drücken Sie erneut auf die Taste ALARM1 3 bzw die Taste ALARM2 5 Bei deakti...

Page 22: ...n LED 19 20 21 oder 22 Die Einschlaffunktion Mit der Einschlaffunktion können Sie das Gerät einschalten und nach Ablauf einer ausgewählten Zeit automatisch abschalten lassen Drücken Sie im ein oder ausgeschalteten Zustand die Taste SNOOZE SLEEP 9 Auf dem Display erscheint die Ziffer 60 und zeigt damit an dass das Gerät nach 60 Minuten abschalten würde Drücken Sie mehrfach auf die Taste SNOOZE SLEE...

Page 23: ...ie wie folgt vor Drücken Sie kurz die Taste TIME DIMMER 1 wird die Displaybeleuchtung abgedunkelt Im Display 10 wird kurz L LOW angezeigt Drücken Sie erneut kurz die Taste TIME DIMMER 1 wird die Displaybeleuchtung abhängig von den Lichtverhältnissen automatisch geregelt Die Lichtverhältnisse werden nun über den Lichtsensor 11 erfasst Im Display 10 wird kurz A AUTOMATIC angezeigt Drücken Sie die Ta...

Page 24: ...en Sie dazu wie folgt vor Trennen Sie das Gerät vom Stromnetz Öffnen Sie das Batteriefach 14 an der Unterseite des Gerätes Legen Sie zwei Batterien der Größe AAA polrichtig in das Batteriefach ein Achten Sie auf die Symbole und auf den Batterien und im Batteriefach siehe Abbildung Schließen Sie das Batteriefach Verbinden Sie das Gerät wieder mit dem Stromnetz Entnehmen Sie die Batterien wenn Sie d...

Page 25: ...aches Drücken der Taste 8 Schlechter Radioempfang Wickeln Sie die Wurfantenne 12 vollständig ab und verändern Sie ggf die Position der Wurfantenne 12 Wartung Reinigung Wartungsarbeiten sind erforderlich wenn das Gerät beschädigt wurde z B wenn Netzstecker Netzkabel oder Gehäuse beschädigt sind Flüssigkeit oder Gegenstände ins Innere des Gerätes gelangt sind es Regen oder Feuchtigkeit ausgesetzt wu...

Page 26: ...n Umwelthinweise und Entsorgungsangaben Die mit diesem Symbol gekennzeichneten Geräte unterliegen der europäischen Richtlinie 2002 96 EC Alle Elektro und Elektronik Altgeräte müssen getrennt vom Hausmüll über dafür staatlich vorgesehene Stellen entsorgt werden Mit der ordnungsgemäßen Entsorgung des alten Gerätes vermeiden Sie Umweltschäden und eine Gefährdung der persönlichen Gesundheit Weitere In...

Page 27: ...werden Folien und Kunststoffe des Lieferumfangs werden über Ihr örtliches Entsorgungsunternehmen eingesammelt und umweltgerecht entsorgt Konformitätsvermerke Dieses Gerät entspricht hinsichtlich Übereinstimmung mit den grundlegenden Anforderungen und den anderen relevanten Vorschriften der EMV Richtlinie 2004 108 EC der Richtlinie für Niederspannungsgeräte 2006 95 EC der RoHS II Richtlinie 2011 65...

Page 28: ...ten Sie für alle Anfragen die Artikelnummer bzw wenn vorhanden Seriennummer bereit Für den Fall dass eine telefonische Lösung nicht möglich ist wird durch unsere Hotline in Abhängigkeit der Fehlerursache ein weiterführender Service veranlasst In der Garantie wird das Produkt bei Material oder Fabrikationsfehler nach unserer Wahl kostenlos repariert oder ersetzt Mit Reparatur oder Austausch des Pro...

Page 29: ...49 0 211 547 69 93 E Mail service DE targa online com Telefon 0043 0 1 79 57 60 09 E Mail service AT targa online com Telefon 0041 0 44 511 82 91 E Mail service CH targa online com IAN 75536 Hersteller TARGA GmbH Postfach 22 44 D 59482 Soest www targa de ...

Page 30: ...ment 34 Câble d alimentation 35 Piles 36 Enfants 36 Droits d auteur 36 Description de l appareil 37 Écran 39 Avant de commencer 39 Prise en main 40 Mise en marche et arrêt de l appareil 40 Réglage de l heure 40 Réglage d une station radio 42 Recherche automatique des stations 43 Sélection d une station mémorisée 44 Programmation du réveil 44 Activation du réveil 45 Répétition 46 Veille automatique...

Page 31: ...ns d avoir choisi ce produit SilverCrest Le radio réveil SilverCrest SRW 250 A1 comporte une horloge numérique accompagnée d une fonction réveil Il permet en outre d écouter la radio Veuillez lire attentivement les pages suivantes pour obtenir des instructions sur la manière d utiliser votre appareil Ce symbole signale des consignes importantes relatives à la sécurité de fonctionnement de l appare...

Page 32: ...ur et dans des climats tropicaux Le fabricant ne pourra pas être tenu pour responsable des dommages ou interférences provoqués suite à des modifications non autorisées Veuillez respecter les réglementations et législations en vigueur dans le pays d utilisation Notez que les normes nationales en matière de bandes de fréquences pouvant être syntonisées peuvent varier selon les pays Les informations ...

Page 33: ...Radio réveil SRW 250 A1 Français 31 Contenu de l emballage Radio réveil SilverCrest SRW 250 A1 Ce manuel d utilisation non illustré ...

Page 34: ... Poids environ 435 g sans pile Température de fonctionnement 5 C à 35 C Humidité de fonctionnement 85 max d humidité relative La consommation électrique en veille dépend de la luminosité de l écran configurée Le tableau ci dessus présente les spécifications techniques de votre appareil La réglementation concernant les bandes de fréquences librement utilisables peut dépendre du pays Par conséquent ...

Page 35: ...nt ce manuel Conditions d utilisation L appareil n est pas conçu pour l utilisation dans des environnements poussiéreux ou l exposition à une température ou une humidité excessive ex salle de bain Température et humidité en fonctionnement 5 C à 35 C humidité relative de 85 max Observez toujours les précautions suivantes Assurez vous que la ventilation de l appareil est suffisante ne le placez pas ...

Page 36: ...es etc sur l appareil ou à proximité N introduisez pas de corps étrangers dans l appareil Évitez de soumettre l appareil à des changements brusques de température qui risqueraient de créer de la condensation et par voie de conséquence de l humidité et des courts circuits Évitez les vibrations ou les chocs excessifs Remarque sur le débranchement Le bouton ON OFF 2 Marche Arrêt situé sur le dessus d...

Page 37: ... Tenez toujours le câble d alimentation par sa fiche Ne tirez jamais sur le câble lui même et ne le manipulez jamais avec les mains mouillées Vous risqueriez de provoquer un court circuit ou de vous électrocuter Ne placez pas l appareil ni de meuble ou tout autre périphérique sur le câble d alimentation et assurez vous que ce dernier n est pas emmêlé Ne faites jamais de nœuds avec le câble et ne l...

Page 38: ...r des appareils électriques sans surveillance Les enfants ne sont généralement pas conscients des risques encourus Les petites pièces impliquent un risque d étouffement En cas d ingestion accidentelle consultez rapidement un médecin Conservez l emballage hors de portée des enfants afin d éviter tout risque d asphyxie Droits d auteur L ensemble du présent manuel d utilisation est protégé par copyri...

Page 39: ...Radio réveil SRW 250 A1 Français 37 Description de l appareil ...

Page 40: ... d activer ou désactiver l ALARME 2 6 PRESET permet de mémoriser et charger les stations préréglées et de rechercher une station 7 permet de réduire le volume audio ou de sélectionner une option 8 permet d augmenter le volume audio ou de sélectionner une option 9 SNOOZE SLEEP permet de reporter la sonnerie du réveil d environ 6 minutes et d activer la fonction de veille automatique 10 Écran 11 Cap...

Page 41: ...tions FM 19 AL2 Réveil par sonnerie activé 20 AL2 Réveil par radio activé 21 AL1 Réveil par radio activé 22 AL1 Réveil par sonnerie activé 23 Réception FM 24 Réception AM Avant de commencer Installez l appareil sur une surface plane et stable Ne placez aucun objet lourd dessus Branchez ensuite la fiche du cordon d alimentation 13 sur une prise de courant facile d accès ...

Page 42: ...ois sur la touche OFF ON 2 Lorsque l appareil est allumé le voyant FM 23 ou le voyant AM 24 et la fréquence actuellement syntonisée ainsi que l heure sont affichées sur l écran 10 Pour éteindre l appareil appuyez de nouveau sur la touche OFF ON 2 Une fois qu il est éteint l heure s affiche à l écran 10 Réglage de l heure Vous ne pouvez régler l heure que lorsque l appareil est éteint S il est allu...

Page 43: ...touche 7 ou 8 pour régler les minutes par tranches de 10 minutes Appuyez sur la touche TIME DIMMER 1 pour basculer entre le format 12 heures et le format 24 heures Selon le format choisi 24 ou 12 apparaît à l écran 10 Vous pouvez ensuite utiliser la touche 7 ou 8 pour changer et passer au format 12 heures ou 24 heures Pour distinguer l heure anté méridienne matin de l heure post méridienne après m...

Page 44: ...ntonisée est indiquée à l écran 10 par le biais des voyants FM 23 ou AM 24 Appuyez brièvement sur la touche TUNE BAND 4 puis appuyez plusieurs fois sur la touche 7 ou 8 pour régler la fréquence manuellement Pour rechercher une station de manière automatique maintenez enfoncée la touche 7 ou 8 La fréquence s affiche en MHz pour la bande FM et en kHz pour la bande MW Pour la bande FM toutes les fréq...

Page 45: ... régler les stations manuellement vous pouvez demander à l appareil de les rechercher de manière automatique Procédez comme suit Allumez l appareil en appuyant sur la touche ON OFF 2 Appuyez sur la touche PRESET 6 et maintenez la enfoncée 6 pendant environ 4 secondes La recherche démarre et toutes les stations trouvées sont enregistrées automatiquement Appuyez à nouveau sur la touche PRESET 6 pour...

Page 46: ...t ALARM2 Vous ne pouvez régler le réveil que lorsque l appareil est éteint S il est allumé appuyez d abord sur la touche ON OFF 2 pour l éteindre Maintenez enfoncée la touche ALARM1 3 ou ALARM2 5 jusqu à ce que l indicateur des heures clignote sur l écran 10 Appuyez sur la touche 7 ou 8 pour régler les heures Vous pouvez également maintenir enfoncée la touche 7 ou 8 Appuyez sur la touche ALARM1 3 ...

Page 47: ...ivé pour se déclencher à l heure définie avec la sonnerie Appuyez de nouveau sur la touche ALARM1 3 ou ALARM2 5 Le voyant de réveil par radio AL1 21 ou voyant de réveil par radio AL2 20 s allume à l écran 10 Le réveil est maintenant activé pour se déclencher à l heure définie avec la radio Pour désactiver le réveil appuyez de nouveau sur la touche ALARM1 3 ou ALARM2 5 Lorsque le réveil est désacti...

Page 48: ...20 21 ou 22 clignote Veille automatique La fonction de veille automatique vous permet de configurer l extinction automatique de l appareil au bout d un délai défini Alors que l appareil est allumé ou éteint appuyez sur la touche SNOOZE SLEEP 9 Le nombre 60 apparaît à l écran pour indiquer que l appareil s éteindra automatiquement au bout de 60 minutes Appuyez plusieurs fois sur la touche SNOOZE SL...

Page 49: ...l écran procédez comme suit Appuyez brièvement sur la touche TIME DIMMER 1 pour réduire la luminosité La lettre L LOW bas en français apparaît brièvement à l écran 10 Appuyez de nouveau brièvement sur la touche TIME DIMMER 1 pour que la luminosité de l écran soit atténuée automatiquement en fonction des conditions d éclairage Les conditions d éclairage sont mesurées par le capteur de lumière 11 La...

Page 50: ...s Procédez comme suit Débranchez l appareil du secteur Ouvrez le compartiment des piles 14 situé sur le dessous de l appareil Insérez deux des piles AAA dans le compartiment en respectant la polarité indiquée Notez les icônes et sur les piles et dans le compartiment des piles voir figure Fermez le compartiment des piles Rebranchez l appareil sur le secteur Retirez les piles si vous ne comptez pas ...

Page 51: ...s sur la touche 8 Mauvaise réception radio Sortez entièrement l antenne filaire 12 et réorientez la si cela s avère nécessaire Entretien nettoyage L appareil doit être réparé lorsqu il a été endommagé si par exemple le câble d alimentation la fiche ou la carcasse a été endommagé e si du liquide ou des objets ont pénétré à l intérieur de l appareil s il a été exposé à la pluie ou à l humidité s il ...

Page 52: ... 2002 96 EC Les appareils électriques ou électroniques usagés ne doivent en aucun cas être jetés avec les déchets ménagers mais déposés dans des centres de collecte officiels En respectant les normes d élimination des appareils usagés vous participez activement à la protection de l environnement et préservez votre santé Pour plus d informations sur les normes d élimination en vigueur contactez vot...

Page 53: ... des films et des plastiques inclus dans l emballage d origine adressez vous à l entreprise locale chargée de l élimination des déchets Déclaration de conformité Cet appareil a été testé et certifié conforme aux exigences de base et aux autres règlements en vigueur de la directive sur la compatibilité électromagnétique 2004 108 EC de la directive concernant les appareils basse tension 2006 95 EC d...

Page 54: ...yez la référence de l article et si disponible le numéro de série à portée de main S il est impossible d apporter une solution par téléphone notre assistance téléphonique organisera une intervention technique en fonction de l origine de la panne Pendant la période de garantie si un défaut matériel ou de fabrication est constaté le produit sera soit réparé soit remplacé le choix restant à notre dis...

Page 55: ... Mail service FR targa online com Téléphone 02 700 16 43 E Mail service BE targa online com Téléphone 800 24 14 3 E Mail service LU targa online com Téléphone 044 511 82 91 E Mail service CH targa online com IAN 75536 Fabricant TARGA GmbH Postfach 22 44 D 59482 Soest www targa de ...

Page 56: ...rete 60 Cavo d alimentazione 61 Batterie 61 Bambini 62 Copyright 62 Panoramica 63 Display 65 Prima di iniziare 65 Introduzione 66 Spegnere accendere il dispositivo 66 Impostazione dell ora 66 Sintonizzazione di una stazione 68 Ricerca automatica delle stazioni 69 Selezione di una stazione salvata 69 Impostazione della sveglia 69 Attivazione della sveglia 70 Spegnere la sveglia 71 Timer di autospeg...

Page 57: ...a 78 Introduzione Grazie per aver acquistato un prodotto SilverCrest La radiosveglia SilverCrest SRW 250 A1 è dotata di un orologio digitale con la funzione di sveglia Inoltre consente di ascoltare i programmi radio Leggere attentamente le pagine seguenti per le istruzioni d uso del prodotto Questo simbolo indica istruzioni importanti per operare in sicurezza con il prodotto e per la sicurezza del...

Page 58: ...onare all esterno o in climi tropicali Il produttore non può essere ritenuto responsabile per eventuali danni o problemi causati da modifiche non autorizzate Rispettare le leggi e la normativa in materia vigenti nel paese di utilizzo Attenzione potrebbero esistere norme specifiche per singolo paese riguardo alle bande di frequenza che possono essere ricevute Qualsiasi informazione ottenuta su band...

Page 59: ...Radiosveglia SRW 250 A1 Italiano 57 Contenuto della confezione Radiosveglia SilverCrest SRW 250 A1 Questo manuale dell utente non illustrato ...

Page 60: ...5 mm L x H x P Peso circa 435 g senza batterie Temperatura operativa Da 5 C a 35 C Umidità operativa Max 85 umidità relativa Il consumo elettrico in standby dipende dall impostazione della luminosità del display Queste informazioni descrivono le caratteristiche tecniche del dispositivo La normativa in materia di bande di frequenza destinate al pubblico utilizzo può differire da nazione a nazione A...

Page 61: ...o Ambiente operativo Non utilizzare il dispositivo in ambienti con alte temperature o forti tassi di umidità es stanze da bagno o in ambienti estremamente polverosi Temperatura e umidità operative da 5 C a 35 C max 85 di umidità relativa Accertarsi sempre che l aria possa circolare liberamente intorno al dispositivo non posizionarlo su librerie tappeti letti o in altri posti in cui i fori di venti...

Page 62: ...che variazioni di temperatura in quanto ciò potrebbe provocare la formazione di condensa e conseguenti cortocircuiti il dispositivo non venga esposto a forti vibrazioni o urti Nota relativa al distaccamento dall alimentazione di rete L interruttore ON OFF 2 posto sulla parte superiore del dispositivo non scollega completamente l apparecchio dall alimentazione di rete In modalità standby il disposi...

Page 63: ...zionare il dispositivo mobili o altre apparecchiature sul cavo di alimentazione e accertarsi che esso non venga schiacciato Non annodare mai il cavo né legarlo insieme ad altri cavi Posizionare il cavo d alimentazione in maniera tale da non inciamparci o che esso non costituisca un ostacolo Un cavo di alimentazione danneggiato può causare un incendio o uno shock elettrico Ispezionare periodicament...

Page 64: ...i Le componenti più piccole possono venire ingerite In caso di ingestione accidentale consultare immediatamente un medico Tenere il materiale d imballaggio fuori dalla portata dei bambini Rischio di soffocamento Copyright Tutti i contenuti del presente Manuale per l utente sono coperti da copyright e vengono forniti all utente unicamente a scopo informativo È rigorosamente vietato copiare qualsias...

Page 65: ...Radiosveglia SRW 250 A1 Italiano 63 Panoramica ...

Page 66: ...a e impostare la frequenza 5 ALARM2 per impostare o attivare disattivare la sveglia ALARM2 6 PRESET salva sintonizza la stazione preimpostata ricerca le stazioni 7 abbassa il volume o seleziona un opzione 8 alza il volume o seleziona un opzione 9 SNOOZE SLEEP ritarda la sveglia di circa 6 min attiva il timer di spegnimento 10 Display 11 Sensore della luce 12 Antenna a filo 13 Cavo d alimentazione ...

Page 67: ...ono di sveglia 20 AL2 orario di sveglia attivato con la radio 21 AL1 orario di sveglia attivato con la radio 22 AL1 orario di sveglia attivato con il suono di sveglia 23 Ricezione FM 24 Ricezione AM Prima di iniziare Posizionare l apparecchiatura su una superficie piana e stabile e non collocare oggetti pesanti sopra di essa Collegare la spina del cavo d alimentazione 13 a una presa facilmente acc...

Page 68: ...sitivo premere OFF ON 2 Una volta accesa l apparecchiatura il LED FM 23 o quello AM 24 si illumineranno e sul display 10 apparirà per pochi secondi la frequenza in uso e poi l orario Per spegnere il dispositivo premere nuovamente OFF ON 2 Quando si spegne il dispositivo sul display 10 appare l ora Impostazione dell ora L ora può essere impostata solo a dispositivo spento Nel caso in cui l apparecc...

Page 69: ...7 o 8 per impostare i minuti procedendo di 10 min alla volta Premere TIME DIMMER 1 per spostarsi fra le modalità 12 e 24 ore Sul display 10 apparirà 12 o 24 È possibile anche utilizzare i pulsanti 7 o 8 per spostarsi fra queste due modalità Nella modalità 12 ore per distinguere fra mattino e pomeriggio sul display apparirà PM 17 Attendere fino a quando sul display 10 non appare l ora impostata o p...

Page 70: ...sintonizzare manualmente la frequenza Per la ricerca automatica di una stazione tenere premuti i pulsanti 7 o 8 La frequenza appare in MHz FM e in KHz AM Per le FM tutte le frequenze con 0 05 MHz appaiono per mezzo del LED 0 05 18 Se necessario per migliorare la ricezione spostare l antenna in una posizione diversa o cambiare posto al dispositivo È possibile salvare una stazione tenendo premuto il...

Page 71: ...o in cui venisse rilevato un numero superiore di stazioni verranno salvate solo le prime 20 Selezione di una stazione salvata Per selezionare una stazione da quelle memorizzate è necessario accendere il dispositivo Nel caso in cui l apparecchio fosse spento accenderlo premendo il pulsante ON OFF 2 Premere brevemente il pulsante PRESET 6 Verrà mostrata la stazione memorizzata selezionata da P01 a P...

Page 72: ...uto 7 o 8 per impostare i minuti procedendo di 10 min alla volta Attendere fino a quando il display 10 non smette di lampeggiare o premere brevemente ALARM1 3 o ALARM2 5 Attenzione L ora della sveglia può essere impostata solo mentre le cifre sul display lampeggiano In assenza di comandi per qualche secondo le cifre sul display 10 smetteranno di lampeggiare e sarà necessario ripetere la procedura ...

Page 73: ...dalità radiosveglia il dispositivo si accende all ora impostata sintonizzandosi sull ultima frequenza e l ultima banda di frequenza utilizzate e all ultimo volume impostato Spegnere la sveglia Quando si attiva la sveglia è possibile disattivarla nel seguente modo Premere ON OFF 2 per interrompere la sveglia La sveglia viene spenta fino al giorno successivo o Premere SNOOZE SLEEP 9 per posticipare ...

Page 74: ...lte per diminuire questo valore Il ritardo nello spegnimento diminuirà di 10 minuti a ogni pressione del pulsante Quando sul display appare OFF il timer di spegnimento viene disabilitato e il dispositivo rimarrà acceso Premere nuovamente SNOOZE SLEEP 9 per ricominciare l operazione Mentre è attivo il conto alla rovescia per lo spegnimento in qualsiasi momento è possibile spegnere il dispositivo pr...

Page 75: ...evemente L Basso Premere nuovamente TIME DIMMER 1 per regolare la luminosità del display automaticamente in base all illuminazione dell ambiente Le condizioni di luce vengono misurate dal sensore relativo Sul display 10 apparirà brevemente A Automatico Premere ancora una volta TIME DIMMER 1 per riportare al massimo la luminosità Sul display 10 apparirà brevemente H Alto Premendo ancora una volta T...

Page 76: ...l seguente modo Scollegare il dispositivo dall alimentazione di rete Aprire l alloggiamento delle batterie 14 sul fondo del dispositivo Inserire due batterie AAA nello scompartimento assicurandosi che la polarità sia corretta Fare attenzione ai simboli e situati sulle batterie e nel relativo alloggiamento vedere illustrazione Chiudere il coperchio Ricollegare il dispositivo all alimentazione di re...

Page 77: ...e il volume con il pulsante 8 Ricezione radio debole Srotolare completamente l antenna a filo 12 e se necessario cambiare posizione Manutenzione Pulizia È necessario rivolgersi all assistenza nel caso in cui il dispositivo abbia subito dei danni come per esempio quando la spina il cavo d alimentazione o il case siano danneggiati quando liquidi od oggetti siano penetrati nel dispositivo quando il p...

Page 78: ...spositivi contrassegnati da questo simbolo sono soggetti alla Direttiva europea 2002 96 EC Tutti i dispositivi elettrici ed elettronici devono essere smaltiti separatamente dai rifiuti domestici presso gli enti prestabiliti Uno smaltimento adeguato dei dispositivi usati evita danni all ambiente e alla salute Per ulteriori informazioni su uno smaltimento appropriato contattare i locali enti di smal...

Page 79: ...plastici della confezione originale possono essere smaltiti in maniera eco compatibile con l aiuto dell ente di raccolta rifiuti Dichiarazione di conformità Questo dispositivo è conforme ai requisiti di base e ad altri relativi della direttiva CEM 2004 108 EC della direttiva sulla bassa tensione 2006 95 EC della direttiva RoHS II 2011 65 EU e della direttiva ErP 2009 125 EC La dichiarazione di con...

Page 80: ...codice articolo o il numero di serie se esistente Nel caso in cui non sia possibile trovare una soluzione per via telefonica tramite la nostra assistenza clienti viene contattata una seconda assistenza in base alla causa del difetto Grazie alla garanzia se dovessero essere riscontrati difetti di materiale o di fabbricazione il prodotto sarà a nostra discrezione riparato o sostituito gratuitamente ...

Page 81: ...a Telefono 02 69 68 28 59 E Mail service IT targa online com Telefono 044 511 82 91 E Mail service CH targa online com Telefono 800 62 175 E Mail service MT targa online com IAN 75536 Produttore TARGA GmbH Postfach 22 44 D 59482 Soest www targa de ...

Page 82: ...peling van het elektriciteitsnet 86 Netsnoer 87 Batterijen 87 Kinderen 88 Copyright 88 Overzicht 89 Scherm 91 Voordat u start 91 Aan de slag 92 Het apparaat in en uitschakelen 92 De tijd instellen 92 Afstemmen op een zender 94 Automatisch naar zenders zoeken 95 Een opgeslagen zenden selecteren 95 De wekker instellen 96 De wekker inschakelen 97 Slaapstand 97 De slaaptimer 98 Schermhelderheid 99 ...

Page 83: ...dankt dat u hebt gekozen voor een product van SilverCrest De wekkerradio SilverCrest SRW 250 A1 bevat een digitale klok met wekkerfunctie Verder kunt u ermee luisteren naar radio uitzendingen Raadpleeg de volgende pagina s voor instructies over het gebruik van het product Dit symbool staat bij belangrijke instructies voor een veilig gebruik van het product en de bescherming van de gebruiker Dit sy...

Page 84: ...ropische klimaten worden gebruikt De fabrikant is niet aansprakelijk voor schade of storing die wordt veroorzaakt door ongeoorloofde wijzigingen Zorg dat u de wetten en regelgeving in het land van gebruik naleeft Houd er rekening mee dat in sommige landen specifieke voorschriften kunnen gelden met betrekking tot de frequentiebanden die kunnen worden ontvangen Informatie die wordt ontvangen van fre...

Page 85: ...Wekkerradio SRW 250 A1 Nederlands 83 Inhoud van de verpakking Wekkerradio SilverCrest SRW 250 A1 Deze gebruikershandleiding niet weergegeven ...

Page 86: ...B x H x D Gewicht Circa 435 gram zonder batterijen Gebruikstemperatuur 5 C tot en met 35 C Luchtvochtigheid tijdens gebruik Max 85 rel luchtvochtigheid Het stand byverbruik is afhankelijk van de ingestelde helderheid van het display Deze informatie beschrijft de technische kenmerken van het apparaat In verschillende landen kunnen afwijkende landelijke voorschriften gelden met betrekking tot freque...

Page 87: ...raat is niet ontworpen voor gebruik in omgevingen met een hoge temperatuur of luchtvochtigheid zoals een badkamer en moet stofvrij worden gehouden Gebruikstemperatuur en vochtigheid 5 C tot 35 C max 85 relatieve luchtvochtigheid Tref altijd de volgende voorzorgsmaatregelen Zorg voor voldoende ventilatie plaats het apparaat niet op een plank op een vloerkleed op een bed of op een plaats waar de ven...

Page 88: ...lingen aangezien dit kan leiden tot vocht door condensvorming en kortsluiting Stel het apparaat niet bloot aan hevige schokken of trillingen Opmerking over loskoppeling van het elektriciteitsnet De ON OFF schakelaar 2 op de bovenkant van het apparaat koppelt het apparaat niet volledig los van het elektriciteitsnet Bovendien verbruikt het apparaat stroom als dit stand by staat Als u het apparaat vo...

Page 89: ...t op het netsnoer en zorg dat het snoer niet klem komt te zitten Leg nooit een knoop in het netsnoer en bind dit niet samen met andere kabels Leg het netsnoer zo neer dat niemand erover kan struikelen of erdoor wordt gehinderd Een beschadigd netsnoer kan brand of een elektrische schok veroorzaken Controleer het netsnoer regelmatig Neem in geval van schade voor vervanging contact op met het dichtst...

Page 90: ...aar Als een batterij wordt ingeslikt dient u direct een arts te raadplegen Houd de verpakkingsmaterialen buiten het bereik van kinderen Verstikkingsgevaar Copyright De volledige inhoud van deze gebruikershandleiding wordt beschermd door het auteursrecht en wordt uitsluitend ter informatie aan de lezer aangeboden Het is strikt verboden om gegevens en informatie te kopiëren zonder voorafgaande uitdr...

Page 91: ...Wekkerradio SRW 250 A1 Nederlands 89 Overzicht ...

Page 92: ... selecteren de frequentie instellen 5 ALARM2 ALARM2 in of uitschakelen 6 PRESET voorkeurzender opslaan starten zender zoeken 7 het geluidsvolume verlagen of een optie selecteren 8 het geluidsvolume verhogen of een optie selecteren 9 SNOOZE SLEEP het wekgeluid ongeveer 6 minuten uitstellen de slaaptimer inschakelen 10 Scherm 11 Lichtsensor 12 Draadantenne 13 Netsnoer 14 Batterijvak 15 Luidspreker ...

Page 93: ...ekgeluid 20 AL2 Wektijd ingeschakeld met radio 21 AL1 Wektijd ingeschakeld met radio 22 AL1 Wektijd ingeschakeld met wekgeluid 23 FM ontvangst 24 AM ontvangst Voordat u start Plaats het apparaat op een stabiele vlakke ondergrond en plaats geen zware voorwerpen op het apparaat Steek vervolgens de stekker van het netsnoer 13 in een gemakkelijk toegankelijk stopcontact ...

Page 94: ...chakeld brandt de FM led 23 of de AM led 24 en wordt op het apparaat een paar seconden lang de huidige frequentie weergegeven Daarna verschijnt de klok op het display 10 Druk nogmaals op de OFF ON knop 2 om het apparaat uit te schakelen Wanneer het apparaat is uitgeschakeld wordt de huidige tijd weergegeven op het display 10 De tijd instellen De tijd kan alleen worden ingesteld wanneer het apparaa...

Page 95: ...e stellen in stappen van tien minuten Druk op de knop TIME DIMMER 1 om te schakelen tussen de12 of 24 uurs tijdweergave Afhankelijk van uw keuze wordt 24 of 12 weergegeven op het display 10 Vervolgens kunt u met de knop 7 of 8 tussen de 12 en 24 uurs weergave wisselen Om bij de 12 uurs weergave onderscheid te maken tussen tijden voor en na 12 uur s middags brandt het PM led 17 op het display Wacht...

Page 96: ...olgens meerdere malen kort op de knop 7 of 8 om handmatig af te stemmen op de frequentie Als u automatisch wilt zoeken naar een zender houdt u de knop 7 of 8 ingedrukt De frequentie wordt weergegeven in MHz voor FM of kHz voor MW Voor FM worden alle frequenties met 0 05 MHz weergegeven met de 0 05 led 18 Wijzig zo nodig de positie van de draadantenne of verplaats het apparaat voor een optimale ont...

Page 97: ...rden automatisch opgeslagen Druk nogmaals op de knop PRESET 6 als u het zoeken wilt annuleren Denk eraan dat u maximaal 20 zenders kunt opslaan Als er meer dan 20 zenders worden gevonden worden alleen de eerste 20 opgeslagen Een opgeslagen zenden selecteren Het apparaat moet zijn ingeschakeld om een voorkeurzender te kunnen selecteren Als het apparaat uitstaat drukt u op de ON OFF knop 2 om het ap...

Page 98: ...8 om de uren in te stellen U kunt de knop 7 of 8 ook ingedrukt houden Druk nogmaals kort op de knop ALARM1 3 of ALARM2 5 om de minuten in te stellen De minutenaanduiding knippert op het display 10 Druk op de knop 7 of 8 om de minuten in te stellen U kunt de knop 7 of 8 ook ingedrukt houden om de minuten in te stellen in stappen van tien minuten Wacht tot de aanduiding op het display 10 stopt met k...

Page 99: ...io Druk nogmaals kort op de knop ALARM1 3 of ALARM2 5 als u de wekker wilt uitschakelen Als de wekker is uitgeschakeld branden de AL1 wekgeluidled 22 de AL1 radioled 21 de AL2 wekgeluidled 19 en de AL2 radioled 20 niet Bij de radiowekker wordt het apparaat ingeschakeld op de ingestelde wektijd en afgestemd op de laatst ingestelde frequentie en frequentieband met het laatst ingestelde volume Slaaps...

Page 100: ...dt uitgeschakeld Druk meerdere malen op de knop SNOOZE SLEEP 9 als u de uitschakeltijd wilt verkorten Telkens wanneer u op de knop drukt wordt de tijd met tien minuten verkort Als OFF wordt weergegeven op het display 10 wordt de slaaptimer uitgeschakeld en blijft het apparaat dus ingeschakeld U kunt nogmaals op de knop SNOOZE SLEEP 9 drukken om de uitschakeltijd opnieuw in te stellen Terwijl de sl...

Page 101: ...DIMMER 1 zodat de helderheid van het display automatisch wordt gedimd op basis van het omgevingslicht De lichtcondities worden gemeten met de lichtsensor 11 A AUTOMATIC wordt kort weergegeven op het display 10 Druk nogmaals kort op de knop TIME DIMMER 1 om de schermhelderheid weer op maximaal in te stellen H HIGH wordt kort weergegeven op het display 10 Als u nogmaals op de knop TIME DIMMER 1 druk...

Page 102: ...niet meegeleverd Ga hiervoor als volgt te werk Koppel het apparaat los van het lichtnet Open het batterijvak 14 aan de onderkant van het apparaat Plaats twee AAA batterijen in het batterijvak waarbij u let op de juiste polariteit Let op de plus en mintekens op de batterijen en in het batterijvak zie de afbeelding Sluit het batterijvak Sluit het apparaat weer aan op het lichtnet Verwijder de batter...

Page 103: ... ingeschakeld en verhoogt u zo nodig het volume door meerdere malen op de knop 8 te drukken Slechte radio ontvangst Trek de draadantenne 12 helemaal uit en richt de draadantenne 12 zo nodig opnieuw Onderhoud reiniging Onderhoud is vereist als het apparaat op welke wijze dan ook is beschadigd bijvoorbeeld als de stekker het netsnoer of de behuizing is beschadigd als er objecten of vloeistoffen in h...

Page 104: ...obeer de behuizing van het apparaat niet te openen omdat anders de garantie komt te vervallen Milieuregelgeving en informatie over afvalverwerking Apparaten met dit symbool zijn onderworpen aan de Europese richtlijn 2002 96 EC Alle elektrische en elektronische apparaten moeten worden gescheiden van huishoudelijk afval en bij een officiële afvalverwerkingsinstantie worden ingeleverd Door oude appar...

Page 105: ...ijke manier Dozen kunnen worden gerecycled via de inzameling van oud papier of worden ingeleverd bij een openbaar inzamelpunt Folie of plastic in de originele verpakking kunt milieuvriendelijk afvoeren via een lokaal verzamelpunt Verklaring van conformiteit Dit apparaat voldoet aan de basis en andere relevante vereisten van de EMC richtlijn 2004 108 EC de laagspanningsrichtlijn 2006 95 EC de RoHS ...

Page 106: ...kelnummer of indien beschikbaar het serienummer bij de hand In het geval dat een oplossing per telefoon niet mogelijk is zal onze hotline er afhankelijk van de oorzaak van het probleem voor zorgen dat het probleem op andere wijze wordt opgelost Binnen de garantie wordt het product bij materiaal of fabricagefouten naar ons goeddunken gratis gerepareerd of vervangen Met de reparatie of vervanging va...

Page 107: ...e Telefoon 020 201 39 89 E Mail service NL targa online com Telefoon 02 700 16 43 E Mail service BE targa online com Telefoon 800 24 14 3 E Mail service LU targa online com IAN 75536 Fabrikant TARGA GmbH Postfach 22 44 D 59482 Soest www targa de ...

Page 108: ...mains disconnection 112 Power cable 113 Batteries 113 Children 114 Copyright 114 Overview 115 Display 117 Before you start 117 Getting started 118 Switching the Device On Off 118 Setting the Time 118 Tuning to a Station 120 Automatic Station Search 121 Selecting a Saved Station 121 Setting the Alarm 122 Enabling the Alarm 123 Switching the alarm off 124 Sleep Timer 124 Display Brightness 125 ...

Page 109: ...ntroduction Thank you for choosing a SilverCrest product The SilverCrest SRW 250 A1 Alarm Clock Radio features a digital clock with an alarm clock function It also allows you to listen to radio programmes Please read the following pages for instructions on how to use your product This symbol indicates important instructions for the safe operation of the device and the protection of the user This s...

Page 110: ...ice may not be used outdoors or in tropical climates The manufacturer is not liable for any damage or problems caused by unauthorised modifications Please observe the regulations and laws in the country of use Please note that country specific regulations may exist with respect to the frequency bands that can be received Any information received from frequency bands outside those that are explicit...

Page 111: ...SRW 250 A1 Alarm Clock Radio English 109 Package contents SilverCrest SRW 250 A1 Alarm Clock Radio This User Manual not shown ...

Page 112: ...x 92 x 85 mm W x H x D Weight approx 435 g without batteries Operating temperature 5 C to 35 C Operating humidity max 85 rel humidity The standby power consumption depends on the display brightness set This information describes the technical characteristics of your device Different national regulations may apply in different countries with respect to the frequency bands that are free for public u...

Page 113: ... or humidity e g bathrooms or those with above average levels of dust Operating temperature and operating humidity 5 C to 35 C max 85 RH Always make sure that there is free circulation of air do not place the device on shelves on a carpet on a bed or anywhere that obstructs the ventilation slots and leave at least 10 cm clearance on all sides no direct heat sources e g radiators can affect the dev...

Page 114: ...ed on the top of the device does not fully disconnect the device from the mains The device still consumes electricity in standby mode Disconnecting the device completely involves removing the power plug from the wall outlet For this reason the device should be positioned such as to enable unobstructed access to the wall outlet so that the power plug can be pulled out immediately in an emergency To...

Page 115: ...d be positioned so that nobody can trip over it or be obstructed by it A damaged power cord can cause a fire or electric shock Check the power cord from time to time If it is damaged contact the nearest authorised service centre or your dealer for a replacement Batteries Insert the batteries with the correct polarity Refer to the diagram inside the battery compartment Do not attempt to recharge th...

Page 116: ...wed seek medical help immediately Keep the packaging materials out of the reach of children There is a risk of suffocation Copyright All the contents of this user manual are protected by copyright and provided to the reader for information only Copying data and information without the prior explicit written consent of the author is strictly forbidden This also applies to any commercial use of the ...

Page 117: ...SRW 250 A1 Alarm Clock Radio English 115 Overview ...

Page 118: ...equency band to set the frequency 5 ALARM2 to set or enable disable ALARM2 6 PRESET save load preset station scan for stations 7 Reduce volume or select an option 8 Increase audio volume or select an option 9 SNOOZE SLEEP delay the alarm for approx 6 minutes enable the sleep timer 10 Display 11 Light sensor 12 Wire antenna 13 Power cable 14 Battery compartment 15 Speaker ...

Page 119: ...ed with alarm sound 20 AL2 Alarm time enabled with radio 21 AL1 Alarm time enabled with radio 22 AL1 Alarm time enabled with alarm sound 23 FM reception 24 AM reception Before you start Position the device on a stable flat surface and do not place any heavy objects on the device Next connect the power plug of the power cord 13 to an easily accessible wall outlet ...

Page 120: ...ess the OFF ON button 2 When switched on the FM LED 23 or the AM LED 24 lights up and the device shows the current frequency for a few seconds and then the time on the display 10 To power the device off press the OFF ON button 2 again When powered off the current time is shown on the display 10 Setting the Time The time can only be set while the device is powered off If it is still powered on pres...

Page 121: ...so press and hold the 7 or 8 button to set the minutes in 10 minute steps Press the TIME DIMMER button 1 to toggle between 12 and 24 hour mode 24 or 12 is shown on the display 10 You can then the 7 or 8 button to change between 12 and 24 hour time mode To distinguish between morning and afternoon time in 12 hour mode there is a PM LED 17 on the display Wait until the display 10 shows the set time ...

Page 122: ...n briefly press the 7 or 8 button a few times to tune the frequency manually To search for a station automatically press and hold the 7 or 8 button The frequency displays in MHz for FM and in kHz for AM For FM any frequencies with 0 05 MHz are shown by means of the 0 05 LED 18 If required move the wire antenna into a different position or move the device to improve reception You can save a station...

Page 123: ...y stations found are saved automatically Press the PRESET button 6 again to cancel the search Please note that a maximum of 20 stations can be saved If more than 20 stations are found only the first 20 are saved Selecting a Saved Station To select a station from a preset the device has to be powered on If it is powered off press the ON OFF button 2 to power the device on Press the PRESET button 6 ...

Page 124: ...r 8 button to set the hour You can also press and hold the 7 or 8 button Press the ALARM1 3 or the ALARM2 5 button quickly again to set the minutes The minutes flash on the display 10 Press the 7 or 8 button to set the minutes You can also press and hold the 7 or 8 button to set the minutes in 10 minute steps Wait until the display 10 stops flashing or quickly press the ALARM1 3 or the ALARM2 5 bu...

Page 125: ...d Press the ALARM1 3 or the ALARM2 5 button again quickly The AL1 alarm radio LED 21 or the AL2 radio 20 lights up on the display 10 The alarm is now enabled for the set time and with the radio To disable the alarm press the ALARM1 3 or the ALARM2 5 button again While the alarm is disabled the AL1 alarm sound LED 22 the AL1 radio LED 21 the AL2 alarm sound LED 19 and the AL2 radio LED 20 are off I...

Page 126: ...ill flash Sleep Timer The sleep timer powers the device off automatically after a set time While the device is powered on or off press the SNOOZE SLEEP button 9 The number 60 appears on the display to indicate that the device will power off automatically after 60 minutes Press the SNOOZE SLEEP button 9 multiple times to decrease the countdown time shown Each press of the button reduces the time by...

Page 127: ... follows Press the TIME DIMMER button 1 quickly to dim the display L LOW is shown briefly on the display 10 Quickly press the TIME DIMMER button 1 again to dim the display brightness automatically as a function of the ambient lighting The lightning conditions are measured by the light sensor 11 A AUTOMATIC is briefly shown on the display 10 Briefly press the TIME DIMMER button 1 once again to set ...

Page 128: ...ied Proceed as follows Disconnect the device from the mains Open the battery compartment 14 on the bottom of the device Insert two AAA batteries into the battery compartment making sure the polarity is correct Note the and icons on the batteries and inside the battery compartment see diagram Close the battery compartment Reconnect the device to the mains Remove the batteries when the device is not...

Page 129: ...he button 8 several times Poor radio reception Extend the wire aerial 12 fully and change its position if necessary Maintenance Cleaning The device must be serviced if it has been damaged in any way for example if the power plug power cord or housing is damaged if liquid or objects have penetrated the device if the product has been exposed to rain or moisture if the product does not work normally ...

Page 130: ...ctronic devices must be disposed of separately from household waste at official disposal centres Proper disposal of old devices prevents damage to the environment or your health For further information about proper disposal contact your local council recycling centre or the shop where you bought the device Respect the environment Old batteries do not belong in with household waste They must be han...

Page 131: ...any in an environmentally friendly way Declaration of conformity This device complies with the basic and other relevant requirements of the EMC Directive 2004 108 EC the Low voltage Directive 2006 95 EC the RoHS II Directive 2011 65 EU and the ErP Directive 2009 125 EC The corresponding Declaration of Conformity can be found at the end of this User Manual ...

Page 132: ...our hotline Please have the article number and if available the serial number to hand for all enquiries If it is not possible to solve the problem on the phone our hotline support staff will initiate further servicing procedures depending on the fault Within the warranty period the product will be repaired or replaced free of charge as we deem appropriate No new warranty period commences if the pr...

Page 133: ...4 E Mail service GB targa online com Phone 01 242 15 83 E Mail service IE targa online com Phone 800 62 175 E Mail service MT targa online com Phone 800 92 496 E Mail service CY targa online com IAN 75536 Manufacturer TARGA GmbH Postfach 22 44 D 59482 Soest www targa de ...

Page 134: ......

Reviews: