background image

SilverCrest SDR 1.5 A1 

English - 13 

8. Before you start 

You can power the device either using the batteries (B) supplied or with a USB 

power adapter. The USB power adapter is not included in the package. 

8.1 Inserting the batteries 

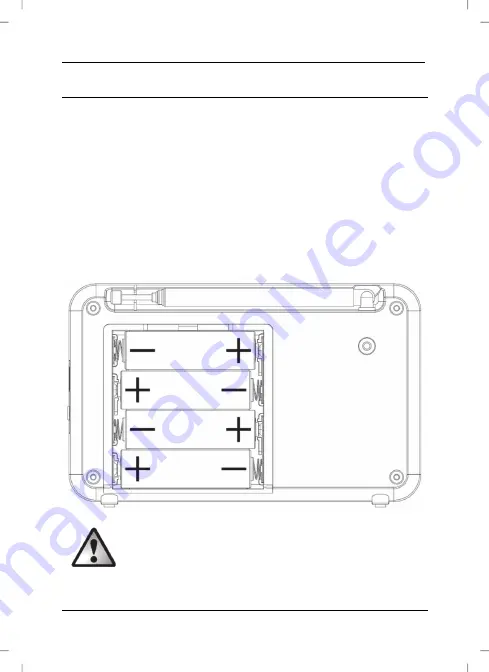
Open the battery compartment cover (15) on the back panel of the device by 

sliding it towards the bottom in the direction shown by the arrow and remove it. 

Insert the batteries with the correct polarity (+ and -), as shown in the following 

figure. The correct polarity is labelled on the batteries and inside the battery 

compartment. Re-insert the cover of the battery compartment (15) and slide it 

upwards until it locks into place. 


CAUTION!

 Remove the batteries when the device is not to be 

used for an extended period. The batteries could leak and 

damage the device. 

Summary of Contents for SDR 1.5 A1

Page 1: ......

Page 2: ......

Page 3: ...V 1 5 English 2 Deutsch 33 ...

Page 4: ...e batteries 13 8 2 Using the power adapter 14 9 Commissioning and operation 14 9 1 Setting up the telescopic aerial 12 14 9 2 Switching the digital radio on and off 14 9 3 Adjusting the volume 15 9 4 Selecting the station 15 9 5 Adjusting the display 15 9 6 Sleep timer 16 9 7 Automatic station scan 16 9 8 Storing presets 16 9 9 Selecting DAB FM radio 17 9 10 DAB Radio 17 9 10 1 Recalling a saved s...

Page 5: ...2 Setting the date and time 22 9 12 3 Automatic time synchronisation 24 9 12 4 Setting the clock format 24 9 12 5 Setting the date format 25 9 12 6 Setting the display brightness 25 9 12 7 Automatic display power off 25 9 12 8 Selecting the language 26 9 12 9 Factory reset 26 9 12 10 SW version 27 9 13 Connecting headphones 27 9 14 Storage when not in use 27 10 Troubleshooting 28 11 Environmental ...

Page 6: ...ms part of this product 1 Intended use This device is a consumer electronics device It has been designed to receive and play back analogue and digital radio stations The device can also be used as a clock and as an alarm clock It is suitable only for private use not for industrial or commercial purposes The device may also not be used in tropical climates The manufacturer is not liable for any dam...

Page 7: ...packaging Remove all packaging material and check that all parts are complete and undamaged If you find anything missing or damaged please contact the manufacturer A SilverCrest SDR 1 5 A1 digital radio B AA batteries x4 C USB cable Mini USB to USB Type A D These operating instructions line art illustration ...

Page 8: ...ies approx 200 g Operating temperature 5 C to 35 C Storage temperature 10 C to 45 C Operating humidity max 85 rel humidity The technical data and design may be changed without prior notice 4 Safety instructions Before you use this device for the first time please read the following notes and heed all warnings even if you are familiar with handling electronic devices Keep this manual in a safe plac...

Page 9: ...ol indicates important instructions to protect against damage to property WARNING This icon warns you about possible damage to the user s hearing Note the user manual This symbol denotes further information on the topic Direct current DANGER Personal safety This appliance may be used by children older than 8 years as well as by persons with physical sensory or mental impairments or persons without...

Page 10: ...new or carbon and alkaline etc Remove the batteries when the device is not to be used for an extended period Improper use could cause explosions or leaks Batteries must never be opened or deformed as this could result in chemicals leaking out which could cause injuries If the batteries have leaked remove them to prevent damage to the device You can wipe off any leaked battery fluid by using a dry ...

Page 11: ...ed by them ATTENTION Repairs Repairs are required if this device has been damaged in any way for example if the device housing is damaged if liquids or objects have penetrated the device or if the product has been exposed to rain or moisture Repairs are also necessary if the device is not working properly or has been dropped If you notice any smoke unusual noises or strange smells disconnect the d...

Page 12: ...device no direct sunlight or bright artificial light reaches the device contact with water spray and drops and aggressive fluids is avoided and the device is never operated near water Also the device must never be submerged and do not place any items containing liquids such as drinks vases etc on or near the device never place the device in the immediate vicinity of magnetic fields e g loud speake...

Page 13: ...n driving or riding a bike working with machines or other situations which require your full attention The sound may distract your attention or prevent you from being aware of what is happening around you 5 Copyright All the contents of this User Manual are protected by copyright and provided to the reader for information only Copying data and information without the prior explicit written consent...

Page 14: ...Fold out the cover so you can refer to the relevant controls at any time 1 Speaker 2 INFO MENU button 3 Display 4 VOL button 5 Switch on off set sleep time 6 I button 7 I button 8 OK AMS button 9 DAB FM button 10 VOL button 11 FAV SEARCH button 12 Telescopic antenna 13 Micro USB connection 14 headphone jack 15 Battery compartment ...

Page 15: ... device by sliding it towards the bottom in the direction shown by the arrow and remove it Insert the batteries with the correct polarity and as shown in the following figure The correct polarity is labelled on the batteries and inside the battery compartment Re insert the cover of the battery compartment 15 and slide it upwards until it locks into place CAUTION Remove the batteries when the devic...

Page 16: ...ng up the telescopic aerial 12 To guarantee optimum radio reception extend the telescopic aerial 12 to its full length The telescopic aerial 12 can be rotated This lets you optimise the radio reception 9 2 Switching the digital radio on and off Switch the digital radio on by pressing and holding the button 5 for approx 3 seconds When the time and date are shown on the display 3 you can switch the ...

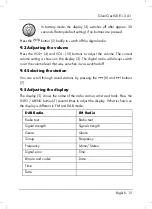
Page 17: ...always switch on at the volume level that was set when it was switched off 9 4 Selecting the station You can scroll through saved stations by pressing the I 6 and I buttons 7 9 5 Adjusting the display The display 3 shows the name of the radio station artist and track Press the INFO MENU button 2 several times to adjust the display What is shown on the display is different in FM and DAB mode DAB Ra...

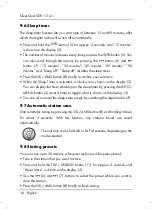
Page 18: ...3 You can display the time remaining on the sleep timer by pressing the INFO MENU button 2 several times to toggle what is shown on the display 3 You can also cancel the sleep timer simply by switching the digital radio off 9 7 Automatic station scan Start automatic tuning by pressing the OK AMS button 8 and holding it down for about 2 seconds With this function any stations found are saved automa...

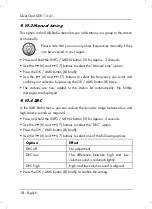
Page 19: ...EARCH button 11 briefly Use the I 6 and I 7 buttons to select the station you want Press the OK AMS button 8 briefly to display the selected station 9 10 2 Complete scan In the DAB Radio menu on the digital radio you can start a station scan and configure various settings Proceed as follows to start a complete station scan Press and hold the INFO MENU button 2 for approx 2 seconds Use the I 6 and ...

Page 20: ...lection by pressing the OK AMS button 8 twice The stations are now added to the station list automatically No further messages are displayed 9 10 4 DRC In the DAB Radio menu you can reduce the dynamic range between low and high volume sounds as required Press and hold the INFO MENU button 2 for approx 2 seconds Use the I 6 and I 7 buttons to select the DRC option Press the OK AMS button 8 briefly ...

Page 21: ...ing the OK AMS button 8 briefly 9 11 FM radio The following options are available in FM Radio mode 9 11 1 Scan setting This option in the FM Radio menu lets you choose if the device scans for strong stations only or also for weak stations Press and hold the INFO MENU button 2 for approx 2 seconds Use the I 6 and I 7 buttons to select the Scan setting option Press the OK AMS button 8 briefly Use th...

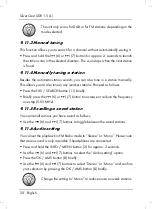
Page 22: ...e FAV SEARCH button 11 briefly Briefly press the I 6 or I 7 button to increase or reduce the frequency one step 0 05 MHz 9 11 5 Recalling a saved station You can recall stations you have saved as follows Use the I 6 and I 7 buttons to toggle between the saved stations 9 11 6 Audio setting You can set the playback in FM Radio mode to Stereo or Mono Please note that stereo sound is only available if...

Page 23: ...Press the OK AMS button 8 briefly Use the I 6 and I 7 buttons to select the Alarm 1 or Alarm 2 option Press the OK AMS button 8 briefly The hour display flashes and you can now use the I 6 and I 7 buttons to set the hour of your alarm time You can keep the buttons pressed to accelerate the digits count Press the OK AMS button 8 briefly to apply the setting The minute display flashes and you can no...

Page 24: ... Press the OK AMS button 8 briefly to confirm You can now use the I 6 and I 7 buttons to set your alarm volume Press the OK AMS button 8 briefly to apply the setting Finally you can enable or disable the alarm To do this use the I 6 and I 7 buttons to select the Alarm on or Alarm off option Press the OK AMS button 8 briefly to confirm your selection If the alarm is enabled there is a bell icon wit...

Page 25: ... buttons to set the minutes You can keep the buttons pressed to accelerate the digits count Press the OK AMS button 8 briefly to apply the setting The day display flashes and you can now use the I 6 and I 7 buttons to set the day You can keep the buttons pressed to accelerate the digits count Press the OK AMS button 8 briefly to apply the setting The month display flashes and you can now use the I...

Page 26: ...on 8 briefly to confirm your selection The station selected must support automatic time synchronisation in order for this function to work 9 12 4 Setting the clock format Upon factory delivery the time format is set to 24 hours To set the date format proceed as follows Press and hold the INFO MENU button 2 for approx 2 seconds In the System menu use the I 6 and I 7 buttons to select the Time optio...

Page 27: ...ed as follows Press and hold the INFO MENU button 2 for approx 2 seconds In the System menu use the I 6 and I 7 buttons to select the Backlight option Press the OK AMS button 8 briefly Use the I 6 and I buttons 7 to select High Medium Low or Off and confirm your selection by pressing the OK AMS button 8 briefly 9 12 7 Automatic display power off You can switch the automatic power off of the displa...

Page 28: ...ant and confirm your selection by pressing the OK AMS button 8 briefly The following languages are available English German Italian French Dutch Spanish Swedish Polish Portuguese Czech Slovenian and Slovakian 9 12 9 Factory reset This option allows you to restore the factory settings for your digital radio Please note that all custom settings and saved stations will be lost Press and hold the INFO...

Page 29: ...installed is displayed 9 13 Connecting headphones Be careful when using headphones Listening at a high volume can damage your hearing You can connect headphones not supplied with a 3 5 mm jack connector to the headphone jack 14 The loudspeaker 1 is switched off if headphones are connected 9 14 Storage when not in use If you will not be using the digital radio for a long period of time remove any b...

Page 30: ...rrectly inserted into the mains socket The USB cable C must also be connected to your USB power adapter and the digital radio No radio reception poor radio reception Pull the telescopic aerial 12 all the way out and make sure it is orientated correctly Tune in the station correctly If necessary start a new station search Device switched on but no sound Check the volume setting While headphones are...

Page 31: ... personal health For further information about proper disposal contact your local government disposal bodies or the shop where you bought the device Disposal of packaging Dispose of all packaging in an environmentally friendly manner Cardboard packaging can be taken to paper recycling centres or public collection points for recycling Any film or plastic contained in the packaging should be taken t...

Page 32: ...f not fully discharged batteries with insulating tape Environmental damage through incorrect disposal of batteries Do not dispose of any batteries with domestic waste They can contain toxic heavy metals and must be handled as specialist waste The chemical symbols of the heavy metals are as follows Cd Cadmium Hg Mercury Pb Lead Always take spent batteries to a local collection point 12 Conformity n...

Page 33: ...e Please have the article number and if available the serial number to hand for all enquiries If it is not possible to solve the problem on the phone our hotline support staff will initiate further servicing procedures depending on the fault Within the warranty period the product will be repaired or replaced free of charge as we deem appropriate No new warranty period commences if the product is r...

Page 34: ...e Phone 0800 404 7657 E Mail targa lidl co uk Phone 1890 930 034 E Mail targa lidl ie Phone 800 62230 E Mail targa lidl com mt Phone 8009 4409 E Mail targa lidl com cy IAN 324181_1901 Manufacturer TARGA GmbH Coesterweg 45 59494 Soest GERMANY ...

Page 35: ...atterien einlegen 44 8 2 Netzteilbetrieb 45 9 Inbetriebnahme und Bedienung 45 9 1 Teleskopantenne 12 ausrichten 45 9 2 Digitalradio ein und ausschalten 45 9 3 Lautstärke anpassen 46 9 4 Sender auswählen 46 9 5 Displayanzeige anpassen 46 9 6 Sleep Timer 47 9 7 Automatischer Sendersuchlauf 47 9 8 Sender speichern 47 9 9 DAB FM Radio auswählen 48 9 10 DAB Radio 48 9 10 1 Gespeicherte Sender aufrufen ...

Page 36: ...ellen 52 9 12 2 Datum und Uhrzeit einstellen 54 9 12 3 Automatische Zeitsynchronisation 55 9 12 4 Zeitformat einstellen 56 9 12 5 Datumsformat einstellen 56 9 12 6 Displayhelligkeit einstellen 57 9 12 7 Display automatisch abschalten 57 9 12 8 Sprache auswählen 58 9 12 9 Werkseinstellungen laden 58 9 12 10 Software Version 58 9 13 Kopfhörer anschließen 59 9 14 Lagerung bei Nichtbenutzung 59 10 Feh...

Page 37: ...t ein Gerät der Unterhaltungselektronik und dient zum Empfang und zur Wiedergabe von analogen und digitalen Radiosendern Das Gerät kann außerdem als Uhr und Wecker eingesetzt werden Es darf nur zu privaten und nicht zu industriellen und kommerziellen Zwecken verwendet werden Außerdem darf das Gerät nicht in tropischen Klimaregionen genutzt werden Bei eigenmächtigen Umbauten des Gerätes und hieraus...

Page 38: ...e alle Verpackungsmaterialien und überprüfen Sie ob alle Teile vollständig und unbeschädigt sind Im Falle einer unvollständigen oder beschädigten Lieferung wenden Sie sich bitte an den Hersteller A SilverCrest SDR 1 5 A1 Digitalradio B Batterien AA 4 Stück C USB Kabel Micro USB auf USB Typ A D Diese Bedienungsanleitung Symbolbild ...

Page 39: ...emperatur 5 C bis 35 C Lagertemperatur 10 C bis 45 C Betriebsluftfeuchtigkeit max 85 rel Feuchte Änderungen der technischen Daten sowie des Designs können ohne Ankündigung erfolgen 4 Sicherheitshinweise Vor der ersten Verwendung des Gerätes lesen Sie die folgenden Anweisungen genau durch und beachten Sie alle Warnhinweise selbst wenn Ihnen der Umgang mit elektronischen Geräten vertraut ist Bewahre...

Page 40: ... Dieses Signalwort bezeichnet eine Gefährdung mit einem niedrigen Risikograd die wenn sie nicht vermieden wird eine geringfügige oder mäßige Verletzung zur Folge haben kann ACHTUNG Dieses Signalwort kennzeichnet wichtige Hinweise zum Schutz vor Sachschäden WARNUNG Dieses Symbol weist Sie auf die Gefahr möglicher Gehörschäden hin Bedienungsanleitung beachten Dieses Symbol kennzeichnet weitere infor...

Page 41: ...ht Batterien wieder aufzuladen und werfen Sie diese unter keinen Umständen ins Feuer Verwenden Sie keine unterschiedlichen Batterien alte und neue Alkali und Kohle usw gleichzeitig Entnehmen Sie die Batterien wenn Sie das Gerät über einen längeren Zeitraum nicht verwenden Bei unsachgemäßem Gebrauch besteht Explosions und Auslaufgefahr Batterien dürfen nicht geöffnet oder verformt werden da auslauf...

Page 42: ... oder behindert wird VORSICHT Wartung Reparaturarbeiten sind erforderlich wenn das Gerät beschädigt wurde z B wenn das Gerätegehäuse beschädigt wurde Flüssigkeit oder Gegenstände ins Innere des Gerätes gelangt sind oder wenn es Regen oder Feuchtigkeit ausgesetzt wurde Reparaturarbeiten sind auch erforderlich wenn das Gerät nicht einwandfrei funktioniert oder heruntergefallen ist Wenn Rauchentwickl...

Page 43: ...onnenlicht oder starkes Kunstlicht auf das Gerät trifft der Kontakt mit Spritz und Tropfwasser und aggressiven Flüssigkeiten vermieden wird und das Gerät nicht in der Nähe von Wasser betrieben wird Insbesondere darf das Gerät niemals untergetaucht werden stellen Sie auch keine mit Flüssigkeit gefüllten Gegenstände wie z B Vasen oder Getränke auf oder neben das Gerät das Gerät nicht in unmittelbare...

Page 44: ... Arbeiten mit Maschinen oder sonstigen Situationen die Ihre volle Aufmerksamkeit erfordern Der Schall kann Ihre Aufmerksamkeit beeinträchtigen oder dazu führen dass Sie nicht mehr wahrnehmen was um Sie herum geschieht 5 Urheberrecht Alle Inhalte dieser Bedienungsanleitung unterliegen dem Urheberrecht und werden dem Leser ausschließlich als Informationsquelle bereitgestellt Jegliches Kopieren oder ...

Page 45: ...g versehen Klappen Sie die Umschlagseite aus damit Sie die Bedienelemente immer vor Augen haben 1 Lautsprecher 2 INFO MENU Taste 3 Display 4 VOL Taste 5 Ein Ausschalten Sleep Timer 6 I Taste 7 I Taste 8 OK AMS Taste 9 DAB FM Taste 10 VOL Taste 11 FAV SEARCH Taste 12 Teleskopantenne 13 Micro USB Anschluss 14 Kopfhörer Anschluss 15 Batteriefach ...

Page 46: ...teriefachdeckel in Pfeilrichtung nach unten schieben und entnehmen Legen Sie die Batterien polrichtig ein und beachten wie auf der folgenden Abbildung gezeigt Die Polung ist an den Batterien und im Batteriefach skizzenhaft abgebildet Setzen Sie nun den Batteriefachdeckel wieder auf das Batteriefach 15 und schieben Sie ihn nach oben bis er einrastet ACHTUNG Entnehmen Sie die Batterien wenn Sie das ...

Page 47: ...12 ausrichten Um einen bestmöglichen Radioempfang zu gewährleisten ziehen Sie die Teleskopantenne 12 auf die komplette Länge aus Die Teleskopantenne 12 ist drehbar Auf diese Weise können Sie den Radioempfang optimieren 9 2 Digitalradio ein und ausschalten Schalten Sie das Digitalradio ein indem Sie die Taste 5 für ca 3 Sekunden gedrückt halten Wenn im Display 3 die Uhrzeit und das Datum angezeigt ...

Page 48: ...et beim Einschalten auf der Lautstärkestufe auf der es zuletzt ausgeschaltet wurde 9 4 Sender auswählen Abgespeicherte Sender können Sie durch Drücken der Tasten I 6 und I 7 durchschalten 9 5 Displayanzeige anpassen Im Display 3 wird Ihnen der Name des Radiosenders Interpret und Musiktitel angezeigt Drücken Sie mehrmals kurz die Taste INFO MENU 2 um die Displayanzeige anzupassen Die Displayanzeige...

Page 49: ...ensymbol im Display 3 angezeigt Die Restlaufzeit des Sleep Timers können Sie sich anzeigen lassen indem Sie durch mehrfaches Drücken der Taste INFO MENU 2 die Anzeige im Display 3 durchschalten Sie können den Sleep Timer auch beenden indem Sie das Digitalradio einfach ausschalten 9 7 Automatischer Sendersuchlauf Den automatischen Sendersuchlauf können Sie starten indem Sie die Taste OK AMS 8 für c...

Page 50: ...tehen folgende Optionen zur Verfügung 9 10 1 Gespeicherte Sender aufrufen Zuvor abgespeicherte Sender in Ihrere Favoritenliste können Sie wie folgt aufrufen Drücken Sie kurz die Taste FAV SEARCH 11 Wählen Sie mit den Tasten I 6 und I 7 den gewünschten Sender aus Drücken Sie kurz die Taste OK AMS 8 um ausgewählten Sender wiederzugeben 9 10 2 Vollständiger Suchlauf Im DAB Radio Menü des Digitalradio...

Page 51: ...für ca 2 Sekunden gedrückt Wählen Sie mit den Tasten I 6 und I 7 die Option Manuell einstellen aus Drücken Sie kurz die Taste OK AMS 8 Wählen Sie mit den Tasten I 6 und I 7 die gewünschte Frequenz aus und bestätigen Sie Ihre Auswahl durch zweimaliges Drücken auf die Taste OK AMS 8 Die Sender werden nun automatisch in der Senderliste ergänzt Eine weitere Meldung wird nicht angezeigt 9 10 4 DRC Hier...

Page 52: ...ngültige Sender sind Sender welche an Ihrem Standort nicht empfangbar sind Halten Sie die Taste INFO MENU 2 für ca 2 Sekunden gedrückt Wählen Sie mit den Tasten I 6 und I 7 die Option Aufräumen aus Drücken Sie kurz die Taste OK AMS 8 Wählen Sie mit den Tasten I 6 und I 7 Ja oder Nein aus und bestätigen Sie Ihre Auswahl durch kurzes Drücken auf die Taste OK AMS 8 9 11 FM Radio In der Betriebsart FM...

Page 53: ...h DAB bzw FM Sendern gesucht 9 11 3 Manueller Sendersuchlauf Mit dieser Funktion können Sie einen Sender suchen ohne diese automatisch zu speichern Drücken Sie die Taste Taste I 6 oder I 7 für ca 2 Sekunden um den Suchlauf in die gewählte Richtung zu starten Der Suchlauf stoppt beim nächsten gefundenen Sender 9 11 4 Manuelle Sendereinstellung Alternativ zum Sendersuchlauf haben Sie auch die Möglic...

Page 54: ...bestätigen Sie Ihre Auswahl durch kurzes Drücken auf die Taste OK AMS 8 Stellen Sie die Wiedergabe auf Mono um bei schwachen Sendern das Rauschen zu reduzieren 9 12 Einstellungen Das System Menü ermöglicht es Ihnen weitere Einstellungen vornehmen Halten Sie die Taste INFO MENU 2 für ca 2 Sekunden gedrückt um ins Menü zu gelangen Im Menü navigieren Sie mit den Tasten I 6 und I 7 Ihre Auswahl bestät...

Page 55: ...ng zu übernehmen drücken Sie kurz die Taste OK AMS 8 Stellen Sie nun die Dauer des Wecktons mit Hilfe der Tasten I 6 und I 7 ein Folgende Option stehen zur Verfügung 15 Minuten 30 Minuten 45 Minuten 60 Minuten und 90 Minuten Um die Einstellung zu übernehmen drücken Sie kurz die Taste OK AMS 8 Nun können Sie mit den Tasten I 6 und I 7 wählen ob Sie mit DAB FM oder Summer geweckt werden wollen Bestä...

Page 56: ...bol mit einer 1 Wecker 1 und oder 2 Wecker 2 angezeigt Der Weckton beginnt leise und steigt langsam auf die eingestellte Lautstärke an Um die Weckfunktion zu beenden drücken Sie kurz auf die Taste 5 oder OK AMS 8 um den Weckton für 5 Minuten auszusetzen 9 12 2 Datum und Uhrzeit einstellen Im Auslieferzustand ist die automatische Zeitsynchronisation über DAB und FM eingestellt Sobald das Digitalrad...

Page 57: ...n Sie die Tasten auch gedrückt halten Um die Einstellung zu übernehmen drücken Sie kurz die Taste OK AMS 8 Die Monatsanzeige blinkt nun können Sie mit den Tasten I 6 und I 7 den Monat einstellen Um den Fortlauf der Ziffern zu beschleunigen können Sie die Tasten auch gedrückt halten Um die Einstellung zu übernehmen drücken Sie kurz die Taste OK AMS 8 Die Jahresanzeige blinkt nun können Sie mit den ...

Page 58: ...ngestellt Um das Zeitformat anzupassen gehen Sie wie folgt vor Halten Sie die Taste INFO MENU 2 für ca 2 Sekunden gedrückt Wählen Sie im System Menü mit den Tasten I 6 und I 7 die Option Uhrzeit aus Drücken Sie kurz die Taste OK AMS 8 Wählen Sie mit den Tasten I 6 und I 7 die Option Zeitformat einstellen aus Drücken Sie kurz die Taste OK AMS 8 Wählen Sie mit den Tasten I 6 und I 7 24 Std Format od...

Page 59: ...m System Menü mit den Tasten I 6 und I 7 die Option Hintergrundbeleuchtung aus Drücken Sie kurz die Taste OK AMS 8 Wählen Sie mit den Tasten I 6 und I 7 Hell Mittel Schwach oder Dunkel aus und bestätigen Sie Ihre Auswahl durch kurzes Drücken auf die Taste OK AMS 8 9 12 7 Display automatisch abschalten Hier können Sie die automatische Abschaltung des Displays 3 ein bzw ausschalten Halten Sie die Ta...

Page 60: ...stehen zur Verfügung Englisch Deutsch Italienisch Französisch Niederländisch Spanisch Schwedisch Polnisch Portugiesisch Tschechisch Slowenisch und Slowakisch 9 12 9 Werkseinstellungen laden Mit dieser Option können Sie das Digitalradio in den Auslieferungszustand zurücksetzen Bitte beachten Sie dass hierbei die Einstellungen und gespeicherte Sender verloren gehen Halten Sie die Taste INFO MENU 2 f...

Page 61: ...hörers Längeres Hören kann bei voller Lautstärke zu Hörschäden des Benutzers führen Am Kopfhörer Anschluss 14 können Sie einen Kopfhörer nicht im Lieferumfang enthalten mit 3 5 mm Klinkenstecker anschließen Bei angeschlossenem Kopfhörer wird der Lautsprecher 1 ausgeschaltet 9 14 Lagerung bei Nichtbenutzung Wenn Sie die das Digitalradio für längere Zeit nicht benutzen entfernen Sie eingelegte Batte...

Page 62: ... der Steckdose steckt Weiterhin muss das USB Kabel C mit Ihrem USB Netzteil und dem Digitalradio verbunden sein Kein Radioempfang schlechter Radioempfang Ziehen Sie die Teleskopantenne 12 ganz heraus und achten Sie auf die korrekte Ausrichtung Stellen Sie den Sender korrekt ein Starten Sie gegebenenfalls einen erneuten Suchlauf Kein Ton trotz eingeschaltetem Gerät Überprüfen Sie die Einstellung de...

Page 63: ...n Gesundheit Weitere Informationen zur Entsorgung des alten defekten Gerätes erhalten Sie bei der Stadtverwaltung beim Entsorgungsamt oder in dem Geschäft in dem Sie das Produkt erworben haben Entsorgung der Verpackung Führen Sie auch die Verpackung einer umweltgerechten Entsorgung zu Kartonagen können bei Altpapiersammlungen oder an öffentlichen Sammelplätzen zur Wiederverwertung abgegeben werden...

Page 64: ...beband ab Umweltschäden durch falsche Entsorgung der Batterien Akkus Batterien Akkus dürfen nicht über den Hausmüll entsorgt werden Sie können giftige Schwermetalle enthalten und unterliegen der Sondermüllbehandlung Die chemischen Symbole der Schwermetalle sind wie folgt Cd Cadmium Hg Quecksilber Pb Blei Geben Sie deshalb verbrauchte Batterien Akkus bei einer kommunalen Sammelstelle ab 12 Konformi...

Page 65: ...r alle Anfragen die Artikelnummer bzw wenn vorhanden die Seriennummer bereit Für den Fall dass eine telefonische Lösung nicht möglich ist wird durch unsere Hotline in Abhängigkeit der Fehlerursache ein weiterführender Service veranlasst In der Garantie wird das Produkt bei Material oder Fabrikationsfehler nach unserer Wahl kostenlos repariert oder ersetzt Mit Reparatur oder Austausch des Produkts ...

Page 66: ...A1 64 Deutsch Service Telefon 0800 5435111 E Mail targa lidl de Telefon 0820 201222 E Mail targa lidl at Telefon 0842 665 566 E Mail targa lidl ch IAN 324181_1901 Hersteller TARGA GmbH Coesterweg 45 59494 Soest DEUTSCHLAND ...

Reviews: