background image


SilverCrest MP3 Sport-Clip 1000 

English - 23


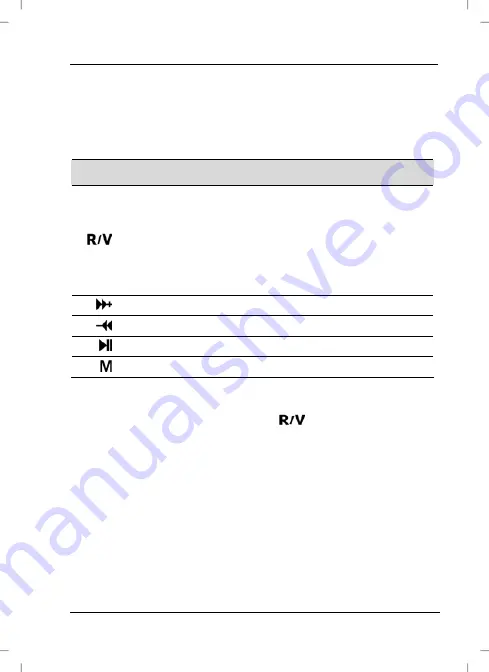
Voice 

This function lets you record and play voice via the built-in 
microphone [5]. 

You can control the recordings as follows:  

Button 

Function 

 [3] 

Press briefly: 
Volume adjustment 


Press and hold for 2 seconds: 
Start recording 


Press during recording: 
Stop recording 

 [9] 

Next recording (if any) 

 [6] 

Previous recording (if any) 

 [7] 

Plays an existing recording 

 [2] 

Opens the Recording menu (see page 24). 

Recording voice 

In 

Voice mode

, press and hold the 

 button [3] for approx. 2 

seconds to start recording. The recording will be assigned a file 
name automatically with a sequential number. 


Summary of Contents for Clip-On Sport-Clip 1000

Page 1: ...CLIP ON MP3 PLAYER User manual and service information IE CY GB 6_mp3sportclip_0804 qxp 24 04 2008 8 51 Uhr Seite 1 ...

Page 2: ...lar MP3 and WMA audio formats The built in flash memory has 2GB of capacity and lets you store hundreds of songs depending on their bit rate The device is DRM compatible and therefore also supports MP3 title downloaded from the Internet Furthermore your Sport Clip integrates a digital voice recorder dictaphone Please read this User manual carefully and follow the safety instructions ...

Page 3: ...mity 8 Disposal of Old Devices 8 Introduction 9 Package contents 9 Summary 10 Music Playback Display 11 Getting started 12 Charging the Battery 12 Recharging from a Power Outlet 12 Recharging from a Computer 12 Powering the Device On Off 13 Powering On 13 Powering Off 13 Choosing the Operating Mode 13 Setting the Language 14 Adjusting the Volume 14 Connecting the Earphones 15 The Clip 15 ...

Page 4: ... 19 Intro 20 Display 21 A B 21 File Browse 22 Voice 23 Recording voice 23 Playing Back a Recording 24 Record Menu 24 Setup 25 USB Mode 25 Power 26 Language 26 Display 27 Sys tools 28 Transferring Music 30 Connecting to a Computer 30 As Pen Drive 30 As DRM Player 31 Appendix 32 Technical Specifications 32 Details of Guarantee 33 ...

Page 5: ...he allowed operating temperature and humidity are 5 C to 35 C max 75 RH Always make sure that no direct heat sources e g heating can affect the device no direct sunlight or artificial light reaches the device contact with spray and dripping water and abrasive liquids is avoided and the device is never operated near water and it must especially never be immersed no fire sources e g burning candles ...

Page 6: ... contacts causing any explosive and or inflammable gases to ignite Explosion sensitive areas will normally but not always be labelled These include fuel storage areas such as below deck on a boat fuel line or tank areas environments where the air contains inflammable substances e g cereals metal dust or powder etc and any areas where you should normally switch off your car engine Maintenance and C...

Page 7: ...tric shock Never place the device heavy objects or furniture on the cable and take care that the cord does not become trapped especially at the plug and sockets Never make knots in the cable and do not tie it together with other cords All cables should be positioned so that nobody can trip over them or be obstructed by them Kids Electrical appliances do not belong in the hands of children Do not a...

Page 8: ...EHS1000 comply with these requirements When using different headphones harmful noise levels may damage the user s hearing Using the earphones at high sound volume can damage your hearing and cause nuisance to your surroundings Under dangerous circumstances for example when driving a vehicle or when working with machines the sound may distract your attention or prevent you from being aware of what ...

Page 9: ...evices If the product is labelled with a struck out waste bin it is subject to the European Guideline 2002 96 EC All electric and electronic devices must be disposed of separately from household waste at established bodies Avoid damaging the environment and danger to your personal health by disposing of the device properly For further information about proper disposal contact your local government...

Page 10: ...erCrest MP3 Sport Clip 1000 English 9 Introduction Package contents A Sports headphones SPHS1000 B Power adapter C In Earphones IEHS1000 D Driver CD for Microsoft Windows 98 E MP3 player F USB adapter cable ...

Page 11: ... 1 Display 2 Mode button 3 R V button Record Volume 4 Reset 5 Microphone 6 Back 7 Play Pause for playback and pause of playback 8 Headphones jack and charger connector for recharging the built in battery use only the supplied USB adapter cable F 9 Next ...

Page 12: ...2 Current title 13 Total number of titles 14 Equalizer see page 18 and 3D indicator 15 Level indicator 16 File format and bit rate 17 Current playtime 18 Total playtime of title 19 Repeat mode see page 17 Intro mode see page 20 A B repeat mode see page 21 20 ID 3 tag or file name of current title ...

Page 13: ...d completely and then fully discharged by using the device For recharging the built in battery use only the supplied USB adapter cable F Recharging from a Power Outlet Insert the round shaped jack connector of the USB adapter cable F into the headphones connector of your MP3 player Plug the flat USB connector of the USB cable into the receptacle of the power adapter B Plug the power adapter into a...

Page 14: ...evice off press and hold the button 7 for approx 3 seconds The MP3 player displays Good Bye and powers off Choosing the Operating Mode When powering the device on for the first time it starts the MP3 Playback mode To toggle between the available operating modes Music Voice and Setup proceed as follows Press the Mode button 2 Press 9 or 6 to toggle to the desired operating mode Press 7 to confirm t...

Page 15: ...ton for approx 6 seconds Press the Mode button 2 Press 9 or 6 until the Setup menu displays Press 7 Press 9 or 6 until the Language menu displays Press 7 Press 9 or 6 to select the desired function Press 7 Press the Mode button 2 to exit the menu Adjusting the Volume Press 3 The current volume level will be displayed Press the button 6 to reduce the sound volume or press the button 9 to increase i...

Page 16: ...to the headphones connector 8 of your MP3 player The Clip The MP3 Sport Clip features a spring type clip This allows you to fix the device on to a belt or clothes for mobile use To open the clip use your thumb and index finger to press the indentation on the back of the device and the mark located on the right side of the multifunction button see figure ...

Page 17: ...p the icons display use the File Browser to navigate the flash memory and erase individual titles You can control the playback as follows Button Function 7 Play Pause 9 Press briefly Next title Keep pressed Fast forward of current title 6 Press briefly Previous title Keep pressed Fast backward of current title 3 Adjust volume see page 14 2 Open the Music menu ...

Page 18: ... Repeat mode you can press 9 or 6 to select from seven different repeat modes and random playback Press 7 to confirm the desired option Icon Function No Repeat Playback stops after the last title has been played ONE The current title will be played back repeatedly All All titles will be played repeatedly Random All Random playback of all available titles Dir Repeat Only the contents of the current...

Page 19: ...ound effect Pop Amplification of the lower mid tones Rock Bass and treble amplification Classic Bass and mid tones amplification Jazz Amplification of mid tones Bass Strong bass amplification Custom EQ User defined sound effect for description see below Assigning a custom sound effect Select Custom EQ and press 7 to confirm A graphic equalizer will appear Marker ...

Page 20: ...arker to All lets you move all sliders simultaneously 3D This option allows you to listen to 3D sound Press 9 or 6 to toggle between On and Off Press 7 to confirm your selection If 3D is enabled the 3D indicator will appear on the music playback display page 11 item 14 Play rate The play rate lets you set the playback speed to 0 67x 0 80x 1 00x 1 14x and 1 33x Press 9 or 6 to select the desired pl...

Page 21: ...unction Press 7 to confirm your setting The display toggles to music playback and the icon appears on the display page 11 item 19 Press 7 to start Intro playback The message Intro will appear for a few seconds and each title will be played for the set time Press 7 to stop Intro playback The current title will be played entirely and the Intro function will be disabled Make sure you set the Repeat m...

Page 22: ... display A B This option lets you set a specific title section to be repeated Proceed as follows Press 7 to confirm the option A B The playback view will appear The icon will blink instead of the repeat indicator page 11 item19 As soon as playback has reached the starting position of the section you want to repeat press 3 The icon changes As soon as playback has reached the end position of the sec...

Page 23: ... to play a selected title You can also delete the currently selected title by pressing the 3 button The message No will appear on the display Then press 9 or 6 to toggle to Yes Press 7 to confirm your selection The title will be deleted To obtain a better folder structure overview we recommend that you connect the device as a removable disk to your computer see page 30 ...

Page 24: ...olume adjustment Press and hold for 2 seconds Start recording Press during recording Stop recording 9 Next recording if any 6 Previous recording if any 7 Plays an existing recording 2 Opens the Recording menu see page 24 Recording voice In Voice mode press and hold the button 3 for approx 2 seconds to start recording The recording will be assigned a file name automatically with a sequential number...

Page 25: ...inking 23 Microphone icon 24 Elapsed recording time Playing Back a Recording Press 9 or 6 to select the desired voice or radio recording and press 7 to play it back Record Menu Press the Mode button 2 during recording to open the Record menu For more information about the options Repeat Play Rate Intro Display A B and File Browse contained in this menu please read from page 17 ...

Page 26: ...ferent menu items see the following pages USB Mode The USB mode contains the options Pen Drive and DRM Download see also from page 30 Here you can decide how to use your device when connected to a computer Even if the connection to the computer has been established already you can press the Mode button 2 to toggle between the modes Pen Drive and DRM Download Connection type Description Pen Drive T...

Page 27: ...g used left figure Press the Mode button 2 multiple times to move the marker to the right to highlight the digits Then press 9 or 6 to change the preset time right figure When using the Mode button to toggle behind the minutes display you can also enable the option Always on in playback In this case the device will never power off automatically Press 7 to save the changes and exit the menu Languag...

Page 28: ...ast and backlight Contrast Press 9 or 6 to select a contrast value between 0 low contrast and 63 high contrast Backlight Press 9 or 6 to enable or disable the backlight or set a value between 1 second and 9 seconds After the set time has elapsed without pressing any button the display will turn off to save power ...

Page 29: ...EDIA music To navigate proceed as follows Button Icon Function 9 Forward browsing through folders and files 6 Backward browsing through folders and files 7 Opens a highlighted folder Deletes a highlighted file see below One folder level up You can delete the currently highlighted title by pressing the 7 button The message No will appear Press 9 or 6 to toggle to Yes Press 7 to confirm your selecti...

Page 30: ... the built in memory Reset Select Reset to restore the factory default configuration All menu settings including the display language will be reset After choosing Reset the message No will appear Press 9 or 6 to toggle to Yes Press 7 to confirm your selection You can also reset the device by briefly pressing the hidden Reset button 4 To do so use a thin object e g a paperclip System Info Here you ...

Page 31: ...ther as a removable disk or as a DRM player depending on the USB mode setting page 25 As Pen Drive The computer will detect the device as a removable disk and will display it under My Computer see figure Use the common functions offered by your computer to copy move rename or delete data The folder MICIN DIR contains all voice recordings page 23 the folder MTPMEDIA is reserved for files that have ...

Page 32: ...indicating that you can now safely remove the device As DRM Player DRM means Digital Rights Management and uses a licensing process that only allows the copying of DRM protected files under certain restrictions To copy DRM files you need the latest version of Windows Media Player This requires your computer to run on Windows 2000 XP or Windows Vista Launch Windows Media Player and select the Sync ...

Page 33: ...ignal to Noise ratio 85 dB Operating temperature 5 C 35 C Operating humidity max 75 rel humidity Max output voltage for headphones 125 mV Battery voltage 3 7 V Battery capacity 240 mAh Power adapter Model Targa KSUFB0500100W1UK Input AC 100 240V 50 60Hz 0 15A Output 5V 1 0A max Earphones Model SPHS 1000 Nominal voltage 530 mV Impedance 32 Ohms Model IEHS 1000 Nominal voltage 51 mV Impedance 32 Ohm...

Page 34: ...SilverCrest MP3 Sport Clip 1000 English 33 Details of Guarantee ...

Page 35: ...SilverCrest MP3 Sport Clip 1000 34 English ...

Page 36: ...M a t N o 1 3 8 2 2 4 4 TARGA GmbH Lange Wende 41 D 59494 Soest www silvercrest cc 6_mp3sportclip_0804 qxp 24 04 2008 8 51 Uhr Seite 2 ...

Reviews: