System LEDs
6
Support Contacts
Contact your local distributor for the technical support.
Technical support for Siklu’s direct customers: [email protected]
Download your copy of the product’s user manuals from ftp://85.17.162.140/ (user: installmanual, password:
siklu).
◊ Siklu Communication Ltd. 43, Hasivim St, Petach-Tikva 49517, Israel
10
Basic Configuration using the Web-Based Management
1.Launch an Internet browser and enter the ODU’s IP address in the address bar. For the default IP address enter:
https://192.168.0.1
. Default read/write access:
admin
,
admin
).
2. Use the
Quick Config
wizard to configure the basic system parameters for both local and remote systems.
3.
System
section: set system information such as Name, Date (YYYY.MM.DD) and Time (HH:MM:SS).
4.
Radio
section: set RF parameters.
·
Channel Width (MHz)
– 500MHz. Note that 250MHz support depends on product’s specs.
·
Frequency (MHz)
– picklist. Default value is 57875. Rx frequency will be configured accordingly.
Make sure to select a channel that is approved for use by local regulation
.
·
Tx Power (dBm) –
ODU’s transmit power (+5 to -35dBm). Default= +5dBm. Reduce the Tx power in case of
short links, making sure the RSSI at the remote ODU does not exceed -35dBm (overload threshold).
·
Mode –
Default value is Adaptive (Adaptive Bandwidth, Code and Modulation), meaning the ODU will switch
to the highest modulation profile available by data-rate license and link condition.
·
Transmit Asymmetry –
Default value is symmetric configuration: 50% for Tx and Rx (50tx-50rx). When
selecting asymmetric configuration (75%/25% or 90%/10%), the
Role
will be changed from
Auto
and will be
set automatically (Master for 75tx-25rx or 90tx-10rx, and Slave for 25tx-75rx or 10tx-90rx).
Role
settings can
be found in the Radio Advanced Settings section.
5.
Eth Ports
: set Ethernet ports configuration such as enable/disable, auto-negotiation and Speed/Duplex.
6.
Network
section: set IP address (static or DHCP, IPv4 or IPv6) and SNMP attributes.
·
IP Address
– set up to 4 IP addresses: IP, Prefix-length (in mask bits) and VLAN for management (VLAN
0=untagged). It is recommended to leave default IP as IP #1 and configure the new IP address as IP #2.
·
Default gateway
·
SNMP Manager
– set SNMP trap destination (up to 5 manager can be defined).
7. Click
Apply
. Settings will be applied for local and remote systems.
Note: when changing RF parameters the link will go down and recover after ~1 minute.
Note: changing IP address will terminate your connection. Reconnect and launch the Web management using the
new IP address
.
8.To save the system configuration, click
Save Configuration
on the Main page for local and remote systems.
Note:
System will lose its configuration upon next reset if you do not click
Save Configuration
, saving the currently
running configuration to the startup configuration, for local and remote systems.
9. To monitor radio link status, use the
Main
(or
Radio)
page:
·
Status –
Displays the radio link status (Up or Down).
·
RSSI (dBm) –
displays the Receiver Signal Strength Indicator displays the received signal level.
·
CINR (dB) –
displays the Carrier to Interf Noise ratio, which indicates the radio link’s signal quality. In
normal conditions, CINR≥18 indicates a good signal quality.
·
Mode –
when working in Adaptive mode, the current modulation profile is displayed. Modulation profile
depends on link status (CINR) and loaded data-rate license.
10. To view and set the loaded license configuration, use the
System
page under the
Licensing
section.
9
PWR (Power)
Green
– Power OK
Red
– Power Failure
Off
– Device not powered
Blinking Green
– Device boot (~90 sec)
RF
Green
– Link UP
Orange
– Alignment Mode
Off
– Link Down
Eth1/Eth2/Eth3
Green
– Link (Carrier) 1G
Orange
– Link (Carrier) 10/100
Off
– No Link (Carrier)
Blinking Green
– 1G Activity
Blinking Orange
– 10/100 Activity
LED
Color
Description
Initial System Setup
1.Disconnect the DVM and re-insert the Alignment Cap Screw and lock it.
2. Reboot both ODUs by shortly pressing the ODU Reset Button or disconnect the power. This returns the ODU to
Adaptive Mode (ODU’s default operational mode). Following this action, and after the ODU has finished
rebooting, the RF LED color indicator on both ODUs will turn Green, indicating that the radio link is Up.
Note:
If you will not re-insert the Alignment Cap Screw, the link will not come up after the reboot.
The EtherHaul link can now pass traffic and management between the ports and over the radio link.
For further radio link configuration, connect to the ODU using the web-based management.
8
Aligning the Antennas
1.Perform a coarse Azimuth and Horizontal alignment using a line-of-sight visual check with the remote ODU. Lock
the Mounting Bracket to the pole using the worm-clamp.
2. Power up the ODUs and switch both ODUs to Alignment Mode by inserting the Digital Volt Meter probes into
the DVM probe slots. For this purpose you will have to remove the Alignment Cap Screw (secured with metal
strip). Following this action, the RF LED color indicator will turn orange, indicating the ODU is in Alignment
mode. The ODU will remain in Alignment Mode until the Alignment Cap Screw is inserted and ODU is rebooted.
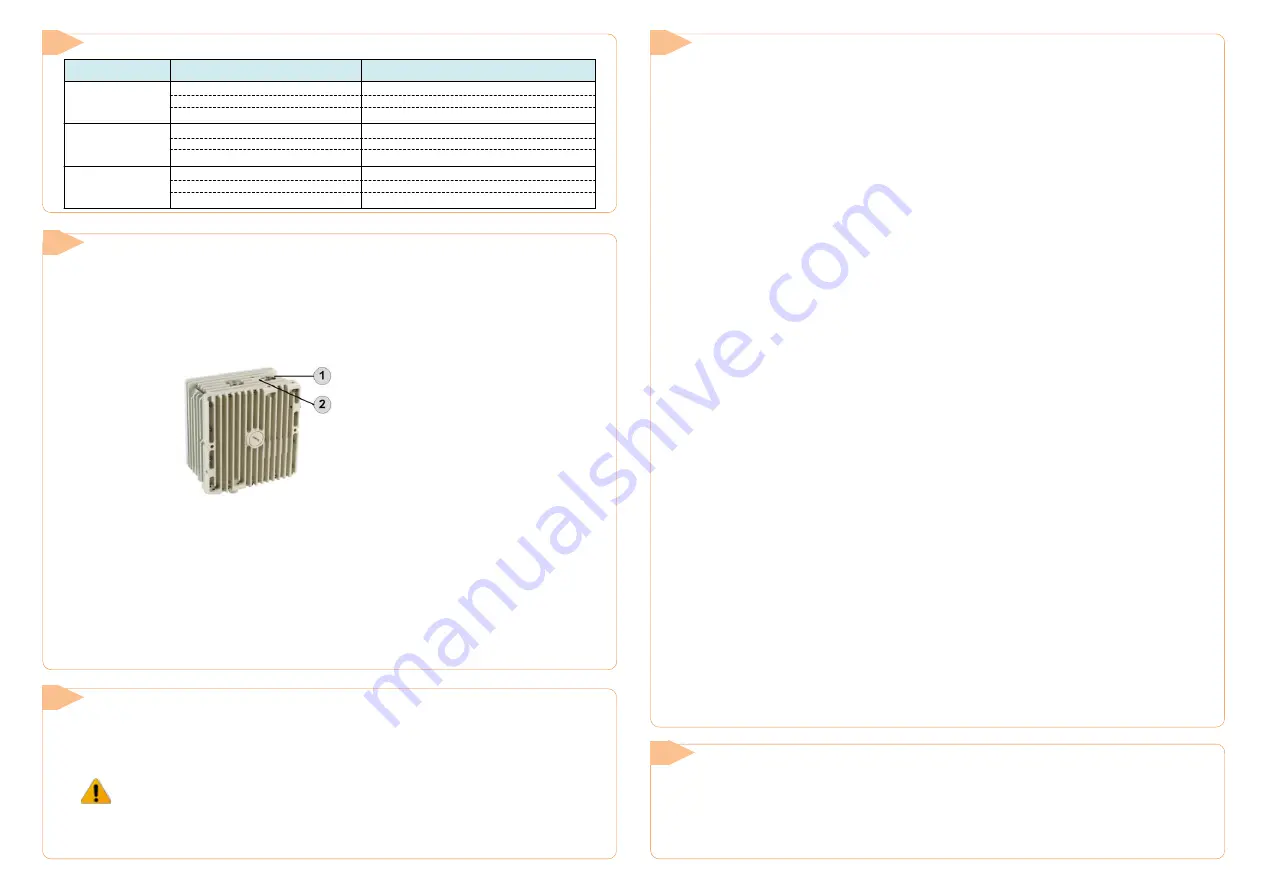
1. Alignment Cap Screw (and DVM probe)
2. Second DVM probe
3. Read the receive level (RSSI) using the DVM. The voltage reading will be between 0 to 1Vdc, indicating the RSSI
in dBms (for example 0.45V=-45dBm). Voltage reading on the RSSI will be available ~1 minute after switching
the ODU to Alignment Mode.
4. Perform fine Azimuth and Elevation alignment using the fine adjustment bolts, identifying the main lobe until
the expected receive level is achieved (/-4dB). Align the ODUs in turns till optimal alignment.
5. Once the optimum position has been achieved, tighten the azimuth and elevation lock bolts on first ODU.
6. Use the DVM to verify that the received signal level has not degraded during locking.
7. Repeat steps 5-6 on the second ODU.
Antenna alignment is now complete.
7


