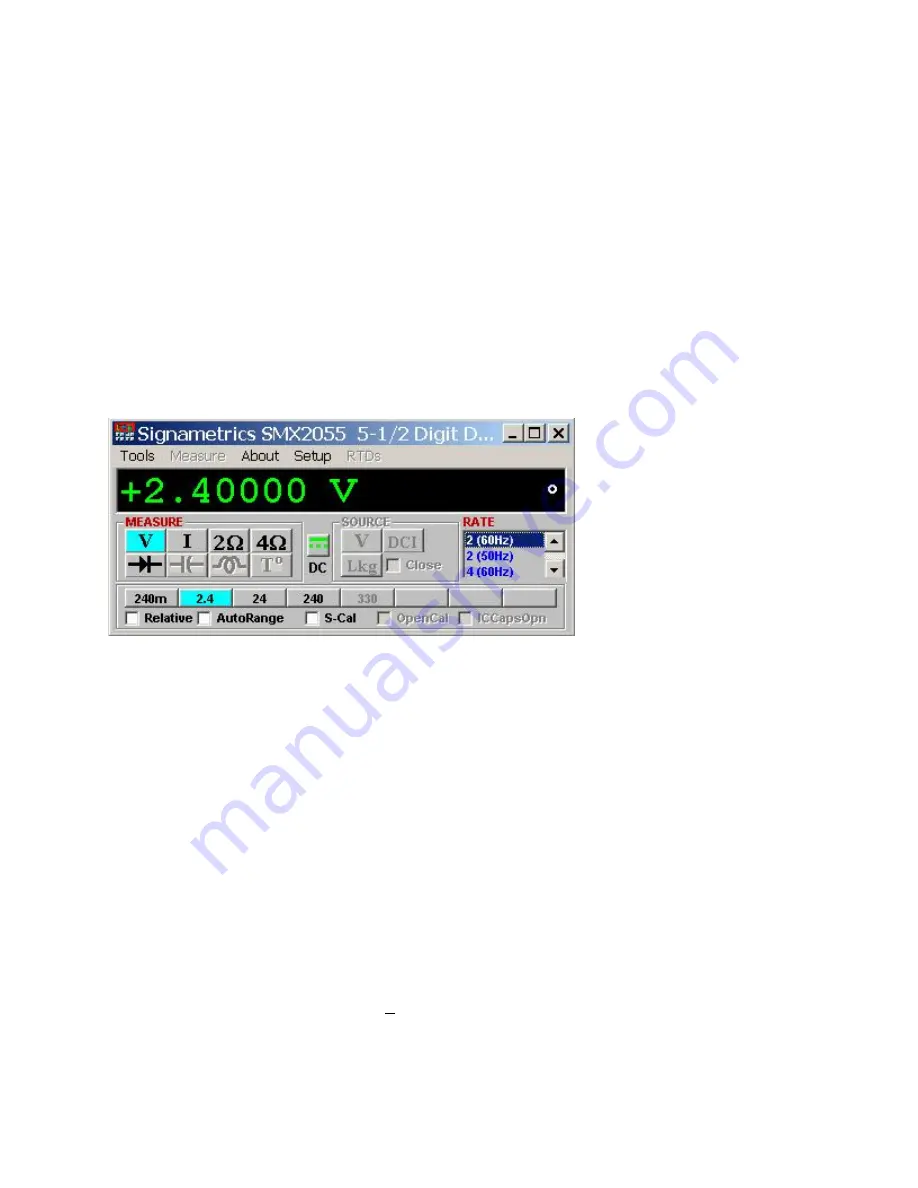
You can verify the installation and gain familiarity with the DMM by exercising its measurement functions using
the Windows based Control Panel. To run the control panel, double click the “SM2064.EXE” icon. If you do not
hear the relays click, it is most likely due to an installation error. Another possible source for an error is that the
SM60CAL.DAT
file does not correspond to the installed DMM.
When the DMM is started the first time, using the provided control panel (SM2064.EXE), it takes a few extra
seconds to extract its calibration data from the on-board store, and write it to a file C:\SM60CAL.DAT
The Control Panel is operated with a mouse. All functions are accessed using the left mouse button. When the
DMM is operated at very slow reading rates, you may have to hold down the left mouse button longer than usual for
the program to acknowledge the mouse click.
Note: The SM2060 front panel powers up in DCV, 8 readings per second (rps) and 240 V range. If the DMM is
operated in Autorange, with an open input, it will switch between the 2.4V and 24V ranges every few seconds, as a
range change occurs. This is perfectly normal with ultra high impedance DMM’s such as the SM2055. This
phenomenon is caused by the virtually infinite input impedance of the 2.4V DC range. On these ranges, an open
input will read whatever charge is associated with the signal conditioning of the DMM. As this electrical charge
changes, the SM2055 will change ranges, causing the range switching. This is normal.
3.5 Using the Control Panel
Figure 3-2
.
The Control Panel. The three main groups include Measure, Source and Range buttons. The
Range buttons are context sensitive such that only “240m, 2.4, 24 and 240 appear when in AC Voltage
Function is selected, and 2.4m, 24m, 240m and 2.4 appear when AC Current functions is selected, etc.
Note: All of the controls described below correspond to their respective software function, which can be invoked
within your control software or as objects in a visual programming environment. The software command language
provides a powerful set of capabilities. Some of the functions are not included in the control panel, but are in the
software.
DC/AC
This function switches between DC and AC. This is applicable for the following DMM functions:
Voltage, Current, and Voltage-Source. If Voltage-Source is the function presently in use, the Source control under
the Tools menu can be used to set frequency and amplitude in ACV, and amplitude only in DCV and DCI.
Relative
This is the Relative function. When activated, the last reading is stored and subtracted from all
subsequent readings. This is a very important function when making low-level DCV measurements, or in 2W
.
For example, when using 2W
, you can null out lead resistance by shorting the leads together and clicking on
Relative.
When making low level DC voltage measurements (e.g., in the
V region), first apply a copper short to
the
V,
+
&
-
input terminals, allow the reading to stabilize for a few seconds, and click on
Relative
. This will
correct for any internal offsets. The
Relative
button can also be used in the Percent and dB deviation displays
(shown below), which are activated using the
Tools
in the top menu.
Signametrics
14


