


Signamax
FO-065-7732AF Manageable Gigabit Switch
User’s Manual 63
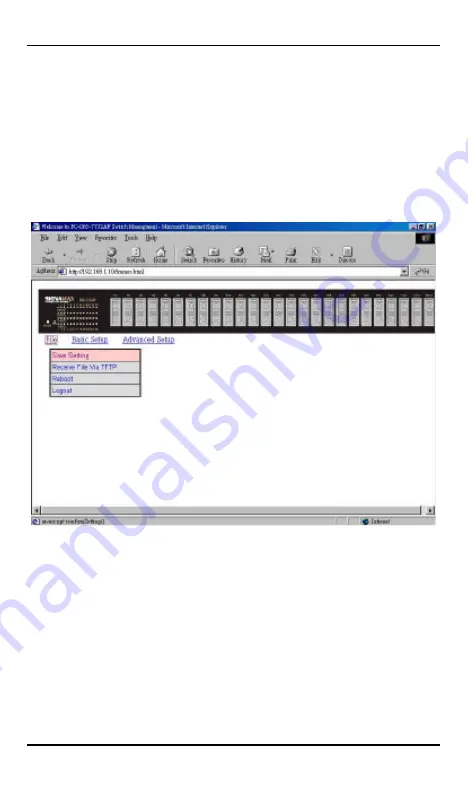
FILE
Save settings configured in the browser interface / download upgraded
software via TFTP / reboot the switch / logout of the browser interface.
BASIC SETUP
Perform general, LAN port, and console port activities.
ADVANCED SETUP
Perform MAC Address Management / Per Port Statistics / Bridging / Static
MAC Filters / IP Multicast Group / Spanning Tree Perspective / SNMP / Other
Protocols / Port Trunking / Port Mirroring / QoS.
Summary of Contents for FO-065-7732AF
Page 2: ...Signamax Connectivity Systems Manageable Gigabit Switch Model FO 065 7732AF User s Guide...
Page 31: ...Signamax FO 065 7732AF Manageable Gigabit Switch User s Manual 29...
Page 89: ...Signamax FO 065 7732AF Manageable Gigabit Switch User s Manual 87...
Page 90: ...Signamax FO 065 7732AF Manageable Gigabit Switch 88 User s Manual...


