background image

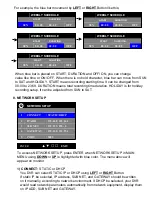
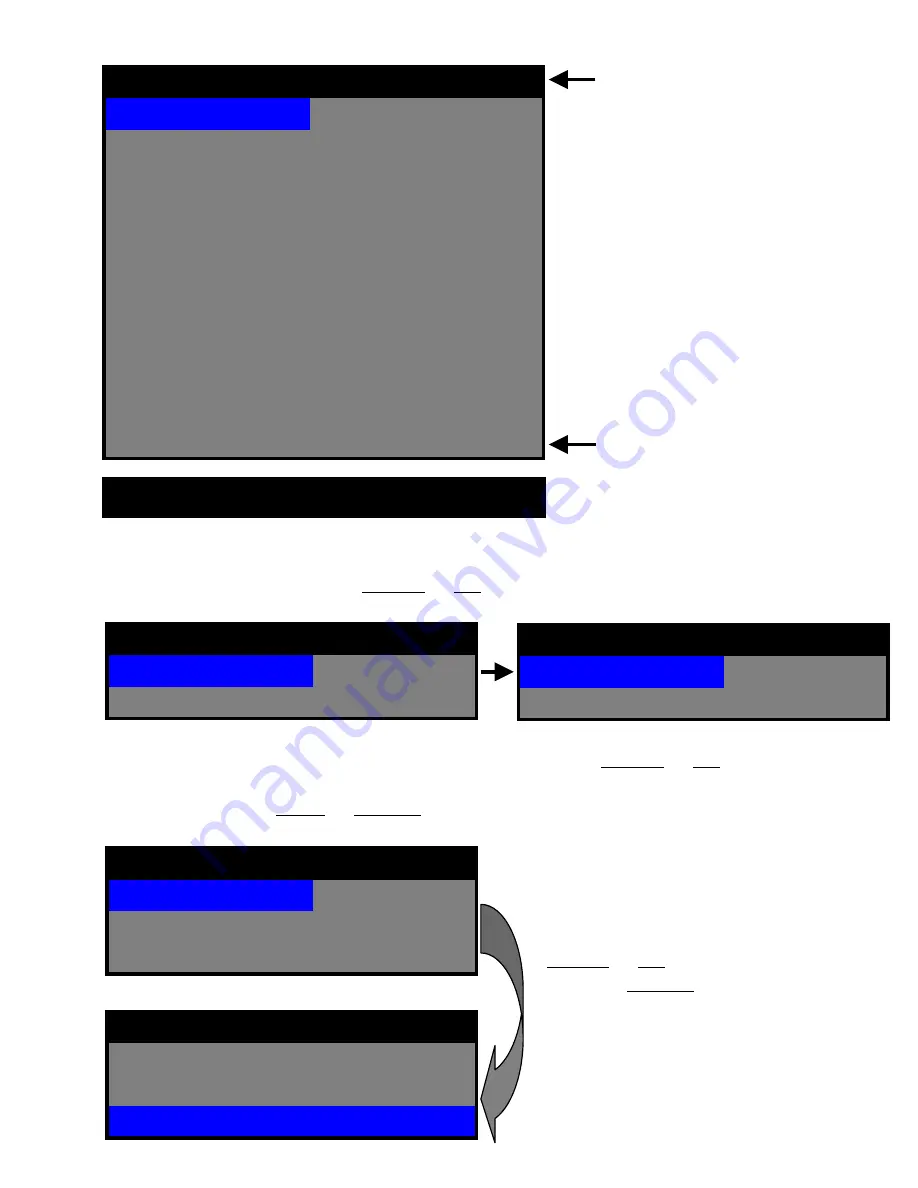
11. Search List 

Search list can be sorted all the recorded file as 

ALL/ TIME/ MANUAL/ ALARM/ 

MOTION/ SCHEDULE 

using 

DOWN

or 

UP

button for fast file searching. 

10-15-2004    23:10

10-15-2004    22:00

10

10-15-2004    21:50

10-15-2004    21:20

9

10-15-2004    20:25

10-15-2004    20:20

8

10-15-2004    19:25

10-15-2004    19:20

7

10-15-2004    18:50

10-15-2004    17:20

10-15-2004    15:20

10-15-2004     14:20

10-15-2004    13:20

10-15-2004    11:20

ALL

ALL

10-15-2004

LIST TYPE

10-15-2004    18:20

6

10-15-2004     16:20

5

10-15-2004    14:20

4

10-15-2004    13:20

3

10-15-2004   12:20

2

10-15-2004   10:20

1

SEARCH LIST                                        10/ 10

The number of  recorded files 

Latest recorded file 

▲ ▼

◀ ▶

EXIT

ENTER

10-15-2004    23:10

10-15-2004    22:00

10

10-15-2004    11:20

ALL

ALL

10-15-2004

LIST TYPE

10-15-2004    10:20

1

SEARCH LIST                                        10/ 10

10-15-2004    23:10

10-15-2004    22:00

10

10-15-2004    11:20

ALL     

ALL      10-15-2004

LIST TYPE

10-15-2004    10:20

1

SEARCH LIST                                        10/ 10

To select recorded file for playback, 

DOWN

or 

UP

button is used after 

pressing ENTER button.        .
Playback will be started by pressing

PLAY/ STOP button (

) button.

10-15-2004    11:20

ALL     

ALL     10-15-2004

LIST TYPE

10-15-2004    10:20

1

SEARCH LIST                                        10/ 10

10-15-2004    11:20

ALL     10-15-2004

LIST TYPE

10-15-2004    10:20

1

SEARCH LIST                                        10/ 10

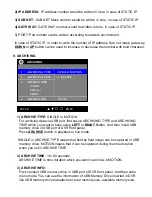
Change the numbers by highlighting them and using the 

DOWN

or 

UP

button to

increase or decrease the number for year/ month/ date after moving from ALL to 
2004-10-** using 

LEFT

or 

RIGHT 

Button.

Summary of Contents for SDVR-PRO1004

Page 1: ...4CH Digital Video Recorder User s Manual SDVR PRO1004 November 2004 ...
Page 2: ...nstitute a risk of electric shock to persons The exclamation point within an equilateral triangle is intended to alert the user to the presence of importance operating and maintenance servicing instructions in the literature accompanying the appliance Warning To reduce the risk of fire or electric shock Do not expose this product to rain or moisture Do not insert any metallic object through ventil...

Page 3: ...tors to enable compliance with emission limits the instruction manual for the EUT shall include appropriate instruction on the first page of the text concerned with the installation of the device that these special accessories must be used with the device It is the responsibility of the user to use the needed special accessories supplied with the equipment For a CLASS A digital device or periphera...

Page 4: ...stall the product on a flat floor not closed and retain the distance of more than 15 cm from the rear panel to the wall z Install the product on a well ventilated place z Keep it away from strong magnetism or electromagnetic wave z Installing it near radio equipment such as TV and radio may cause a fault z Do not install it on a place that is exposed directly to the sun or contains lots of heat su...

Page 5: ...osed terminal z For the power off of system normally turn off the power of the program and then power off the peripherals Do not power it off with the power button on the front panel of body z Be careful to prevent a conductive object from falling into a hole that was punched for ventilation z Do not dissemble and remodel the product z Do not place a heavy thing on the body z Do not give a shock d...

Page 6: ...ENU Programming 1 Overview Main Menu 2 SYSTEM SETUP 3 DISPLAY SETUP 4 RECORDING SETUP 5 ALARM SETUP 6 MOTION SETUP 7 WEEKLY SETUP 8 NETWORK SETUP 9 ARCHIVING 10 HDD INFORMATION 11 SEARCH LIST 12 DISPLAY Mode 13 RECORDING Mode 14 PLAYBACK Mode IV Viewing USB archiving image V Remote NetViewer Program Installation APPENDIX 1 Specification 2 Pin Description of connectors ...

Page 7: ...ack it at first and unload it on a flat floor or a place where it is to be located Then verify that the following contents are contained z 4CH DVR z Power code z Rack Mount Bracket z User s manual z Install CD 4CH DVR Power Code Rack Mount Bracket Install CD User s Manual ...

Page 8: ...video recording with 720x480 resolution NTSC Compression M JPEG Standard image high quality 16KB field Multiple Search Engines Date Time Event Records up to 60 NTSC IPS 50 PAL Images per Second Continuous Recording in Disk Overwrite Mode Simultaneously Record Playback and Network Archiving using USB Memory Drive USB 1 1 Storage Class support User friendly Graphical User Interface GUI Manual Schedu...

Page 9: ...3 Front Panel and Rear Panel Connection Power Code Sensor Input Monitor Audio Out Audio Input Alarm Output LAN Ethernet Cameras RS485 RTZ Camera USB Memory Drive RS232C ...

Page 10: ...l be displayed to begin playback After selecting one recorded file playback will be started by PLAY STOP button 5 FF Press FF to perform high speed forward playback 6 REW Press REW to perform high speed backward playback 7 PAUSE Press PAUSE to pause playback NOTE Still image will be displayed For single image forward in PAUSE PAUSE button can be pressed 8 MENU ESC Press MENU ESC button to enter me...

Page 11: ...erformed when network LED is lit 3 Archiving indicator Indicates archiving has been doing when archiving LED is lit 11 Direction Number buttons It is consists of UP 1 RIGHT 2 DOWN 3 LEFT 4 buttons NOTE These buttons is used in numbering input for password in left right movement and increasing decreasing parameter for MENU 12 ENTER button Press ENTER button to confirm a selection ...

Page 12: ...nnectors If the connection of loop through video outputs into another video equipments is requested 4CH Loop Through outputs can be utilized for it If loop through video outputs will be connected to another video equipments 75 Ohm termination switch should be OFF Then another video equipments should be 75 ohm terminated 4 Video Output 1 composite video output Connect this video output to monitor s...

Page 13: ...easing the button tug gently on the wire to make certain it is connected To disconnect a wire press and hold the button above the wire and pull out the wire 4 Alarm Inputs 1 2 3 4 G Ground You can use external devices to signal the DVR to react to events Mechanical or electrical switches can be wired to the Alarm Inputs and GND Ground connectors The threshold voltage is 4 3V and should be stable a...

Page 14: ...NE NONE HOLIDAY 00 00 00 00 00 00 00 00 00 00 00 00 00 00 WEEK START DURATION 00 00 SUN 00 00 SAT 00 00 FRI 00 00 THU 00 00 WED 00 00 TUE 00 00 MON WEEKLY SCHEDULE PORT 5 CONNECT 1 GATE WAY 4 SUB NET 3 IP ADD 2 NETWORK SETUP ARCHIVE LOG 4 ARCHIVING TYPE 1 ARCHIVE INFO NAME TOTAL 3 ARCHIVING TIME 2 ARCHIVING OVERWRITE 3 MASTER HDD 1 FORMAT HDD 2 FREE TOTAL HDD INFORMATION POP UP DISPLAY 6 VIDEO LOS...

Page 15: ...ETWORK SETUP 7 WEEKLY SCHEDULE 6 ALARM SETUP 4 RECORDING SETUP 3 DISPLAY SETUP 2 MAIN MENU NOTE To access the DVR Main Menu press MENU ESC To escape MENU MENU ESC button is also used Buttons for movement in Menu are 4 2 Button for selection is ENTER Buttons for increasing or decreasing parameter are 1 3 Press MENU ESC to return to the previous MENU after setting and to save the values of setup Í L...

Page 16: ...ion will be displayed on VIDEO FORMAT User don t need to change video format 2 PASSWORD Move Highlight bar to PASSWORD in the SYSTEM Menu using DOWN or UP button And then press ENTER to change password For four digit password input UP 1 RIGHT 2 DOWN 3 LEFT 4 buttons are used NOTE Factory Default is 1111 Press UP button four times OLD PASSWORD 2 SYSTEM SETUP Input old password Factory Default is 11...

Page 17: ...tton Date format can be changed using LEFT or RIGHT button 6 DATE TIME SET Move Highlight bar to DATE TIME SET in the SYSTEM Menu using DOWN or UP button And then press ENTER to set the time NOTE 1 If you set a date and time that is older than some of your recorded images it is not easy to manage recorded files 2 Before starting your DVR DATE TIME should be setting properly 2004 01 11 10 50 11 DAT...

Page 18: ...ry dark maximum value is 99 very bright CONTRAST 1 to 99 CONTRAST can be changed using LEFT or RIGHT button PTZ TYPE Pan Tilt and zooming protocol selection The high end camera s with panning tilting and zooming function would be connected with some of video inputs The camera s has have its own control protocol to control panning tilting and zooming according to PTZ camera manufacturer In order to...

Page 19: ...N OFF When it is set as OFF pop up image of camera which motion detection or alarm triggering is occurred will not displayed 7 DEFAULT Return to factory default mode NOTE Factory default is 50 for BRIGHTNESS 31 for CONTRAST NONE for SEQ DWELL TIME 4 RECORDING SETUP To access RECORDING SETUP press ENTER when RECORDING SETUP in MAIN MENU using DOWN or UP is highlighted with blue color The menu above...

Page 20: ...PAL It can be selected using LEFT or RIGHT button 2 DURATION It define recording duration after motion is detected This DVR support 10 sec 30 sec 1 2 3 4 5 6 7 8 9 10 20 30 40 50 60 minutes It can be selected using LEFT or RIGHT button 3 SENSOR TYPE NONE N O N C Your DVR can select the input type for external alarm inputs which usually has normal open or normal close using LEFT or RIGHT button 4 T...

Page 21: ... 5 IPS for NTSC 50 25 16 10 5 1 0 5 IPS for PAL It can be selected using LEFT or RIGHT button 3 DURATION It define recording duration after motion is detected This DVR support 10 sec 30sec 1 2 3 4 5 6 7 8 9 10 20 30 40 50 60 minutes It can be selected using LEFT or RIGHT button 4 CAM1 CAM2 CAM3 CAM4 DISABLE ALL SETUP Motion Enable Disable Motion zone can be selected separately for each of four cam...

Page 22: ...F NONE NONE HOLIDAY OFF OFF OFF OFF OFF OFF OFF 00 00 00 00 00 00 00 00 00 00 00 00 00 00 WEEK START DURATION 00 00 SUN 00 00 SAT 00 00 FRI 00 00 THU 00 00 WED 00 00 TUE 00 00 MON WEEKLY SCHEDULE 6 EXIT ENTER To setup WEEKLY SCHEDULE press ENTER when WEEKLY SCHEDULE in MAIN MENU using DOWN or UP button is highlighted with blue color The menu above will appear on monitor OFF NONE NONE WEEK OFF OFF ...

Page 23: ...RATION means total recording time duration HOLIDAY is for holiday recording setup It can be adjusted from SUN to SAT 8 NETWORK SETUP To access NETWORK SETUP press ENTER when NETWORK SETUP in MAIN MENU using DOWN or UP is highlighted with blue color The menu above will appear on monitor 1 CONNECT STATIC or DHCP You DVR can select STATIC IP or DHCP using LEFT or RIGHT Button If static IP be selected...

Page 24: ...CHIVING 8 1 ARCHIVE TYPE SINGLE or MOTION For archiving data via USB port first set up ARCHIVING TYPE and ARCHIVING TIME which you want to have using LEFT or RIGHT Button And then insert USB memory drive in USB port of DVR front panel Press ARCHIVE button in playback or live mode SINGLE in ARCHIVE TYPE means that field by field image can be captured in USB memory drive MOTION means that it can be ...

Page 25: ...ed image it needs NetViewer program For the installation of NetViewer program in PC Setup exe in NetViewer S W CD can be executed To playback archived image file in USB memory driver First connect USB memory drive to PC then execute Netviewer program NOTE For more detail information about NetViewer program confer the user s manual of NetViewer program The procedure of archived file playback using ...

Page 26: ...ter searching the image files double click the file And then it will be playbacked 2 Slide bar In order to move much faster the archived image where you want to see just drag this slice bar forward or backward 3 Move to beginning of archived images 4 Move single frame backward 5 Playback button 6 Stop PAUSE button 7 Move single frame forward 8 Move to end of archived images ...

Page 27: ... space 2 FORMAT HDD This support quick HDD format function To format HDD in FORMAT HDD first select YES using LEFT or RIGHT Button and then press ENTER button Press ENTER button again after MASTER is displayed Then quick format is implemented with CONFIRM 3 OVERWRITE Your DVR can be enable or disable HDD overwrite when HDD is full EXIT ENTER OFF OVERWRITE 3 NO 111GB 111GB WDC WD1200 MASTER HDD 1 F...

Page 28: ...ed files Latest recorded file EXIT ENTER 10 15 2004 23 10 10 15 2004 22 00 10 10 15 2004 11 20 ALL ALL 10 15 2004 LIST TYPE 10 15 2004 10 20 1 SEARCH LIST 10 10 10 15 2004 23 10 10 15 2004 22 00 10 10 15 2004 11 20 ALL ALL 10 15 2004 LIST TYPE 10 15 2004 10 20 1 SEARCH LIST 10 10 To select recorded file for playback DOWN or UP button is used after pressing ENTER button Playback will be started by ...

Page 29: ...g the recorded file using DOWN or UP button 11 20 2004 23 10 11 20 2004 22 00 2 11 20 2004 11 20 TIME TIME 11 20 2004 10 33 LIST TYPE 11 20 2004 10 33 1 SEARCH LIST 2 2 12 DISPLAY Mode There are three kind of display modes such as single as full QUAD sequential mode regardless recording mode When there are motion detection or alarm triggering the video channel which motion is detected or alarm is ...

Page 30: ...utton after recorded file selection in search list While your DVR is in playback mode the camera channel which want to watch could be selected by UP 1 RIGHT 2 DOWN 3 LEFT 4 button Fast forward FF or fast backward playback REW can be done by FF and REW button In order to freeze picture in playback PAUSE button is used The movement of single field in still picture mode can be fulfilled by PAUSE butt...

Page 31: ...g option Choose recording section at 1min time intervals during days of week Schedule Recording 60 Field per Sec NTSC 50 Field per Sec PAL Display 60 30 15 10 5 1 0 5 NTSC 50 25 12 6 5 1 0 5 PAL Recording 60 fps NTSC 50 fps PAL Recording Frame Rate IPS Record Playback Network Triplex Embedded Linux OS M JPEG modified Compression Algorithm NTSC 720x480 PAL 720x576 Full Mode 4Ch Multiplexing Recordi...

Page 32: ...44 5 H 17 1 x 14 2 x 1 73 19 rack mountable 1U Mechanical AC100 240V 50 60Hz Power Supply USB 1 1 for data export M JPEG format Note Memory Key not included in the package Archiving Data storing in sequence Not decrease HDD lifetime No loss of data by FAT breakage Efficient HDD space increase Pre formatting not required Automatic formatting by system HDD Management ...

Page 33: ...o connected 7 RXD 6 No connected 5 No connected 4 RXD 3 TXD 2 TXD 1 Pin description Pin NO SHIELD 5 GND 4 D TX 3 D TX 2 VCC 1 Pin description Pin NO 1 5 1 8 3 RS485 Pin Descriptions GND 3 RS485 D TX 2 RS485 D TX 1 Pin description Pin NO 1 3 DVR RS485 D RX RS485 D RX Pin description Pin NO Slave Unit like PTZ Camera ...

Page 34: ...ected DCD 1 Pin description Pin NO DVR Communication Unit Like PC 1 9 No connected 9 No connected 8 No connected 7 No connected 6 GND 5 No connected 4 TXD 3 RXD 2 No connected 1 Pin description Pin 5 Alarm Input Outputs Pin Descriptions Common 8 Relay output with normal close 7 Relay output with normal open 6 Ground 5 Sensor input 1 Sensor input 4 1 4 Pin description Pin NO 1 8 ...

Page 35: ...se z Service fee and replacement parts will be charged in below cases 1 Damaged the user s carelessness 2 Damaged due to a natural disaster 3 Damaged due to the user not following the instructions and cautions written in the user s guide 4 Damaged due to incorrect power voltage and or frequency being used 5 If the Product Warranty sheet is expired 6 Damaged due to an engineer not employed by SIGNA...

Reviews: