9
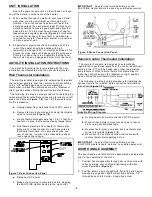
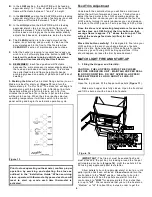
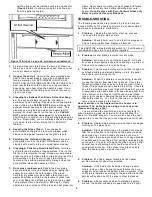
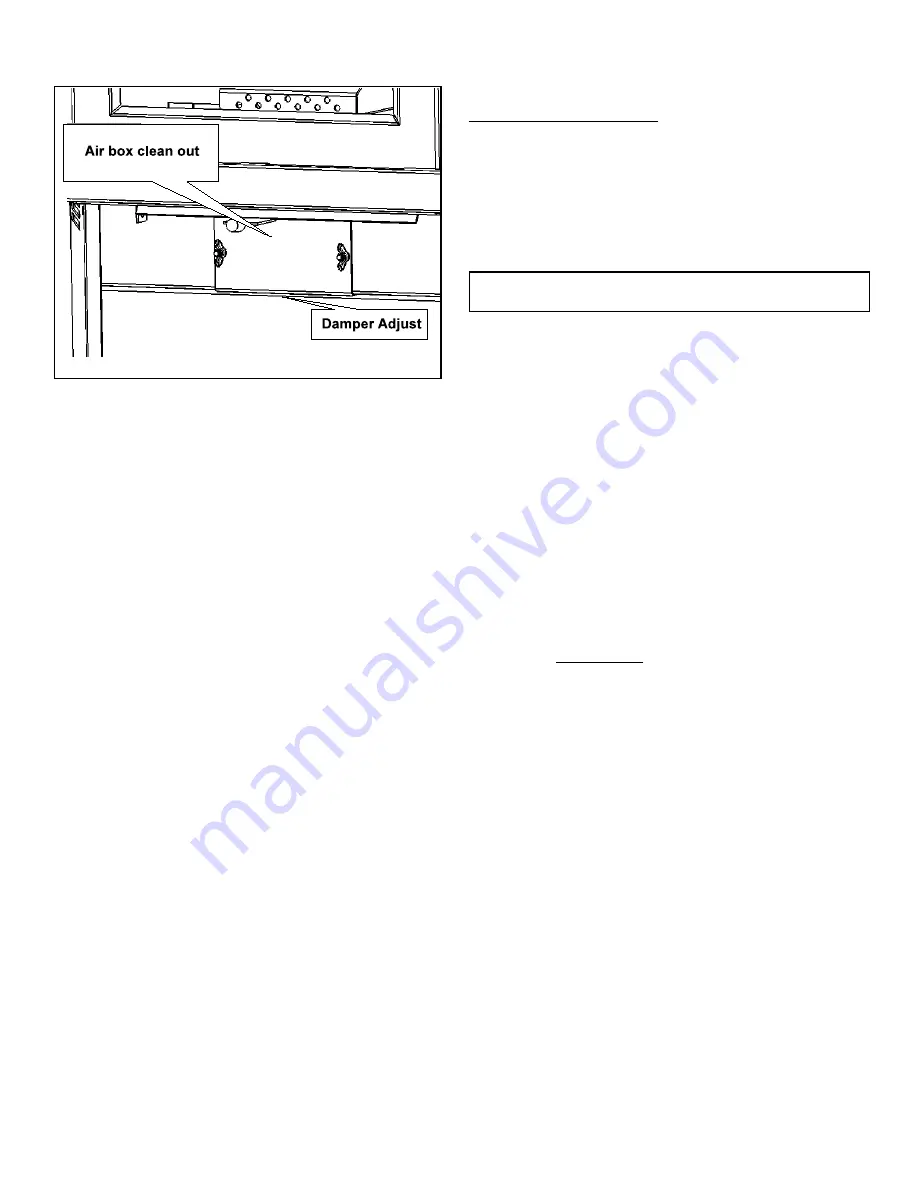
Figure 18
Air box clean out, air dam per adjustm ent
The EASYFIRE will autom atically switch to 12 volt backup
provided you have the 12 volt option installed.
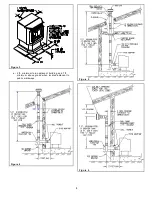
existing flue m ust be installed with a tee connector
(
Figure 3,4,& 5
) to allow access to clean the ash
from the pellet vent pipe.
f.
Fly-ash will accum ulate below the burn pot. Rem ove
the air box clean out and depose of ash. Use care not
m ove air dam per setting.
2.
Hopper Clean Out:
Vacuum the accum ulated saw
dust in the hopper weekly. Keep free of debris and
foreign m aterial. AN ACCUMULATION OF SAW
DUST CAN CAUSE IRREG ULAR PELLET FEED. For
best results this should be done on a regular basis
depending upon how often the heater is used. If you
burn the heater all the tim e you should do this every
eight to ten days.
3.
Cleaning the Exhaust Fan Blade & Heat Exchang-
er:
The exhaust blower should be checked for
excessive fly ash buildup. Regular and routine m ainte-
nance utilizing the
CLEAN OUT
feature will keep the
exhaust blower housing and fan blades clean. This
cleaning can only be done when the heater is NOT
burning. For best results run the fan in the
CLEAN
OUT
position
w ith the door open
for approxim ately
one m inute or until ash is no longer being picked up by
the fan. Rem em ber, you m ust always check the clean
out cap on the tee after utilizing the CLEAN OUT
feature.
4.
Keeping the Glass Clean:
If soot deposits
accum ulate on the glass, clean with window glass
cleaner and a paper towel when the glass is cold.
5.
Polishing the Gold and Chrom e:
All chrom e and
gold plating used on the EASYFIRE heater can be
cleaned with a soft cloth and non-abrasive cleaner.
6.
Cleaning & Polishing Gold Plated Parts:
Gold is a
soft m etal and therefore a fragile surface. Prior to the
first burn it is im portant to use W index or com parable
product and a soft clean cloth to wipe any m arks off all
gold surfaces or the heat will cause the m arks to
rem ain in the surface perm anently. Always clean the
gold surface when the heater is COOL.
7.
Door glass replacem ent:
Should the door glass
becom e broken it m ay be replaced by scraping the
sealer from around the outer edge of the glass.
Carefully pry glass from door fram e then clean all
sealer from fram e. Obtain a replacem ent glass from
your local dealer and attach glass to door using High
Tem perature Silcon Sealer (m in. 400 deg.F). Apply
sealer to all four corners of the glass and set glass into
fram e. Apply sealer to m ating edge of glass and fram e.
Allow two hours dry tim e before installing door onto
heater.
Note: Replace w ith Pyro-Ceram ic G lass only.
Refer to parts list for specifications.
TROUBLE-SHOOTING
The following scenarios are provided in order to help you
locate a difficulty if the heater perform s in a m anner which
would seem to indicate a m alfunction:
l.
Problem :
I loaded the heater for start-up, pressed
“Low” and the heater did not start.
Solution:
Check power cord to see that it is plugged in.
Check 5 am p ignitor fuse. Replace if burned.
2.
Problem :
Heater starts slow with lots of sm oke.
Solution:
a) Check burn pot for ash deposit. b) Check
burn pot is im properly placed and is seating on igniter. c)
Check air box clean out for ash build up.
3.
Problem :
The fire was burning well and then it began to
overfeed pellets and started backing up into the pellet
feed chute, sm othering the fire.
Solution:
W hen the pellets are overfeeding, it usually
m eans that the air flow has been reduced. Check the
firepot air intake holes to be sure they are clear. Check
to see if firepot was properly seated in pot tray. Check to
see if the m anifold m ay have filled with fly ash. If you use
a low grade pellet, and clinkers (fused ash and dirt) form
in the bottom of the firepot, it will choke the air intake
(you m ight consider changing the brand of pellets to one
that burns cleaner). You m ust let the fire go out before
rem oving and cleaning the firepot.
Never vacuum out the heater w hen the heater is in
operation! The hot ashes can lodge in your vacuum
cleaner and cause a fire!
You m ust clean the m anifold and air box regularly in
order to insure a good air to fuel ratio, thus allowing the
heater to "breathe" properly. You m ust also check the vent
pipe and tee to see that they are not clogged and full of ash.
4.
Problem :
Heater was burning well and then soot began
form ing on the glass door.
Solution:
Black soot form ing on the glass door m eans
that the com bustion is not right and the heater needs a
good clean out. Som e brands of pellets burn m uch
richer than others and you m ight have to change brands
of pellets and/or have the air/fuel settings re-adjusted by
your dealer. It is norm al to have the glass cloud up after
several hours of burning but it should wipe off with a
good window cleaner. If the glass turns black quickly,
then the heater needs a good clean out.
5.
Problem :
W e had a power failure and the heater
em itted sm oke for about five m inutes.
Solution:
If the heater em its sm oke during a power
failure, and you have frequent power failures then we
suggest you purchase the battery back-up system . If the
vent pipe is installed according to these instructions the
sm oke will syphon out of the pipe in m ost instances.
6.
Problem :
After several weeks of outstanding perfor-
m ance, the heater suddenly stopped and the red light

