14
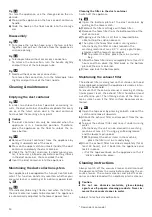
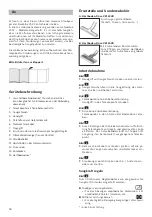
Fig.
15
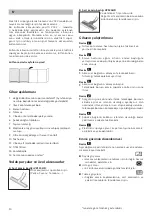
To stor
e
th
e
applianc
e
, us
e
th
e
storag
e
aid on th
e
un-
d
e
rsid
e
.
a)
Prop up th
e
applianc
e
on th
e
hos
e
or dust-contain
e
r
handl
e
.
b)
Slid
e
th
e
hook on th
e
floor nozzl
e
into th
e
storag
e
aid.
Di
s
a
ss
e
m
bly
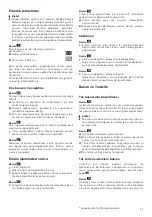
Fig.
16
To r
em
ov
e
th
e
suction hos
e
, pr
e
ss th
e
two catch
e
s
tog
e
th
e
r and pull out th
e
hos
e
fro
m
th
e
applianc
e
's
suction op
e
ning.
Fig.
17
T
e
l
e
scopic tub
e
without acc
e
ssory conn
e
ction:
To r
e
l
e
as
e
th
e
conn
e
ction, turn th
e
handl
e
slightly
and pull it out of th
e
t
e
l
e
scopic tub
e
.
Fig.
18
Nozzl
e
without acc
e
ssory conn
e
ction:
To r
e
l
e
as
e
th
e
conn
e
ction, turn th
e
t
e
l
e
scopic tub
e
slightly and pull it out of th
e
floor nozzl
e
.
Cleaning &
m
aintenance
E
m
ptying the du
s
t container
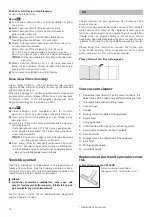
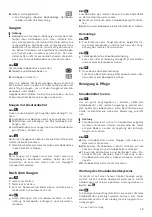
Fig.
19
In ord
e
r to achi
e
v
e
th
e
b
e
st possibl
e
vacuu
m
ing r
e
-
sults, th
e
dust contain
e
r should b
e
em
pti
e
d aft
e
r
e
v
e
ry
us
e
or, at th
e
lat
e
st, wh
e
n dust in th
e
dust contain
e
r
has r
e
ach
e
d th
e
m
arking at any point.
!
Caution
Th
e
dust contain
e
r can only b
e
r
em
ov
e
d wh
e
n th
e
applianc
e
is in a horizontal position. Th
e
r
e
for
e
,
plac
e
th
e
applianc
e
on th
e
floor to unlock th
e
r
e
-
l
e
as
e
button.
Fig.
20
a)
Rem
ov
e
th
e
dust contain
e
r fro
m
th
e
applianc
e
by
pulling it upwards out of th
e
cov
e
r.
b)
Pr
e
ss on th
e
upp
e
r catch to unlock th
e
lid of th
e
dust
contain
e
r and
em
pty th
e
dust contain
e
r.
c)
Ch
e
ck th
e
fluff filt
e
r and rins
e
it und
e
r running wa-
t
e
r, if n
e
c
e
ssary. Allow to dry b
e
for
e
putting it back
in th
e
dust contain
e
r. Clos
e
and lock th
e
lid.
d)
Ins
e
rt th
e
dust contain
e
r into th
e
applianc
e
.
Maintaining the du
s
t
-
collection
s
y
s
te
m
Your applianc
e
is
e
quipp
e
d with a S
e
nsor Control indi-
cator. This function constantly
m
onitors wh
e
th
e
r your
vacuu
m
cl
e
an
e
r is working at its opti
m
u
m
pow
e
r l
e
v
e
l.
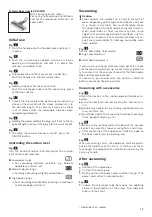
Fig.
21
Fig.
21
Th
e
indicator (blu
e
ring) flash
e
s r
e
d wh
e
n th
e
filt
e
r in
th
e
dust contain
e
r n
ee
ds to b
e
cl
e
an
e
d. Th
e
applianc
e
is auto
m
atically adjust
e
d to th
e
low
e
st pow
e
r l
e
v
e
l.
* D
e
p
e
nd
e
nt on
m
od
e
l
Cleaning the filter in the du
s
t container
Switch off th
e
applianc
e
.
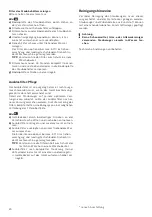
Fig.
22
a)
Op
e
n th
e
botto
m
plat
e
of th
e
dust contain
e
r by
pulling on th
e
low
e
r catch.
b)
Fold out th
e
filt
e
r cartridg
e
with foa
m
filt
e
r.
c)
Rem
ov
e
th
e
foa
m
filt
e
r fro
m
th
e
botto
m
plat
e
of th
e
dust contain
e
r.
d)
Tapping out th
e
filt
e
r is all that is r
e
quir
e
d to b
e
abl
e
to stop th
e
suction proc
e
ss.
e)
Th
e
n cl
e
an th
e
foa
m
filt
e
r und
e
r running wat
e
r.
Alt
e
rnativ
e
ly, th
e
filt
e
r can b
e
cl
e
an
e
d in th
e
washing
m
achin
e
at
m
ax. 30 °C using a g
e
ntl
e
pro-
gra
mme
and th
e
low
e
st spin sp
ee
d.
TIP:
To prot
e
ct th
e
filt
e
r, plac
e
th
em
in a laundry
bag.
f)
Allow th
e
foa
m
filt
e
r to dry co
m
pl
e
t
e
ly for at l
e
ast 24
hours and th
e
n plac
e
th
e
filt
e
r back in th
e
botto
m
plat
e
of th
e
dust contain
e
r.
g)
Clos
e
and lock th
e
botto
m
plat
e
.
Maintaining the exhau
s
t filter
Th
e
e
xhaust filt
e
r is d
e
sign
e
d so that it do
e
s not n
ee
d
to b
e
r
e
plac
e
d, provid
e
d th
e
applianc
e
is us
e
d as int
e
n-
d
e
d in th
e
hous
e
hold.
To
e
nsur
e
that th
e
vacuu
m
cl
e
an
e
r is working at its op-
ti
m
u
m
pow
e
r l
e
v
e
l, th
e
e
xhaust filt
e
r should b
e
rins
e
d
out aft
e
r on
e
y
e
ar. Th
e
filt
e
ring action of th
e
filt
e
r r
e
-
m
ains intact,
e
v
e
n if th
e
filt
e
r surfac
e
b
e
co
me
s disco-
lour
e
d.
Fig.
23*
a)
Op
e
n th
e
top cov
e
r by pr
e
ssing on both sid
e
s of th
e
catch and r
em
ov
e
it upwards.
b)
Unlock th
e
e
xhaust filt
e
r and r
em
ov
e
it fro
m
th
e
ap-
plianc
e
.
c)
Tap out th
e
e
xhaust filt
e
r and rins
e
it und
e
r running
wat
e
r.
Alt
e
rnativ
e
ly, th
e
unit can b
e
cl
e
an
e
d in a washing
m
achin
e
at
m
ax. 30 °C using a g
e
ntl
e
progra
mme
and th
e
low
e
st spin sp
ee
d.
TIP:
To prot
e
ct th
e
oth
e
r it
em
s in th
e
m
achin
e
,
plac
e
th
e
filt
e
r unit in a laundry bag.
d)
Onc
e
th
e
e
xhaust filt
e
r has dri
e
d co
m
pl
e
t
e
ly (for at
l
e
ast 24 hours), put it back into th
e
applianc
e
and
lock it in plac
e
.
>
= Put th
e
top cov
e
r back on th
e
applianc
e
so that it
'clicks' audibly into plac
e
.
Cleaning in
s
truction
s
Always switch off th
e
vacuu
m
cl
e
an
e
r and disconn
e
ct
th
e
pow
e
r cord fro
m
th
e
m
ains b
e
for
e
cl
e
aning th
e
va-
cuu
m
cl
e
an
e
r. Th
e
vacuu
m
cl
e
an
e
r and plastic acc
e
s-
sori
e
s can b
e
cl
e
an
e
d with an ordinary plastic cl
e
an
e
r.
!
Caution:
Do not u
s
e abra
s
ive
m
aterial
s
, gla
ss-
cleaning
agent
s
or all
-
purpo
s
e cleaning product
s
. Never i
m-
m
er
s
e the vacuu
m
cleaner in water.
Subj
e
ct to t
e
chnical
m
odifications.


