background image

Chapter 2

Sm@rt DAS System

Breaker Requirements

The Sm@rt DAS system requires certain features in both the 
WL and VL breakers. This section highlights the requirements 
for breakers as well as the features for each breaker with  
Sm@rt DAS.

WL 

Features


  ETU 776 required


  

COM16

Normal settings


  

Parameter A on breaker


  

Default settings are minimum


 

 Adjust on breaker to change

DAS (maintenance mode) settings


  

Parameter B on breaker

  

   Default settings are minimum


  

Adjust on breaker to change

VL

Features


  

ETU 586


 

 COM21

Normal settings


  

Parameters on breaker 


  

Default settings are minimum


 

 Adjust on breaker to change

DAS (maintenance mode) settings


  

Stored in controller


  

Default settings are minimum


  

Adjustable settings are:

      - Short time delay (A)
      - Short time delay (ms)
      - Instantaneous (A)
   

  

To adjust settings, see Chapter 4

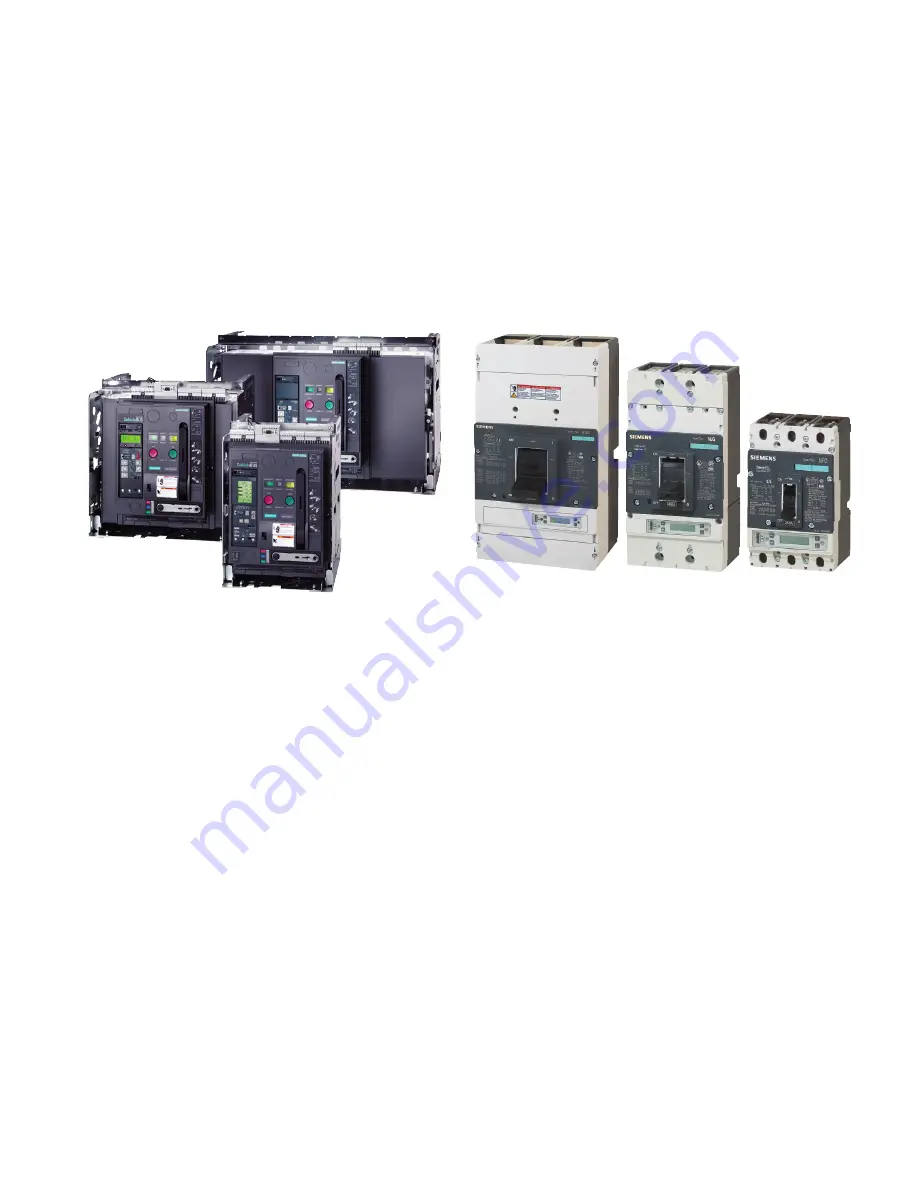
Figure 2.5:

 WL Breakers

Figure 2.6:

 VL Breakers


7

Summary of Contents for Sm@rt DAS

Page 1: ...Siemens Sm rt DAS usa siemens com smartgear User Guide ...

Page 2: ... with the installation construction operation or maintenance of the equipment and the hazards involved In addition this person has the following qualifications a is trained and authorized to de energize clear ground and tag circuits and equipment in accordance with established safety practices b is trained in the correct care and use of protective equipment such as rubber gloves hard hat safety gl...

Page 3: ...ens The warranty contained in the contract between the parties is the sole warranty of Siemens Any statements contained herein do not create new warranties or modify the existing warranty Chapter 1 Introduction 4 Overview 4 Chapter 2 Sm rt DAS System 5 Introduction 5 Controller 5 Gateway 6 Breaker Comm Modules 7 Breaker Requirements 7 Chapter 3 System Interface 8 Introduction 8 One Switch and Ligh...

Page 4: ...The Sm rt DAS system is used to control maintenance mode of VL and WL breakers in Type WL Switchgear SB Switchboards P4 and P5 Panelboards The controller switches DAS on off for a combination of up to 10 VL WL breakers For larger systems multiple controllers will be used The Sm rt DAS controller allows the panel to respond to triggering of maintenance mode via digital inputs MODBUS or HMI commands...

Page 5: ...put requires 24V to activate This is typically done via an activation switch Digital Outputs Each breaker in the Sm rt DAS system has an assigned output from the controller When it is confirmed that a breaker is in maintenance mode 24V DC appears in the output The outputs can drive indicators typically blue LEDs for visual confirmation of system status Ethernet connection The Sm rt DAS controller ...

Page 6: ...wer Supply 120VAC or 24VDC MODBUS RTU Second RJ45 port Ethernet Gateway Figure 2 2 Ethernet Gateway Breaker Comm Modules COM21 VL Breakers Switchboards and Panelboards The COM21 module connects VL breakers to the Sm rt DAS system COM16 WL Breakers Switchgear and Switchboards The COM16 module connects WL breakers to the Sm rt DAS system Figure 2 4 WL MODBUS module Figure 2 3 VL MODBUS module 6 ...

Page 7: ...settings are minimum Adjust on breaker to change DAS maintenance mode settings Parameter B on breaker Default settings are minimum Adjust on breaker to change VL Features ETU 586 COM21 Normal settings Parameters on breaker Default settings are minimum Adjust on breaker to change DAS maintenance mode settings Stored in controller Default settings are minimum Adjustable settings are Short time delay...

Page 8: ...ach input activates maintenance mode for one breaker There is also a dedicated output for each breaker that confirms when the breaker has entered maintenance mode Figure 3 1 highlights the configuration For example Input 0 I 0 and Output 0 O 0 will be the input and output controlling maintenance mode on breaker one Introduction There are three different ways to activate the Sm rt DAS system Switch...

Page 9: ...ystem One Light per Breaker The second architecture is a single switch that is toggled to turn all breakers into maintenance mode The output indicators will turn on sequentially once maintenance mode has been verified on each breaker I 0 I 1 I 2 I 3 I 4 I 5 I 6 I 7 I 8 I 9 O 0 O 1 O 2 O 3 O 4 O 5 O 6 O 7 O 8 O 9 Ethernet MODBUS TCP IP Power Supply 120VAC or 24VDC 24VDC Single Switch Input Output L...

Page 10: ... the WL HMI with VL Breakers The HMI option offers more features for the VL breaker Figure 3 4 shows an example of the VL HMI screen From the screen maintenance mode can turn on and off In addition the instantaneous pickup short time pickup and short time pickup delay can be adjusted from this panel The HMI option is best used for ease of access to the maintenance mode settings on the VL breaker W...

Page 11: ...ed at the time of ordering For the controller the next address would be 192 168 0 76 followed by 192 168 0 78 The increase of 2 on the address is due to the gateway filling in between these values In order to activate DAS over MODBUS you will need a MODBUS program Siemens has a program called Sm rt DAS MODBUS Communication Module that can be used to read and write settings for Windows 7 and later ...

Page 12: ...ding Management System or other supervisory system Table 4 2 shows the MODBUS system codes if integration is needed to upstream devices In order to permanently connect the Sm rt DAS to an upstream system the second RJ45 port of the gateway can be used An Ethernet switch will need to be placed between the controller and gateway Figure 4 2 4 3 if several external connections are needed Figure 4 1 Et...

Page 13: ...ws MODBUS function codes used to access data from devices For Sm rt DAS Code 03 is used to read holding registers and Code 16 is used to write the holding registers Code Description 01 Read coil status 02 Read input status 03 Read holding registers 04 Read input registers 05 Force single coil 06 Preset single register 10 Write multiple registers 15 Force multiple registers 16 Preset multiple regis...

Page 14: ...US module available through the Siemens Download Center It can be used by connecting directly to the PLC or connecting through an Ethernet switch It is used to change maintenance mode settings and can remotely activate maintenance mode The software is compatible with Windows 7 and later Figure 4 4 Sm rt DAS MODBUS Communication Module HMI 14 ...

Page 15: ...ou can connect through the gateway directly Direct to the PLC Start by plugging an Ethernet cable directly into the PLC and ensure all other network connections are closed Once plugged in open the control panel on the PC and follow the following menu options Go to the Network and Sharing Center Select Change Adaptor Settings Right click on Local Area Network and select Properties Select Internet P...

Page 16: ...s highlighted in 4 as well as activate DAS For WL breakers you can only activate DAS 4 Once new settings are entered click Write States 5 You can verify the new settings on the module and breaker by re running read states For changing VL settings it is recommended to put the breaker in DAS mode either via switch or the software and check states on the breaker to verify the new settings You must re...

Page 17: ... W 1 16 15 DAS State 1 DAS on 0 DAS off R 2 17 15 Switch State DAS switch 1 switch on 0 switch off R 3 18 15 Current IOC Reads breakers instantaneous on VL breakers For WL 0 Param A 1 Param B R 4 19 15 DAS IOC Instantaneous when DAS on 2X breaker rating would be default VL only R W 5 20 15 DAS IOC State 1 DAS state 0 nominal state R 6 21 15 DAS ST Pu Short time setting when DAS on default is 1 5X ...

Page 18: ... 10 breaker IP addresses will be 192 168 0 77 02 The slave address to each device is documented on the drawings submitted with the switchboard or switchgear Figure 4 7 shows where the slave address is documented on record drawings The addresses start at one and increment by one top to bottom left to right See Figure 4 1 for details Refer to the Circuit Breakers with Communication Capability SENTRO...

Page 19: ...1 is located in panel mounted compartments with the VL breakers or in a full aux compartment if they are individually mounted See Figure 5 1 for an example of which LED lights should be lit on comm Ensure Sm rt DAS controller has control power by checking the LEDs in Figure 5 2 The Sm rt DAS controller will be in the main device aux compartment if available or in the panel mounted aux compartment ...

Page 20: ...ew will show the breakers with Sm rt DAS highlighted in Figure 5 4 Parameter A should be shown on the center of the trip unit screen as in Figure 5 5 Turn the DAS switch the blue light should come on next to the switch The WL breaker trip unit should also now show Parameter B on the screen Figure 5 5 Indication of active WL parameter set Figure 5 3 Location of switches and lights Figure 5 4 Locati...

Page 21: ...either the default settings which are the minimum or the settings input by the user Turn the DAS switch on for the VL breaker The blue light should then come on Then refresh the instantaneous pickup setting by scrolling up or down on the keypad Scroll back to review the instantaneous settings They should be 1 25x the breaker rating or the settings set earlier into the controller The preset values ...

Page 22: ...ted between any shipping splits Verify Communication Modules have power Check each communication module and verify each has green LEDs on indicating power as per commissioning requirements If not verify power connection wiring Verify device is communicating Each device will have a MODBUS communication light verify that it is green as well when the switch is closed Check wiring to ensure all connec...

Page 23: ...Notes 23 ...

Page 24: ...SA 2016 Siemens Industry Inc Subject to changes and errors The information given in this document only contains general descriptions and or performance features which may not always specifically reflect those described or which may undergo modification in the course of further development of the products The requested performance features are binding only when they are expressly agreed upon in the...

Reviews: