


Section B: The application example as demonstration
system
O
t
t l f th
li
ti
l
Flying Saw with SIMOTION
A4027118-A0414
V 1.4
Release 06/06/08
44/107
C
opyr
ight
©
Si
em
ens
AG 2
0
08
Al
l r
ights r
e
s
e
rv
ed
M
anual_
S
IM
OTION Fl
ying Saw
_
V1
.4.
d
oc
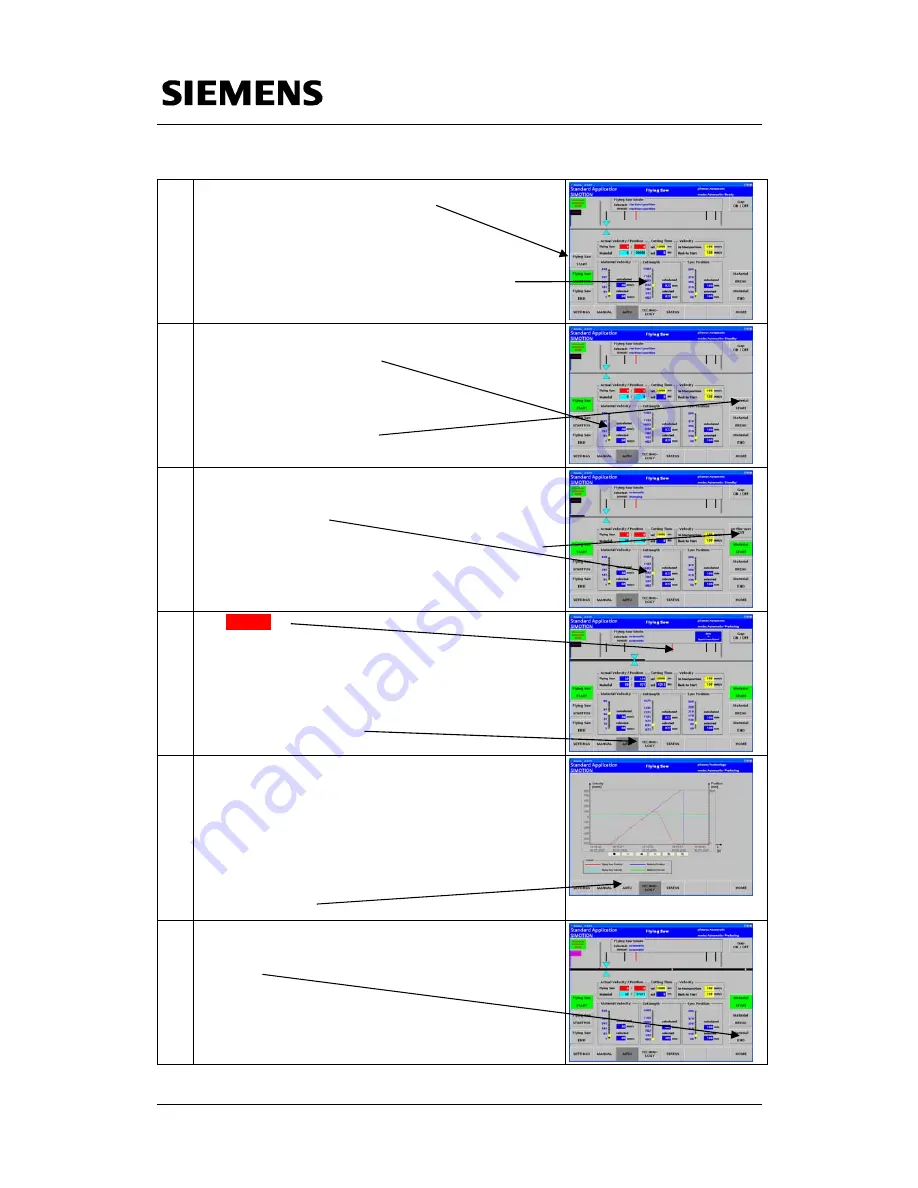
6 Once the “flying saw” has reached its starting position,
the
Flying Saw START
button is
displayed to activate the “flying saw”
Before you activate the “flying saw”, the required cut
length should be selected using the
Cutlength
slider.
7 Now you can start the material feed!
Select the
Material Velocity
using the
Material Velocity slider
You can start the
material feed by pressing
the
Material START
button
8 After the material web starts, the material enters the unit
and the print mark simulation generates, after the length,
set using the
Cutlength
slider switch, a print mark. The
flying saw then makes a cut.
You can immediately generate a print mark using the
on-
the-spot CUT
button – which is also then cut by the flying
saw.
9 The red bar
indicates how far the
flying saw must travel with the material web with the
current setting for one cut.
Activate the technology screen
by pressing the
TECHNOLOGY
button
10 The following are displayed in the technology screen:
•
The actual material velocity
•
The actual velocity of the "flying saw"
•
The actual position of the "flying saw"
•
The position of the material referred to the actual cut
•
You can return to the
automatic screen by pressing
the
AUTO
button
11 The material can be removed
by pressing the
Material END
button


