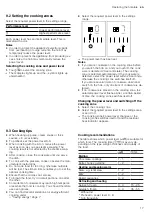
background image

Move function

 en

19

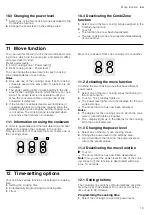
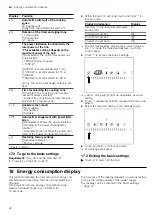
10.3 Changing the power level

1.

Select one of the two cooking zones assigned to the
CombiZone function.

2.

Change the power level in the settings area.

10.4 Deactivating the CombiZone
function

1.

Select one of the two cooking zones assigned to the
CombiZone function.

2.

Touch  ⁠.

a

The function has now been deactivated.

a

The two cooking zones now operate independently
of one another.

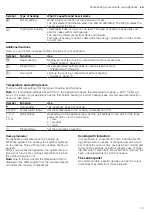
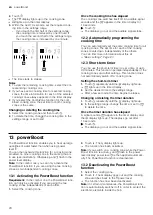
11  Move function

You can use this function to link the two left-hand cook-
ing zones, which are the same size, and select a differ-
ent power level for both.
Preset power levels:

¡

Front cooking zone = Power level 

¡

Rear cooking zone = Power level  ⁠.

You can change the power levels for each cooking
zone independently of each other.

Notes

¡

Only use one of the cooking zones. If both cooking
zones are used at the same time, the function is not
activated.

¡

The power setting lights up less brightly in the dis-
play for the cooking zone on which there is no cook-
ware. The power level is not activated until you
move the cookware to this cooking zone or the
cookware is detected.

¡

If the function is activated and a second piece of
cookware is placed on the free cooking zone, the
display lights up less brightly, but the cooking zone
is not active. The cooking zone is activated when
you remove the first item of cookware.

11.1 Information on using the cookware

In order to guarantee good thermal detection and heat
distribution, position the cookware in the centre.
Only use one item of cookware that only covers one of
the cooking zones:

Move the cookware from one cooking zone to another:

11.2 Activating the move function

Combine the two cooking zones that have different
power levels.

1.

Select one of the two cooking zones that belong to
the move function.

2.

Touch  . The   display lights up.

a

The power level lights up in the displays for the two
cooking zones.

a

The move function has now been activated.

Notes

¡

The display for the cooking zone on which the cook-
ware is located lights up brighter.

¡

The   display lights up in the display for the cooking
zone that is still selected.

11.3 Changing the power level

1.

Select one of the two move cooking zones.

2.

Change the power level in the settings area.

a

If you deactivate the function, the power levels re-
turn to the preset values.

11.4 Deactivating the move function

Touch  ⁠.

a

The move function has now been deactivated.

Note: 

You you set the power level for one of the cook-

ing zones to  , the function is deactivated within ap-
prox. 10 seconds.

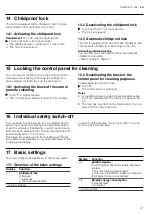
12  Time-setting options

Your hob has various functions for setting the cooking
time:

¡

Setting the cooking time

¡

Automatically programming the cooking time

¡

Timer

12.1 Setting the time

The cooking zone switches off automatically once the
time that is set has elapsed. You can set a cooking
time of up to 99 minutes.

Programming the cooking time

1.

Select the cooking zone and the power level.

Summary of Contents for HL9S5A340

Page 1: ...ee standing cooker HL9S5A340 en User manual Register your product on My Siemens and discover exclusive ser vices and offers siemens home bsh group com welcome The future moving in Siemens Home Appliances ...

Page 2: ...Ø cm 2 1 1 18 1 800W 3 100W 18 x 18 3 600W 14 5 1 400W 2 200W 21 2 200W 3 700W 1 IEC 60335 2 6 ...

Page 3: ... licensed professional may connect ap pliances without plugs Damage caused by in correct connection is not covered under the warranty Only use the appliance as follows To prepare meals and drinks Under supervision Never leave the appli ance unattended when cooking for short periods In private households and in enclosed spaces in a domestic environment Up to an altitude of max 4000 m above sea leve...

Page 4: ...order to avoid touching heating elements Young children under 8 years of age must be kept away from the appliance Hob protective grilles may cause accidents Never use hob protective grilles The hotplate heats up but the display does not work Switch off the fuse in the fuse box Call the customer service Accessories and cookware get very hot Always use oven gloves to remove ac cessories or cookware ...

Page 5: ... these hot parts Keep children at a safe distance Hot steam may escape when you open the appliance door Steam may not be visible de pending on the temperature Open the appliance door carefully Keep children at a safe distance If there is water in the cooking compartment when it is hot this may create hot steam Never pour water into the cooking compart ment when the cooking compartment is hot WARNI...

Page 6: ...Using oven cleaner in a hot cooking compartment damages the enamel Never use oven cleaner in the cooking compartment when it is still warm Remove all food remnants from the cooking com partment and the appliance door before you next heat up the appliance If the seal is very dirty the appliance door will no longer close properly during operation This may dam age the front of adjacent kitchen units ...

Page 7: ...d or enamelled baking tins These types of baking tin absorb the heat particu larly well Open the appliance door as little as possible during operation This will maintain the temperature in the cooking compartment and eliminate the need for the appli ance to reheat When baking multiple dishes do so in succession or in parallel The cooking compartment is heated after baking the first dish This reduc...

Page 8: ...e cookware with a smaller ferromagnetic base only the area that is ferromagnetic heats up As a result the heat is not distributed evenly The temperat ure of the non ferromagnetic area may therefore be too low for cooking Cookware bases that contain aluminium reduce the fer romagnetic area This may reduce the output and the cookware will not be detected sufficiently or at all and will therefore not...

Page 9: ... and ensure that WARNING Risk of electric shock There is a risk of electric shock if you touch live com ponents Hold the mains plug with dry hands only Never pull out the mains plug from the socket while the appliance is in operation Pull out the power cable directly at the plug and never by pulling the power cable as this may be come damaged Fit the mains plug and socket together The mains plug c...

Page 10: ...be heat resistant up to at least 90 C Wall fixing To prevent the appliance from tipping over you must fix it to the wall using the enclosed brackets To secure the appliance to the wall follow the installation instruc tions 5 3 Removing the appliance Unplug the appliance from the mains WARNING Risk of electric shock When you disconnect the appliance from the mains the connections may cause residual...

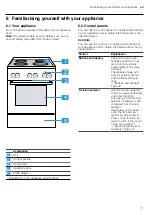
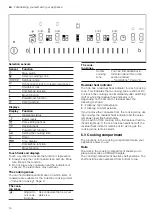
Page 11: ...tatus Controls You can use the controls to configure all functions of your appliance and to obtain information about the op erating status Control Explanation Buttons and display The buttons are touch sensitive surfaces To se lect a function simply press lightly on the relev ant field The display shows sym bols for active functions and the time setting op tions Buttons and display Page 12 Function...

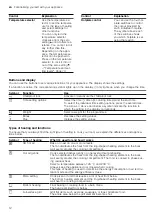
Page 12: ...a symbol indicate the function to which the setting in the display corresponds Weight Select a weight for the programmes Minus Plus Decrease the setting values Increase the setting values Types of heating and functions To ensure that you always find the right type of heating to cook your food we explain the differences and applica tions below Symbol Type of heating What it s used for and how it wo...

Page 13: ...pliance has the top bottom heating or bottom heating types this temperature reduction does not take place Symbol Function Use Zero setting The appliance does not heat up 50 275 Temperature range Set the temperature in the cooking compartment in C 1 2 3 or I II III Grill settings Depending on the appliance type set the grill settings for the grill for the large area and grill or for the small area ...

Page 14: ...le size The cook ing zones Combi cooking zone You can find additional in formation about this in the section entitled combiZone Page 18 Residual heat indicator The hob has a residual heat indicator for each cooking zone This indicates that a cooking zone is still hot Do not touch the cooking zone immediately after switching it off or while the residual heat indicator is lit Depending on the amount...

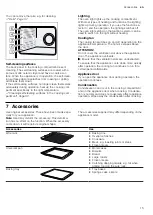
Page 15: ...The hot air escapes above the door ATTENTION Do not cover the ventilation slot above the appliance door The appliance overheats Ensure that the ventilation slots are unobstructed To ensure that the appliance cools down more quickly after operation the cooling fan continues to run for a certain period afterwards Appliance door If you open the appliance door during operation the operation continues ...

Page 16: ...starts at 12 00 Set the current time Requirement The function selector must be set to the off position 1 Use or to set the time 2 Press a The time that is set appears in the display Tip You can define whether the time is shown in the display in the basic settings Page 21 8 2 Cleaning the appliance before using it for the first time Clean the cooking compartment and accessories be fore using the ap...

Page 17: ...tching off the cooking zone 1 Select the cooking zone 2 Select the required power level in the settings area or set it to a The cooking zone s power level changes or the cooking zone switches itself off and the residual heat indicator appears 9 3 Cooking tips When heating up puree cream soups or thick sauces stir occasionally To preheat set the power level 8 9 When cooking with the lid on reduce t...

Page 18: ... stir fries 6 7 6 10 Pancakes cooked one after the other 6 7 Omelette cooked one after the other 3 4 3 10 Fried eggs 5 6 3 6 Deep frying 150 200 g per portion in 1 2 l oil deep fat fried in portions1 Frozen products e g chips chicken nuggets 8 9 Croquettes frozen 7 8 Meat e g chicken portions 6 7 Fish breaded or battered 6 7 Vegetables mushrooms breaded beer battered or tem pura 6 7 Small baked it...

Page 19: ...ng the cookware In order to guarantee good thermal detection and heat distribution position the cookware in the centre Only use one item of cookware that only covers one of the cooking zones Move the cookware from one cooking zone to another 11 2 Activating the move function Combine the two cooking zones that have different power levels 1 Select one of the two cooking zones that belong to the move...

Page 20: ... Setting the short term timer 1 Touch repeatedly until the display lights up a lights up in the timer display 2 Set the desired time in the settings range a After a few seconds the time begins to elapse Changing or deleting the timer duration 1 Touch repeatedly until the display lights up 2 In the settings range change the time or set to to delete the time Once the timer duration has elapsed A sig...

Page 21: ...rol panel for cleaning purposes To deactivate the function early touch a The control panel is unlocked Notes An audible signal sounds 30 seconds after activa tion This indicates that the function is about to fin ish The lock has no effect on the main switch You can switch off the hob at any time 16 Individual safety switch off If you operate a cooking zone for an extended period and do not change ...

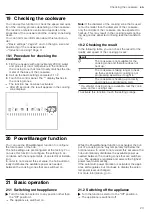
Page 22: ...ings Individual settings 1 Factory settings 1 Factory setting 17 2 To go to the basic settings Requirement The hob must be switched off 1 To switch on the hob touch 2 Within the next 10 seconds touch and hold for four seconds Product information Display Directory for the technical after sales service TK Production number Production number 1 Production number 2 a The first four displays provide the...

Page 23: ...ore does not heat up 1 The cookware is taking longer to heat up than expected and cooking is not progressing as well as it ought to 1 The cookware is heating up correctly and cooking is progressing well 1 If a smaller cooking zone is available test the cook ware on this cooking zone To activate this function touch the settings range 20 PowerManager function You can use the PowerManager function to...

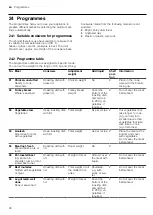
Page 24: ...f heating 4 Place the food in the cooking compartment 23 Time setting options Your appliance has different time setting options which ensure that operation can be controlled 23 1 Overview of the time setting options You can use the button to select the different time setting options Time setting option Use Timer The timer can be set independently of the operation It does not affect the appliance C...

Page 25: ...set for types of heating with grill function In order to achieve a good cooking result do not delay the end time once the appliance is already op erating Food will spoil if you leave it in the cooking com partment for too long Requirements The type of heating and temperature or setting have been set A cooking time must be set 1 Press repeatedly until is selected in the display 2 Press the or butto...

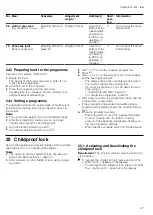
Page 26: ...e bottom of the roasting dish and add up to 250 g ve getables if required 2 Do not sear the meat beforehand 03 Vegetable stew Vegetarian Deep roasting dish with lid Total weight As per recipe 2 Cut vegetables that take longer to cook e g carrots into smaller pieces than vegetables that take less time to cook e g tomatoes 04 Goulash Diced beef or pork with vegetables Deep roasting dish with lid Tot...

Page 27: ...the temperature selector to set 3 Use or to set the required programme 4 Press 5 Use or to set the weight of your food Always set the next higher weight The display shows the calculated cooking time You cannot change the cooking time On some programmes you can delay the end time using Setting the end time Page 25 To change the programme press a After a few seconds the programme starts and the cook...

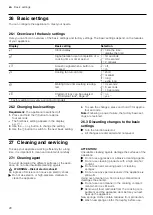
Page 28: ...ur seconds Note Following a power failure the factory basic set tings are restored 26 3 Discarding changes to the basic settings Turn the function selector a All changes are discarded and not saved 27 Cleaning and servicing To keep your appliance working efficiently for a long time it is important to clean and maintain it carefully 27 1 Cleaning agent To avoid damaging the different surfaces of th...

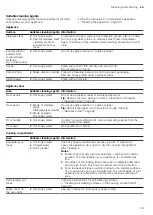
Page 29: ...clean them thoroughly Appliance door Page 32 Door panel Made of stainless steel Stainless steel cleaner Made of plastic Hot soapy water Do not use glass cleaner or a glass scraper Tip Remove the upper door panel for thorough cleaning Appliance door Page 32 Door handle Hot soapy water In order to avoid stubborn dirt remove descaling agents from the door handle immediately Door seal Hot soapy water ...

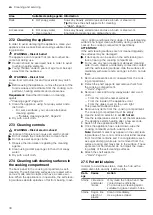
Page 30: ...f fat from baking roast ing or grilling and break them down If the self cleaning surfaces no longer clean sufficiently during operation heat up the cooking compartment specifically ATTENTION If the self cleaning surfaces are not cleaned regularly the surfaces may be damaged If dark spots can be seen on the self cleaning sur faces heat up the cooking compartment Do no use any oven cleaners or abras...

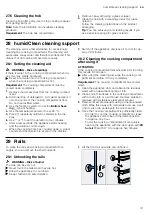
Page 31: ...he duration to four minutes a After a few seconds the appliance starts heating and the duration counts down a When the cooking time has counted down a signal sounds and the duration is at zero in the display 7 Switch off the appliance and leave it to cool for ap prox 20 minutes 28 2 Cleaning the cooking compartment after using it ATTENTION If the cooking compartment remains damp for too long this ...

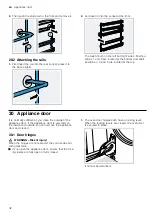
Page 32: ...ated at the top 30 Appliance door It is normally sufficient if you clean the outside of the appliance door If the appliance door is very dirty on the inside and outside you can remove the appliance door and clean it 30 1 Door hinges WARNING Risk of injury When the hinges are not secured they can snap shut with great force If you open the appliance door ensure that the lock ing levers are fully ope...

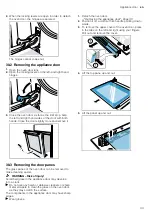
Page 33: ... of the oven door can be removed to make cleaning easier WARNING Risk of injury Scratched glass in the appliance door may develop into a crack Do not use any harsh or abrasive cleaners or sharp metal scrapers to clean the glass on the oven door as they may scratch the surface The components in the appliance door may have sharp edges Wear gloves 1 Detach the oven door Removing the appliance door Pa...

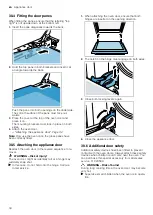
Page 34: ... the appliance door Reattach the oven door in the reverse sequence to re moval WARNING Risk of injury The oven door might accidentally fall or a hinge may suddenly snap shut In this case do not hold onto the hinge Call cus tomer service 1 When attaching the oven door ensure that both hinges are inserted in the opening direction 2 The notch on the hinge must engage on both sides 3 Close both lockin...

Page 35: ...he cookware is made from different multilayer materials or if you use cookware of different sizes and different materials The loudness of the noise can vary depending on the quantity of food being cooked or the cooking method Loud whistling noises These may arise if you are operating two cooking zones at the same time and at the maximum power level These whistling noises disap pear or become quiet...

Page 36: ...leaning products dishwater detergent concentrated or scouring pads You can find more information about this under Cleaning and servicing Page 28 32 Troubleshooting You can rectify minor faults on your appliance yourself Read the troubleshooting information before contacting after sales service This will avoid unnecessary costs WARNING Risk of injury Improper repairs are dangerous Repairs to the ap...

Page 37: ...n the display panel Fault Cause and troubleshooting No displays light up The power supply has been disconnected Use other electrical appliances to check whether there has been a power failure The appliance has not been connected as shown in the circuit diagram Connect the appliance in accordance with the circuit diagram Electronics fault If you are unable to rectify the fault inform the technical ...

Page 38: ...kept away from the appliance WARNING Risk of electric shock When changing the bulb the bulb socket contacts are live Before replacing the bulb ensure that the appliance is switched off in order to prevent a potential electric shock Also unplug the appliance from the mains or switch off the circuit breaker in the fuse box Requirements The appliance is disconnected from the power sup ply The cooking...

Page 39: ...our website 34 1 Product number E Nr and production number FD You can find the product number E Nr and the pro duction number FD on the appliance s rating plate You will see the rating plate with these numbers if you open the appliance door The product number E no can also be found on the glass ceramic You can also display the customer ser vice index KI and the production number FD in the basic se...

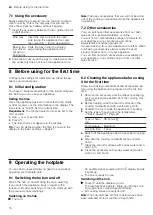
Page 40: ... type of heating is used to meas ure both the energy consumption in circulating air mode and the energy efficiency class Only use original accessories The original accessory has been tailored to the cooking compartment and the types of heating Ensure that the accessory slides in the right way round Greaseproof paper Only use greaseproof paper that is suitable for the se lected temperature Always c...

Page 41: ... Temperature in C Cooking time minutes Sponge cake simple Vienna ring tin loaf tin 2 160 180 50 60 Sponge cake simple 2 levels Vienna ring tin loaf tin 3 1 140 160 60 80 Sponge cake delicate Vienna ring tin loaf tin 2 150 170 60 80 Sponge flan base Flan base tin 3 160 180 30 40 Fruit tart or cheesecake with shortcrust pastry base Springform cake tin diameter 26 cm 2 160 180 70 90 Strudel Tart dish...

Page 42: ...n wire rack 3 1 160 170 30 40 Small baked items Universal pan 3 150 170 25 35 Viennese whirls 2 levels Universal pan Baking tray 3 1 150 170 25 40 Puff pastry Universal pan 3 180 200 20 30 Puff pastry 2 levels Universal pan Baking tray 3 1 180 200 25 35 Puff pastry 3 levels 2x Baking tray Universal pan 5 3 1 170 190 30 45 Choux pastry e g profiteroles eclairs Universal pan 3 190 210 35 50 Choux pa...

Page 43: ... baking you can find some tips here Topic Tip Your cake collapses Note the ingredients and preparation in structions that are given in the recipe Use less liquid Or Reduce the baking temperature by 10 C and increase the bak ing time Your cake is too dry Increase the baking tem perature by 10 C and shorten the baking time Your cake is generally too light in colour Check the shelf posi tion and acce...

Page 44: ...will create steam The change in temperature may cause damage Never pour water into the cooking compartment when it is still hot Never place cookware containing water on the cooking compartment floor Recommended settings Bread and bread rolls Meal Accessory cookware Shelf posi tion Type of heating Temperature in C Cooking time minutes Bread 750 g in a loaf tin or free form Universal pan or Loaf tin...

Page 45: ... 190 210 35 45 Pierogi Ovenproof dish 2 170 190 55 65 Empanadas Universal pan 3 180 190 35 45 Börek Universal pan 3 190 210 25 35 1 Preheat the appliance 35 8 Bakes and gratins How well cooked the bake is will depend on the size of the ovenware and the thickness of the bake Use wide shallow cookware for bakes and gratins Food takes longer to cook in deep narrow cookware and it browns more on top Y...

Page 46: ...lowly and does not brown as well Increase the temperature accordingly and extend the cooking time Follow the manufacturer s instructions for your roast ing dishes Cookware without lid Use a deep roasting dish Place the cookware onto the wire rack If you do not have any suitable cookware use the universal pan Cookware with lid Use a suitable lid that seals well Place the cookware onto the wire rack...

Page 47: ...is cooked because the dorsal fin can be removed easily When stewing add two to three tablespoons of li quid and a little lemon juice or vinegar into the cookware Tips for roasting and braising Use these tips for good results when roasting and braising Topic Tip Lean meat must not dry out Coat lean meat with fat or oil as required or cover it with strips of bacon If you want to cook a joint with ri...

Page 48: ...n the dish 2 3 of the way through the cooking time 4 Do not turn the food Cover the base with water Fish Food Accessories cook ware Shelf posi tion Type of heating Temperature in C grill setting Cooking time in mins Fish grilled whole 300 g e g trout Wire rack 2 2 20 251 Fish grilled whole 1 kg e g gilthead Wire rack 2 180 200 45 501 Fish grilled whole 1 5 kg e g salmon Wire rack 2 170 190 50 601 ...

Page 49: ...ring the appliance settings 8 After making the yoghurt leave it to cool in the refri gerator Recommended settings Yoghurt Meal Accessory cookware Shelf position Type of heating function Temperature in C Cooking time minutes Yoghurt Cup jar Cooking compartment floor 4 5 hours 35 12 Tips for keeping acrylamide levels to a minimum when cooking Acrylamide is harmful to your health and is produced when...

Page 50: ...0 5 8 hours Herbs stalks removed Wire rack 3 3 1 60 2 5 hours 35 14 Preserving food You can preserve fruit and vegetables by heating them and sealing them in air tight jars Only use heat resistant clean undamaged pre serving jars rubber seals and clips Only use fruit and vegetables which are in perfect condition Only use jars that are the same size and contain the same food WARNING Risk of injury ...

Page 51: ...les e g beans kohlrabi red cabbage 1 litre pre serving jars 2 1 170 180 2 120 140 3 1 Until bubbling starts 2 Once it starts bubbling 60 3 Residual heat 30 Vegetables e g peas 1 litre pre serving jars 2 1 170 180 2 120 140 3 1 Until bubbling starts 2 Once it starts bubbling 70 3 Residual heat 30 Stone fruit e g cherries apricot peach grapes gooseberries damsons 1 litre pre serving jars 2 1 170 180...

Page 52: ...est for another 10 to 30 minutes in the appliance after switching it off Recommended settings Defrosting Meal Accessory cookware Shelf position Type of heating Temperature in C Cooking time minutes Baked items cake and bread fruit veget ables meat products Wire rack 2 3 1 35 17 Test dishes These overviews have been produced for test institutes to facilitate appliance testing in accordance with EN ...

Page 53: ...sal pan 3 1501 25 35 Small cakes Universal pan 3 1501 25 35 Small cakes 2 levels Universal pan Baking tray 3 1 1501 25 35 Small cakes 3 levels 2x Baking tray Universal pan 5 3 1 1401 35 45 Hot water sponge cake Springform cake tin diameter 26 cm 2 160 1702 30 40 Hot water sponge cake Springform cake tin diameter 26 cm 2 170 30 40 Hot water sponge cake 2 levels Springform cake tin diameter 26 cm 3 ...

Page 54: ......

Page 55: ......

Page 56: ...hen GERMANY www siemens home bsh group com Valid within Great Britain Imported to Great Britain by BSH Home Appliances Ltd Grand Union House Old Wolverton Road Wolverton Milton Keynes MK12 5PT United Kingdom Manufactured by BSH Hausgeräte GmbH under the trademark licence of Siemens AG ...

Reviews: