background image

Getting the Most Out of Your Appliance

English 31

Turn meats once halfway through the recommended cooking time (see Broil 
Chart for examples).

When top browning casseroles, use only metal or glass ceramic dishes such 
as Corningware®.

Never use heat-proof glass (Pyrex®); they can’t tolerate the high temperature.

Convection Roast

Convection Roast uses heat from the lower 
burner and an element behind the backwall. The 
heat is also circulated by the convection fan. The 
result is a crispier exterior that seals in juices. 
The Convection Roast mode is well suited to pre-
paring tender cuts of meat and poultry.

The benefits of Convection Roasting, include:

As much as 25% faster cooking than standard Roasting/ Baking

Rich, golden browning

For Best Results:

Use the same temperature as indicated in the recipe.

Check doneness early as roasting time may decrease by as much as 25%. 
Refer to Convection Roast Chart for examples.

Do not cover meat or use cooking bags.

Use the broil pan and grid provided with the range for roasting. A low-sided, 
uncovered pan can also be used.

Use a meat thermometer to determine the internal temperature of the meat.

If the meat is browned to your liking, but is not yet done, a small strip of foil 
can be placed over the meat to prevent overbrowning.

Let meat stand covered with foil 10-15 minutes after removing from the oven.

Table 4: Broiling Chart

Food

Item / Thickness

Rack 

Position

 Broil 

Setting

Internal 

Temp. (

o

F)

Time Side 1 

(min.)

a

Time Side 2 

(min.)

a

Beef

Steak (3/4”-1”)
     Medium Rare
     Medium
     Well
Hamburgers (3/4”-1”) - Well

5
5
5
5

high
high
high
high

145
160
170
160

6-7
7-8
8-9
9-11

5-6
6-7
7-9
8-10

Poultry

Breast (bone in)

4

low

170

18-20

18-19

Pork

Pork chops (1”)
Sausage - fresh
Ham slice (1/2”)

4
3
5

high
high
high

160
160
160

8-9
7-9
5-6

7-8
6-8
5-6

Seafood

Fish filets (3/4”-1”) buttered

5

low

Cook until 
opaque and 
flakes easily

12-14

Do Not Turn

Bread

Garlic bread slices (1”)

5

high

N/A

2-4

Do Not Turn

a. Broiling times are approximate and may vary slightly, Times are based on cooking with a preheated broil 

burner.

Summary of Contents for HG2425UC

Page 1: ...Siemens Gas Range with threeD Surround Convection Use and Care Manual Models HG2425UC HG2528UC Please read instructions before using Important Save these instructions ...

Page 2: ......

Page 3: ...e for the First Time 17 Operation Cooktop 18 About the Cooktop 18 Operation 18 Operation Oven 20 About the Oven 20 Operation 20 Operation Warming Drawer some models 24 About the Warming Drawer 24 Operation 24 Getting the Most Out of Your Appliance 26 Getting the Most Out of Your Cooktop 26 Getting the Most Out of Your Oven 27 Getting the Most Out of Your Warming Drawer 33 Cleaning and Maintenance ...

Page 4: ......

Page 5: ...to operate each range component The Getting the Most out of Your Appliance section includes information about the modes cooking charts and tips for improving performance The Cleaning and Maintenance section describes how to clean and maintain your appliance The Service section includes troubleshooting tips and your Warranty Before using your range be sure to read this manual Pay special attention ...

Page 6: ...pliance only for its intended use as described in this manual For example never use the appliance for warming or heating the room Never use the appliance for storage Do not allow aluminum foil plastic paper or cloth to come in contact with a hot burner or grate Do not allow pans to boil dry If the cooktop is near a window forced air vent or fan be certain that flamma ble materials such as window c...

Page 7: ...propriate fire extinguisher available nearby highly visible and easily accessible near the oven e Use an extinguisher ONLY if 1 You know you have a Class ABC extinguisher and you already know how to operate it 2 The fire is small and contained in the area where it started 3 The fire department is being called 4 You can fight the fire with your back to an exit Whenever possible do not operate the v...

Page 8: ...do not touch or let clothing potholders or other flammable materi als contact heating elements or interior surfaces of oven until they have had sufficient time to cool Other surfaces of the appliance may become hot enough to cause burns Among these surfaces are oven vent openings sur faces near these openings and oven doors Exercise caution when opening the appliance Standing to the side open the ...

Page 9: ...e backsplash Children climbing on an appliance to reach items could be seriously injured Cleaning Safety IMPORTANT SAFETY NOTICE The California Safe Drinking and Toxic Enforcement Act requires the Governor of California to publish a list of substances known to the state to cause cancer birth defects or other reproductive harm and requires businesses to warn customers of potential exposure to such ...

Page 10: ...r details This appliance is intended for normal family household use only It is not approved for outdoor use See the Warranty If you have any questions con tact the manufacturer Do not store or use corrosive chemicals vapors flammables or nonfood prod ucts in or near this appliance It is specifically designed for use when heating or cooking food The use of corrosive chemicals in heating or cleanin...

Page 11: ...dels 6 Rack Positions Rack Guides 7 Oven Racks Flat 2 or 3 varies by model 8 Oven Door Gasket 9 Storage Drawer some models 10 Warming Drawer some models 11 Model and Serial Plate 12 Oven Vent 13 Anti Tip Bracket not shown 14 Oven Rack Half some models not shown 15 Oven Rack Full Extension some models not shown 16 Broiler Pan not shown 17 Oven Door Lock not visible not shown 18 Literature Package n...

Page 12: ...should rest in the indents on the cooktop Electronic Ignitor The cooktop uses electronic ignitors to light the burners There is no pilot light Each burner has its own ignitor For proper operation keep the ignitor clean and dry It is necessary to clean these when there is a boilover or when the burner does not light even though the ignitor clicks CAUTION All ignitors spark when any single burner is...

Page 13: ... mitts contact hot burners Inserting Racks Into Oven 1 Grasp rack firmly on both sides 2 Tilt rack up to allow stop into rack guide 3 Bring rack to a horizontal position and press the rest of the way in Rack should be straight and flat not crooked Removing Flat Racks From Oven 1 Grasp rack firmly on both sides and pull rack toward you 2 When the stop is reached tilt rack up and pull the rest of th...

Page 14: ...en Disassembly for cleaning The two sections of the rack are designed to come apart for easier cleaning 1 Place rack on flat surface in the closed position top side up 2 Rotate one side of top rack towards you until it is past the stop ball 3 Pull the rack up and out rotated side first Reassembly CAUTION Always verify that top rack is installed correctly after reassembly The back edges of the top ...

Page 15: ...lf oven rack can be used as a simple flat rack or as a half sized rack With the right half of the rack removed you can place a tall item such as a turkey on one side of the rack below and a shorter item such as a casserole on the other side A second shorter item can then be placed on the half rack above the first shorter item This allows for easier access to all items and better utilization of the...

Page 16: ...he Select Function section Self Cleaning The oven features a self cleaning function that eliminates the manual labor involved with cleaning your oven Indicators and Other Features Beep Signals that more information must be entered or confirms the receipt of an entry A Beep also signals the end of a program or an oven error End of Cycle Indicator To indicate when a mode is finished 3 consecutive be...

Page 17: ...rs that are active for the mode that is selected The icon will also display a fan if the convection fan is utilized in the selected mode Control Knob Used to set the clock timers select cook ing mode and temperature Turn clockwise to increase and turn counterclockwise to decrease Light Press pad to turn oven light on or off Door Locking Indicator Icon is displayed during the self clean mode when t...

Page 18: ... Turn knob to change hours 5 Press TIME again and minute digits flash 6 Turn knob to change minutes 7 Press TIME again and the clock is set Note To cancel the TIME selection when setting the clock press OFF at any time while in the clock mode The Select Functions Menu SELECT FUNCTIONS is the section of the menu where you can set or change the range features listed below To access the SELECT FUNCTI...

Page 19: ...ept a language change Lock Unlock the Oven Control Panel The oven keypad can be locked for safety purposes This feature can be used to prevent changes to the oven function This function DOES NOT lock the oven door 1 Access SELECT FUNCTIONS Menu 2 Turn knob clockwise until LOCK KEYS is flashing 3 Press START KEY PAD LOCKED is displayed The display will beep if a key is pressed to indicate that the ...

Page 20: ...will show in display and temperature will flash 5 Turn knob to set oven temperature 6 Turn oven light on if desired press LIGHT Note The light cannot be changed after this point It will stay on or off as selected during the entire Sabbath mode 7 Press START Oven starts after 5 seconds The oven operates for 73 hours and then turns off automatically Setting the Sabbath Feature for both the Warming D...

Page 21: ... feature automatically converts package or recipe temperatures for use with the convection bake mode The default setting is on 1 Access SELECT FUNCTIONS Menu 2 Turn knob clockwise until AUTO CONVECT BAKE is displayed 3 Press START 4 Turn knob to select ON or OFF 5 Press START to accept new selection Before Using the Appliance for the First Time Remove all packing materials and labels from range Re...

Page 22: ... on the burner base and that the ignitor is clean and dry If the burner still fails to ignite see Cooktop Troubleshooting Chart on page 43 Caution All ignitors spark when any single burner is turned on Do not touch any of the burners when the cooktop is in use Lighting the Burner during a Power Failure Cooktop burners can be lit manually during a power failure Hold a match at the port and turn the...

Page 23: ...amage to the pan or the appli ance the flame should not extend beyond the edge of the pan Turning the Burner off Turn knob clockwise to the OFF position Note A pop may be heard when the burner is turned off The pop may be louder with LP gas than with natural gas This is normal ...

Page 24: ...between the cooking mode and preheat The preheated temperature is displayed starting at 100ºF The actual tempera ture increases until set temperature is reached at which point the oven will beep 10 To change temperature during cooking press Temperature Turn the knob to select new temperature and press START 11 Once cooking has been completed press OFF to turn off oven Automatic Convection Conversi...

Page 25: ... Press TIME and new time is set Clearing the Timer s 1 Press TIME once TIMER 1 flashes 2 Turn knob to select CLEAR TIMER 1 2 Press TIME 3 If TIME pad is not pressed range will beep and display will continue flashing 4 Press TIME to return to the main screen Cancelling If operation is not completed the oven will beep periodically as a reminder to set time Press OFF to exit the Timer mode Selecting ...

Page 26: ...inished to prevent overcooking Food left in the oven will cook even after the cycle is complete To Check the Cooking Time and Stop Time After a Delay Has Been Set 1 Press TIME 2 Turn knob to BAKE END or BAKE TIME 3 Press TIME Setting the Sabbath Feature See Set the Sabbath Feature on page 16 Using the Probe some models This section explains how to operate the probe See See Inserting the Probe on p...

Page 27: ...e tem perature is reached The oven is preheated when the beep signals once When the set probe temperature is reached END appears in display and oven turns off Changing the Oven Temperature When Using the Probe 1 Touch TEMPERATURE Oven temp will flash in the display 2 Turn the knob to desired temperature and press START twice Changing the Probe Temperature 1 Touch TEMPERATURE The oven temperature w...

Page 28: ...gle or stacked Operation CAUTION To maintain food safety follow these guidelines DO NOT use the warming drawer to heat cold food exception it is safe to use the drawer to crisp crackers chips or dry cereal and to warm plates Be sure to maintain proper food temperature The USDA recommends hold ing hot food at 140 F or warmer Operation Warming Drawer some models Parts Key 1 Stainless Steel Drawer In...

Page 29: ...ng the Sabbath Feature Note The warming drawer does not operate with the Sabbath feature unless the feature is also activated in the oven See Setting the Sabbath Feature for both the Warming Drawer and the Oven on page 16 1 Turn the warming drawer on the desired heat level 2 Activate the Sabbath Feature See Set the Sabbath Feature on page 16 Turning Off the Warming Drawer When Only Using the Warmi...

Page 30: ...cting Cookware type quantity and temperature of the food burner used and the cook s preference Cookware Selection Guide Cookware Characteristics Pan selection directly affects cooking speed and uniformity For best results select pans with flat bases When a pan is hot the base pan bottom should rest evenly on the surface without wobbling rocking Flat medium to heavy weight pans are best To Test the...

Page 31: ...ks water bath canners and pressure canners must have the same features as described above Use only a flat bottomed wok Getting the Most Out of Your Oven Oven Cooking Guide Rack Position Multiple Rack Cooking When using multiple racks follow the placement recommendations below Two rack Use rack positions 2 and 5 Three rack for convection bake Use positions 1 3 and 6 Pan Placement Baking results are...

Page 32: ... will impair your ability to easily connect the probe to the receptacle and to insert it into the meat The Probe some models The oven is well insulated and the retained heat will continue to cook the meat after the oven has shut off For this reason remove the meat from the oven as soon as the control beeps Since meat continues to cook after being removed from the oven set the internal probe temper...

Page 33: ...be covered with a lid or aluminum foil CAUTION When using Warm mode follow these guidelines Do not use the Warm Mode to heat cold food Be sure to maintain proper food temperature The USDA recom mends holding hot food at 140 F or warmer DO NOT warm food for longer than one hour Convection Bake Convection baking is similar to baking Heat comes from the lower burner and an element behind the backwall...

Page 34: ...ts or liquids Browning as the food cooks For Best Results Preheat oven 3 4 minutes Do not preheat for more than 5 minutes Steaks and Chops should be at least 3 4 thick Brush fish and poultry with butter or oil to prevent sticking Use the broil pan and grid included with your range Do not cover the broiler grid with foil It is designed to drain fats and oils away from the cooking surface to prevent...

Page 35: ... Do not cover meat or use cooking bags Use the broil pan and grid provided with the range for roasting A low sided uncovered pan can also be used Use a meat thermometer to determine the internal temperature of the meat If the meat is browned to your liking but is not yet done a small strip of foil can be placed over the meat to prevent overbrowning Let meat stand covered with foil 10 15 minutes af...

Page 36: ...luded can be used simultaneously Contact your dealer to order drying racks Treat fruits with antioxidants to avoid discoloration Consult a food preservation book county Cooperative Extension Office or library for additional information Table 5 Convection Roast Chart Meats Item Weight lbs Oven Temp o F Roasting Timea min per lb Internal Temp o F Beef Rib roast Rib eye roast boneless Rump eye tip si...

Page 37: ...les Bananas Cherries Orange peels slices Pineapple rings Strawberries Dipped in 1 4 cup lemon juice and 2 cups water 1 4 slices Dipped in 1 4 cup lemon juice and 2 cups water 1 4 slices Wash towel dry Fresh cherries remove pits 1 4 slices of orange orange part of skin thinly peeled from oranges Towel dried Wash and towel dry Sliced 1 2 thick skin outside down on rack 11 15 10 15 10 15 Peels 2 4 Sl...

Page 38: ...offee cakes Med Covered Biscuits Med Covered Casseroles Med Covered Eggs Med Covered Fish seafood Med Covered Fried foods Hi Uncovered Gravy cream sauces Med Covered Ham Med Covered Pancakes Hi Covered Pies one crust Med Covered Pies two crusts Med Uncovered Pizza Hi Covered Pork Med Covered Potatoes baked Hi Covered Potatoes mashed Med Covered Poultry roasted Med Covered Vegetables Med Covered Pl...

Page 39: ...o cool Clean around the burner and burner ports Reassemble burner s and check for proper operation Cleaning Guidelines Avoid these Cleaners Glass cleaners which contain ammonia or chlorine bleach These ingredients may permanently etch or stain the cooktop Caustic Cleaners Oven cleaners such as Easy Off may etch the cooktop surface Abrasive Cleaners Metal scouring pads and scrub sponges such as Sco...

Page 40: ...exterior of range Control Knobs Plastic or Nickel Plated varies by model Hot sudsy water rinse and dry immediately To remove knobs place in OFF position and pull straight out Do not soak knobs Do not force knobs onto valve shaft Line up D shaped opening in knob with valve shaft Do not use abrasive scrubbers or cleansers such as BonAmi Ajax or Comet They may per manently damage the finish Exterior ...

Page 41: ...r a non abrasive cleaner such as Formula 409 Gently scrape soil off with a tooth pick Keep the ignitor ports clean for proper performance It is neces sary to clean these when there is a boilover or when the burner does not light even though the electronic ignitors click A damp igniter will prevent burner from igniting For proper burner performance keep ignitors clean and dry Remove any lint that m...

Page 42: ...ot unlock until the oven reaches a safe temperature Preparing the Oven for Self Clean WARNING A flexible door gasket is necessary for a good seal Do not clean rub damage or move the gasket 1 Remove all utensils and bakeware 2 Remove oven racks If oven racks are left in the oven during the self clean cycle they will permanently lose the shiny finish and change to a dull dark fin ish See Oven Cleani...

Page 43: ...s To change cleaning time turn knob to change number of hours Otherwise continue to step 4 4 Press START SELF CLEAN flashes Press START 5 REMOVE RACKS appears in the display as a reminder to remove oven racks 6 Press START again to begin the self clean Note The door locks at the beginning of the cycle The door lock symbol will appear in the display at this point If door does not lock press OFF and...

Page 44: ...oduce ash which will settle in the bottom of the oven If this happens remove ash with a damp cloth before using the oven 3 Wipe rack edges with cooking oil to allow for proper glide Wipe off excess After self cleaning the entire oven can be safely cleaned with a soapy sponge rinsed and dried If stubborn soil remains follow the guidelines on this page Always use the mildest cleaner that will remove...

Page 45: ...he door Failure to do so could result in electrical shock or burns The oven door is heavy and fragile Use both hands to remove the oven door The door front is glass Handle carefully to avoid breaking Grasp only the sides of the oven door Do not grasp the handle as it may swing in your hand and cause dam age or injury Failure to grasp the oven door firmly and properly could result in personal injur...

Page 46: ...emove the lens by unscrewing it 4 Remove the light bulb from its socket by unscrewing it 5 Replace the bulb with a new 40 watt appliance bulb Avoid touching the bulb with fingers as oils from hands can damage the bulb when it becomes hot 6 Screw the lens back on 7 Turn power back on at the main power supply fuse or breaker box ...

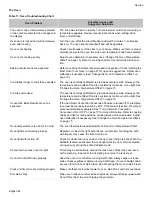
Page 47: ... up to the gas supply Call gas company Plug is not completely inserted into outlet or the house wiring is incorrect Check the power supply verify that the unit is grounded with the correct polarity make sure the unit is plugged in Circuit breaker is tripped Check circuit breaker and reset if necessary Check and or replace fuse Burner ports are clogged Turn the cooktop off and allow the burners to ...

Page 48: ...istently too brown or too light See Change the Oven Temperature Offset on page 15 Convection Bake Results are not as expected If the Automatic Convection Conversion Feature is turned off the tempera ture must be manually reduced by 25 F If the feature is active the temper ature is automatically adjusted See Turn Automatic Convection Conversion ON or OFF on page 17 for more information Refer to coo...

Page 49: ...ter will repair or replace at its sole option any Range that proves to have been defective under conditions of normal use without charge All removed parts and components shall become the property of BSH at BSH s option All replaced and or repaired parts shall assume the iden F and a number appears in display and control beeps This is a fault code Press OFF to clear the display and stop beeping Res...

Page 50: ...EQUENTIAL PUNITIVE INCIDENTAL SPECIAL INDIRECT OR DIRECT DAMAGES OR FOR ANY ACTS OR OMISSIONS OF THIRD PARTIES INCLUDING WITHOUT LIMITATION THOSE OF A DEALER TRANSPORTER INSTALLER OR SERVICER BSH MAKES NO OTHER WARRANTY AND SHALL NOT BE DEEMED TO HAVE MADE ANY OTHER WARRANTY EXCEPT AS EXPRESSLY PROVIDED FOR HEREIN WHETHER EXPRESS OR IMPLIED INCLUDING WITHOUT LIMITATION ANY WARRANTY OF FITNESS FOR ...

Page 51: ......

Page 52: ...s 5551 McFadden Avenue Huntington Beach CA 92649 866 447 4363 www siemens home com 9000178819 5V06S2 Rev A 8 06 BSH Home Appliances Corporation Litho in USA ...

Reviews: