background image

27

SMS (text messages)

Gigaset E455 / IM-MEA EN / A31008-M1718-A601-1-7619 / sms_BRD_neutral.fm / 03.12.2008

SMS mailboxes

The 

General Mailbox

 is the default set-

ting. Anyone can access this mailbox and 

it cannot be protected by a PIN. You can 

also set up three 

personal mailboxes

 and 

protect these with a 

PIN

. Each mailbox is 

identified by a name and a "Mailbox ID" (a 

kind of extension number).

Please note:

u

If you operate a number of devices 

(base stations) with SMS functionality 

on a single phone line, then each SMS 

mailbox ID may only occur once. In this 

case you must also change the preset 

ID of the general mailbox ("0"). 

u

You can only use personal mailboxes if 

your service provider supports such a 

function. You can tell that this is sup-

ported by the fact that a star (*) is 

added to the number of a (preset) SMS 

centre.

u

If you have forgotten your mailbox PIN, 

you can reset it by restoring the base 

station's factory settings. This will 

delete all messages from all mail-

boxes

.

Setting up and changing a personal 

mailbox

Setting up a personal mailbox

v


¢

î


¢

Settings  

¢

SMS Mailboxes 

s

Select a mail box, 

e.g. 

Mailbox 2 

, and press 

§OK§

 .

¤

Change multiple line input:

On/Off:

Activate or deactivate mailbox. 

ID:

Select mailbox ID (0–9). You can only 

select the available numbers.

Protection: 

Activate/deactivate PIN protection.

PIN 

Enter 4-digit PIN, if necessary.

¤

Save changes (page 53).

Active mailboxes are marked with 

in 

the mailbox list. They are shown in the 

SMS list and can, if necessary, be displayed 

by pressing the message key 

f

.

Deactivating a mailbox

¤

Set 

On/Off:

 to

 Off  

. Confirm message 

with 

§Yes§

 if necessary. 

All

 SMS saved in this mailbox will be 

deleted.

Deactivating PIN protection

¤

Set

 Protection: 

to

 Off  

.

The mailbox PIN is reset to "0000".

Changing the name of a mailbox

v


¢

î


¢

Settings  

¢

SMS Mailboxes  

¢

s

(Select mailbox)

§Edit§

Press the display key. 

~

Enter new name.

§Save§


Press the display key.

a

 Press 

and 

hold

 (idle status). 

Changing a mailbox's PIN and ID

v


¢

î


¢

Settings  

¢

SMS Mailboxes  

¢

s

(Select mailbox)

Enter mailbox PIN if necessary 

und press 

§OK§

.

¤

Set

 ID:

Protection:

 and 

PIN

 (page 27). 

Sending a text message to a personal 

mailbox

To send a text message to a personal mail-

box, the sender must know your ID and 

enter it after your number.

¤

You can send your SMS contact an SMS 

via your personal mailbox. 

Your SMS contact will receive your SMS 

number with current ID and can save it in 

their directory. If the ID is invalid, the SMS 

will not be delivered.

Summary of Contents for Gigaset E455

Page 1: ... 10 2005 12 01 Uhr Seite 1 Issued by Gigaset Communications GmbH Schlavenhorst 66 D 46395 Bocholt Gigaset Communications GmbH is a trademark licensee of Siemens AG Gigaset Communications GmbH 2008 All rights reserved Subject to availability Rights of modifications reserved www gigaset com ...

Page 2: ...us Toggle between upper lower case and digits 7 Call by call list key Open call by call list 8 Connection socket for headset 9 Microphone 10 Recall key Confer Flash Insert a dialling pause press and hold 11 Star key Ringtones on off press and hold Open table of special characters 12 Key 1 Select answering machine network mailbox press and hold 13 Talk key Answer a call open last number redial list...

Page 3: ...s 27 Setting SMS centre 28 SMS to a PABX 28 Activating deactivating the SMS function 28 SMS troubleshooting 29 Operating the answering machine 30 Operation via the handset 30 Activating deactivating listen in 33 Setting up the answering machine 33 Resetting fast access on the answering machine 34 Operating when on the move remote operation 34 Using the network mailbox 36 Configuring the network ma...

Page 4: ...to base station 46 Connecting the base station to the PABX 47 Dialling modes and flash time 47 Setting pauses 47 Switching temporarily to tone dialling DTMF 47 Appendix 48 Care 48 Contact with liquid 48 Questions and answers 48 Service Customer Care 50 Specifications 51 Notes on the operating instructions 52 Symbols used 52 Example menu input 52 Example multiple line input 53 Writing and editing a...

Page 5: ...e battery pack as directed in this user guide page 51 The operation of medical appliances may be affected Be aware of the technical conditions in your particular environment e g doctor s surgery The handset may cause an unpleasant humming noise in hearing aids Do not install the base or charging cradle in bathrooms or shower rooms base and charging cradle are not splash proof page 48 Do not use th...

Page 6: ...ion u one Gigaset E45 handset u one charging cradle u 2 mains adapters u one phone cord u one battery pack u one battery cover u one lock ring u one belt clip u one headset socket cover u one user guide Installing the base station and charging cradle base station and charging cradle are designed for use in closed dry rooms with a temperature range of 5 C to 45 C Set up the base station at a centra...

Page 7: ...set for use Fitting the battery pack Insert the plug into the socket as shown in the enlarged view Insert the battery pack Place the cords in the cord routing Correct phone jack assignment 1 unused 2 unused 3 a 4 b 5 unused 6 unused 1 3 2 1 1 1 3 2 1 4 5 6 Caution Use only the rechargeable battery pack recom mended by Gigaset Communications GmbH page 51 Never use a conventional non rechargeable ba...

Page 8: ...e same time turn the lock ring or belt clip anticlockwise and remove Insert a coin into the cavity at the top of the battery cover and twist it until the cover opens Placing the handset in the charging cradle Plug the charging cradle mains adapter into a mains power socket Place the handset in the charger with the display facing forward The handset is already registered with the base station at th...

Page 9: ...t put it back again until the battery pack is fully discharged Please remember u Always repeat the charging and dis charging procedure if you remove the battery pack from the handset and insert it again u The battery pack may warm up as it is charging This is not dangerous u After a time the charge capacity of the battery pack will decrease for technical reasons Your answering machine is set with ...

Page 10: ... page 25 1 3 Outgoing 0 page 24 You have activated an SMS mailbox with a PIN or 2 3 mailboxes 1 1 Mailbox 1 1 1 New SMS page 23 1 1 2 Incoming 0 page 25 1 1 3 Outgoing 0 page 24 1 2 to 1 4 Mailbox 1 Mailbox 2 Mailbox 3 1 2 1 to 1 4 1 New SMS page 23 1 2 2 to 1 4 2 Incoming 0 page 25 1 2 3 to 1 4 3 Outgoing 0 page 24 1 6 Settings 1 6 1 Service Centres page 28 1 6 2 SMS Mailboxes page 27 1 6 3 Notif...

Page 11: ... Register H Set page 37 5 4 4 Select Base page 37 5 4 5 Reset Handset page 45 5 5 Base 5 5 2 Music on hold page 46 5 5 3 System PIN page 46 5 5 4 Base Reset page 46 5 5 5 Add Features page 39 page 46 page 47 5 5 6 Preselection page 21 5 5 7 Calls List Type page 19 5 6 Voice Mail 5 6 1 Set Key 1 page 34 5 6 2 Ans Machine page 30 5 6 3 Call Screening page 33 5 6 4 Announcements page 30 5 6 5 Message...

Page 12: ... intrusive press the dis play key Silence You can take the call as long as it is displayed on the screen Calling Line Identification When you receive a call the caller s number and or name is displayed on the screen if the following conditions are met u Your network provider supports CLIP CLI and CNIP CLI Calling Line Identification number of the caller is transmitted CLIP Calling Line Identificat...

Page 13: ...rticipate in the call Activating deactivating handsfree Activating while dialling d Enter the number and press the handsfree key You should inform your caller before you use the handsfree function so that they know someone else is listening Switching between earpiece and handsfree mode d Press the handsfree key During a call and when listening to the answering machine switch handsfree on or off If...

Page 14: ...he directory v Open main menu u Open list of handsets t Set the ringtones on the hand set page 43 In the main menu and in input fields You can use the control key to move the cursor up t down s right v or left u In lists and submenus t s Scroll up down line by line v Open submenu or confirm selection u Go back one menu level or cancel During an external call s Open the directory u Initiate an inte...

Page 15: ... a list with icon and name To access a function i e open the corre sponding submenu next menu level Navigate to the function using the con trol key q Press the display key OK Submenus The functions in the submenus are dis played as lists To access a function Scroll to the function with the control key q and press OK Or Enter the corresponding digit combina tion page 9 Pressing briefly on the end c...

Page 16: ...twork services Network services are functions that your network provider makes available to you You have to request these services from your network provider If you require assistance please con tact your network provider Setting functions for the next call v ê Withhold No Enter number c Press talk key ...

Page 17: ...its Name max 16 characters Storing a number in the directory s New Entry Change multiple line input Number Enter number Name Enter name Annivers Enter anniversary if required page 18 Speed Dial Select key for quick dial Save changes Storing a number in the call by call list C New Entry Change multiple line input Number Enter number Name Enter name Selecting entries in the directory and call by cal...

Page 18: ...e station u The other handset and base station can send and receive directory entries s C s select entry Options open menu Copy Entry Copy List Enter the internal number of the receiver handset You see Copying entry Yes No Press the display key A successful transfer is confirmed by a message and confirmation tone on the receiver handset Please remember u Entries with identical numbers are not over...

Page 19: ...n anniversary A reminder call is signalled on the handset using the selected ring tone Silence Press the display key to stop the reminder call Last number redial list The last number redial list contains the ten numbers last dialled with the handset max 32 numbers If one of the numbers is in the directory then the corresponding name will be displayed Manual last number redial c Press the key brief...

Page 20: ...s Select the list with q To open press OK SMS incoming message list All received SMS messages are saved in the incoming message list see page 25 Calls list Requirement Calling Line Identification CLIP page 11 Depending on the type of list set the calls list contains u accepted calls u missed calls u calls recorded by the answering machine à The numbers of the last 30 incoming calls are stored Mult...

Page 21: ...ist entry Options Open menu Information Select and press OK If the name and town are not shown it means that the caller has not requested caller display or that caller display has been withheld Press OK to return to the list Making cost effective calls Sign up with a network provider who offers particularly low cost call rates call by call You can manage the numbers in the call by call list Linkin...

Page 22: ...gits of the dialled number match with only one entry in the list with preselection Storing preselection numbers v Ð Base Preselection Preselect No Enter or edit preselection number call by call number Save changes page 53 a Press and hold idle status Saving editing entries in the preselection lists Each of the two lists can contain 20 entries each with 6 digits Numbers may be prefixed according to...

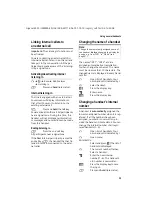
Page 23: ...S menu only consists of the entry Settings Enter an SMS Service Centre page 28 u Entering text see page 53 u Writing using the predictive text tool EATONI see page 54 Rules u An SMS can be up to 612 characters long u If there are more than 160 characters or a lot of image data the text message is sent as a linked SMS up to 4 mes sages with 153 characters each Please remember u Each incoming SMS is...

Page 24: ...ress the end call key briefly to return to the text panel The input language setting only applies to the current SMS SMS status report Requirement Your service provider sup ports this feature If you have activated the status report you will receive a message with a confirmation text after you have sent your SMS Activating deactivating the status report v î Settings Status Report Select and press O...

Page 25: ...ected character set Deleting draft message list Open the draft message list and then Options Open menu Delete all Select press OK and confirm with Yes The list is cleared a Press and hold idle status Sending an SMS to an e mail address If your service provider supports the SMS to e mail service then you can also send your text messages to e mail addresses The e mail address must be written at the ...

Page 26: ... signalled on all Gigaset E45 handsets by the À icon in the display the flashing message key f and an advisory tone Opening the incoming message list with the f key f Press Select mailbox if necessary and enter mail box PIN The incoming message list is displayed as follows example 1 bold number of new entries not bold number of read entries 2 name of mailbox here general mailbox Open list with OK ...

Page 27: ...Changing the character set Read the SMS page 25 Options Press the display key Character Set Text is shown in the selected character set Notification by SMS You can be notified by SMS about missed calls or new messages on the answering machine Requirement For missed calls the caller s number CLI must have been transmitted Notification is sent to your mobile phone or another phone with SMS functiona...

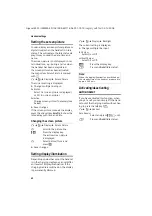
Page 28: ... and press OK Change multiple line input On Off Activate or deactivate mailbox ID Select mailbox ID 0 9 You can only select the available numbers Protection Activate deactivate PIN protection PIN Enter 4 digit PIN if necessary Save changes page 53 Active mailboxes are marked with in the mailbox list They are shown in the SMS list and can if necessary be displayed by pressing the message key f Deac...

Page 29: ...an only receive an SMS when the Calling Line Identification is for warded to the extension of the PABX CLIP The CLIP of the phone number for the SMS centre is evaluated in your Gigaset u If required you must prefix the number for the SMS centre with the access code depending on your PABX If in doubt test your PABX e g by send ing a text message to your own number once with and once without the acc...

Page 30: ...ed receiving messages 1 You have changed the ID of your mailbox Tell your SMS contacts your new ID or undo the change page 27 2 You have not activated your mailbox Activate your mailbox page 27 3 Call diversion is activated with When AllCalls or the call diversion All Calls is activated for the network mailbox Change your call diversion The message is played back 1 The display call number service ...

Page 31: ...e or announce only mode If a per sonal announcement has not been recorded the corresponding pre recorded announcement is used Recording a personal announcement announce only v Ð Voice Mail Announcements Record Announce Record Anc Only OK Press the display key to start the recording You hear the ready tone short tone Now speak your announcement at least 3 secs End Press the display key to end the r...

Page 32: ...utside this period 08 01 to 17 59 the Ans Record is active v Ð Voice Mail Announcements Set Ans Mode Ans Mode Time on Change multiple line input From Enter hours minutes for the start of the period in 4 digit format Until Enter hours minutes for the end of the period in 4 digit format Activation Select On or Off Save changes with Save If the memory for messages is full and Acti vation On has been ...

Page 33: ...An announcement informs you of the message s new status Or Options Open menu Mark as New Select and press OK Playback of the current message is can celled Playback of next message starts if applicable The f key on the handset flashes Adding the telephone number of a message to the directory See also Adding a displayed number to the directory page 17 Deleting messages You can delete old messages ei...

Page 34: ...mory of the answering machine If the memory is full you will hear an end tone the recording is aborted and the call recorded up to that point is listed in the answering machine list as a new message Activating deactivating listen in During recording of a message you can lis ten in via the loudspeaker of registered handsets Permanently activating deactivating listen in v Ð Voice Mail Call Screening...

Page 35: ...ding quality Save Press the display key Changing language for voice prompt and pre recorded announcement v55O2 Enter the digits 1 OK Set English 2 OK Set French I OK Set Arab 4 OK Set beep In the beep setting certain answering machine phrases are replaced by tones The remaining phrases and the pre recorded announcements are played back in English Resetting fast access on the answering machine The ...

Page 36: ...hen deleting a message you are prompted to repeat the command Repeat DELETE without first press ing the 9 Activating the answering machine Phone home and allow to ring until you hear Please enter PIN Enter system PIN Your answering machine is activated It tells you how much memory time is left The messages are now played back The answering machine cannot be deacti vated remotely Initiating call ba...

Page 37: ...ring the network mailbox number v Ð Voice Mail Set Key 1 Network Mailb Select and press OK on Enter the number for the network mailbox Press the display key Save Entry Select and press OK The entry is stored a Press and hold idle status The setting for fast access applies to all Gigaset E45 handsets Calling the network mailbox 1 Press and hold You are connected straight to the network mailbox d Pr...

Page 38: ...er Gigaset handsets and handsets for other devices with GAP functionality as follows On the handset Start to register the handset as described in its user guide On the base station Press and hold the registration paging key on the base station page 1 approx 3 secs De registering handsets You can de register any registered handset from any registered Gigaset E45 handset u Open list of internal user...

Page 39: ...e display key End to return to the external call When diverting a call you can also press the end call key a before the internal participant lifts the receiver Then if the internal participant does not answer or is busy the call will automati cally return to you the display will show Recall Internal consultation calls When you are speaking to an external participant you can simultaneously call an ...

Page 40: ... end call key a the handset that has lis tened in remains connected to the exter nal caller Changing the name of a handset The names INT 1 INT 2 etc are assigned automatically at registration You can change these names The name must be no more than 10 characters The changed name is displayed in every hand set s list u Open list of handsets Your own handset is indicated by s Select handset Edit Pre...

Page 41: ... the handset the room monitor mode is deactivated You must reactivate the function after switching on the handset again Activating the room monitor and entering the number to be called v í Room Monitor Change multiple line input Room M Select On to activate Call to Press the display key Edit and enter des tination number External number select number from the directory or enter directly Only the l...

Page 42: ...itor calls The other room moni tor settings on the handset e g no ring tone will however remain activated until you press the display key OFF on the hand set To reactivate the room function with the same phone number Turn on the activation again and save page 40 with Save Handset settings Your handset is preconfigured but you can change these settings to suit your individual requirements Changing ...

Page 43: ...play with time and date Changing the screen picture v Ð Display Screen Picture s Scroll to the picture line View Press the display key The active screen picture is displayed s Select picture Clock and press OK Save changes Setting display illumination Depending on whether or not the handset is in the charging cradle you can set differ ent levels of display illumination If the charging cradle is sw...

Page 44: ...how to set the ringtones for the base station see page 46 Settings for individual functions Set the volume and melody depending on the type of signalling required v Ð Audio Settings Ringer Settings q Set e g select Ext Calls and press OK Change multiple line input r Set volume 1 6 s Scroll to the next line r Select melody Save Press the display key to save the setting In idle status you can also o...

Page 45: ...dvisory tones to tell you about different activities and statuses The following advisory tones can be acti vated and deactivated independently of each other u Key beep Each key press is acknowl edged u Acknowledge tones Confirmation tone ascending tone sequence at the end of an entry setting and when an SMS or a new entry arrives in the answering machine list or calls list Error beep descending to...

Page 46: ... minute intervals and then switched off During a call the wake up call is signalled by a short tone Deactivating the wake up call repeating after a pause slumber mode Requirement A wake up call is sounding OFF Press the display key The wake up call is deactivated or Snooze Press the display key or any key The wake up call is deacti vated and then repeated after 5 minutes After the second repetitio...

Page 47: ... the next line re enter new system PIN and press OK a Press and hold idle status Activating deactivating the wait melody v Ð Base Music on hold Press OK to activate or deactivate the wait melody on Repeater support With a repeater you can increase the range and reception strength of your base sta tion First you must activate the repeater mode This will terminate any calls cur rently running throug...

Page 48: ...between pressing the talk key c and sending the number v Open menu 5 5 O 1 L Press keys Enter digit for the pause length 1 1 sec 2 3 secs 3 7 secs and press OK Changing the pause after the recall key You can change the length of the pause if your PABX requires this refer to the user guide for your PABX v Open menu 5 5 O 1 2 Press keys Enter a digit for the length of the pause 1 800 ms 2 1600 ms 3 ...

Page 49: ... you will nor mally be able to use it again Questions and answers If you have any queries about the use of your telephone you can contact us at any time at www gigaset com customercare The table below contains a list of common problems and possible solutions The display is blank 1 The handset is not switched on Press and hold the end call key a 2 The battery pack is flat Charge replace the battery...

Page 50: ...at the operation Watch the display and refer to the operating instructions if necessary You cannot listen to messages on the net work mailbox Your phone system is set for pulse dialling Set your phone system to tone dialling The calls list does not indicate a time for a message Date time are not set Set the date time page 8 The answering machine reports PIN is incor rect during remote operation 1 ...

Page 51: ...nia 06 30 47 97 Finland 09 22 94 37 00 France 01 56 38 42 00 Germany 01805 333 222 Greece 0 80 11 11 11 16 Hong Kong 28 61 11 18 Hungary 06 14 71 24 44 Iceland 520 3000 India 01 13 73 85 89 98 Indonesia 0 21 46 82 60 81 Ireland 18 50 77 72 77 Italy 02 66 76 44 00 Ivory Coast 80 00 03 33 Jordan 0 64 39 86 42 Kenya 2 72 37 17 Kuwait 2 45 41 78 Latvia 7 50 11 14 Lebanon 01 44 30 43 Libya 02 13 50 28 ...

Page 52: ...ox 6 hours Note When the display illumination is switched on the standby time of the handset is reduced to approx 30 hours DECT standard is supported GAP standard is supported No of channels 60 duplex channels Radio frequency range 1880 1900 MHz Duplex method Time multiplex 10 ms frame length Channel grid 1728 kHz Bit rate 1152 kbit s Modulation GFSK Language code 32 kbit s Transmission power 10 m...

Page 53: ...ted form This is illustrated below using the example of Setting the contrast for the display The things you have to do are explained in the boxes v Ð Display With the handset in idle status press on the right of the control key to open the main menu Select the Ð icon using the control key press the control key at the top or bottom In the display header Settings is dis played Press the OK display k...

Page 54: ...n SMS using the key Select the required character and insert it with Insert Writing an SMS name without predictive text Press the hash key and hold it to switch from Abc mode to 123 and from 123 to abc and from abc to Abc upper case 1st letter upper case all oth ers lower case Press the hash key before entering the letter The following applies when writing an SMS u The display shows whether upper ...

Page 55: ...h key repeatedly until the required letter is reverse highlighted on the display line and copied into the text panel If you press and hold the hash key you switch from Abc mode to 123 and from 123 to abc and from abc to Abc Deactivating activating predictive text Requirement You are writing an SMS Options Press the display key Predictive Text Select and press OK on a Press the end call key briefly...

Page 56: ...6 colours u Illuminated keypad u Handsfree operation u Polyphonic ringer melodies u Directory for around 150 entries u SMS CLIP must be enabled u Headset socket u Room monitor www gigaset com gigasete45 Gigaset Handset S45 u Illuminated colour display 4096 colours u Illuminated keypad u Handsfree operation u Polyphonic ringer melodies u Directory for around 150 entries u SMS CLIP must be enabled u...

Page 57: ...Voice dialling u PC interface e g for managing directory entries ringtones and screen savers u Headset socket www gigaset com gigasetsl55 Gigaset repeater The Gigaset repeater can be used to increase the reception range of your Gigaset handset to the base station www gigaset com gigasetrepeater All accessories and batteries are available from your mobile phone retailer Only use original accessorie...

Page 58: ...nswering machine see Network mailbox Auto answer 11 42 Automatic network provider code 20 B Base station changing 37 connecting and setting up 5 connecting the device 6 connecting to PABX 47 range 5 restoring to factory settings 46 setting 46 system PIN 46 Battery pack charging 8 display 8 icon 8 inserting 6 recommended battery pack 51 tone 44 Best base station 37 Birthday see Anniversary C Call a...

Page 59: ...ectory 16 copying number from text 17 managing entries 16 opening 13 order of entries 54 saving entry 16 sending entry list to handset 17 storing anniversary 18 storing number of sender SMS 26 using to enter numbers 17 Display changing display language 41 contrast 41 illumination 42 in idle status 14 keys 1 13 memory 17 name CNIP 11 network mailbox message 36 number CLI CLIP 11 screen picture 42 s...

Page 60: ...ock 45 answering machine 30 battery pack 8 display 13 for new messages 32 keypad lock 13 new message 31 new SMS 25 ringtone 43 Idle status display 14 Idle status returning to 14 Incoming message list SMS 25 Incorrect input correction 14 Input language SMS 23 Internal consultation 38 listening in 39 making calls 38 Internal call 38 call waiting 38 K Key 1 fast access 1 34 Keypad lock 13 Keys assign...

Page 61: ...ication via SMS 26 Number adding to directory 17 as destination for room monitor 40 copying from an SMS text 26 copying from directory 17 display calling number CLIP 11 entry using directory 17 saving in directory 16 Number list network provider 16 O On Off key 1 Order of entries in directory 54 P PABX connecting base station 47 pause times 47 setting dialling mode 47 setting flash time 47 SMS 28 ...

Page 62: ...ication number 26 notification type 26 notification via SMS 26 PIN protection 27 reading 24 receiving 25 registration wizard 22 replying to and forwarding 25 rules 22 self help with error messages 29 sending as fax 24 sending to a personal mailbox 27 sending to e mail address 24 status report 23 storing number 26 to a PABX 28 troubleshooting 29 SMS centre changing number 28 setting 28 Sound see Ri...

Page 63: ...62 Gigaset E455 IM MEA EN A31008 M1718 A601 1 7619 montage_charger fm 03 12 2008 max Ø 8 mm max Ø 4 mm 26 mm ...

Reviews: