background image

en 

How it works

22

16 

How it works

Here, you can find the ideal settings for various dishes
as well as the best accessories and cookware. We
have tailored these recommendations to your appli-
ance.

16.1 What is the best way to proceed?

In this section, you will find out the best way to proceed
step-by-step in order to be able to make optimum use
of the recommended settings. You will get information
on a number of dishes, with details and tips on how to
best manually use and set your appliance.

Tip: 

Your appliance has programmed settings for a se-

lection of dishes. If you want to be guided by the appli-
ance, use the automatic programmes.

1.

Select a suitable dish from the overviews.

Tips

¡

If you are using the appliance for the first time,
follow this basic information:

– → 

"Safety", Page 2

– → 

"Saving energy", Page 6

– → 

"Condensation", Page 9

¡

If you do not find the exact dish or application
that you want to prepare or implement, look for a
similar dish and take the general information into
consideration.

2.

Remove any accessories from the cooking compart-
ment.

3.

Select suitable cookware and accessories.
Use the cookware and accessories listed in the re-
commended settings.

4.

Only preheat the appliance if the recipe or the re-
commended settings tell you to do so.

5.

Set the appliance according to the recommended
settings.

6.

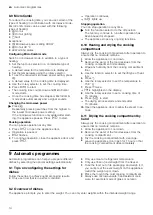
WARNING ‒ Risk of scalding!

Hot steam may escape when you open the appli-
ance door. Whether or not you can see steam de-
pends on its temperature.

Do not stand too close to the appliance when
opening the door.

Open the appliance door carefully.

Keep children at a safe distance.

When the dish is ready, switch off the appliance.

16.2 Tips for keeping acrylamide levels low
during cooking

Acrylamide is dangerous to your health and is pro-
duced in particular when you cook cereal and potato
products at high temperatures.

Dish

Tip

General

¡

Keep cooking times as
short as possible.

¡

Brown dishes until they
are golden brown and
not too dark.

¡

Use large, thick pieces
of food. These contain
less acrylamide.

Dish

Tip

Baked items and biscuits

¡

Set the temperature for
hot air to max. 180 °C.

¡

Brush baked items
and biscuits with egg
or egg yolk. This re-
duces the production
of acrylamide.

Oven chips

¡

Spread the chips out
evenly and in a single
layer on the baking
tray.

¡

Cook at least 400 g at
once on a baking tray
so that the chips do
not dry out.

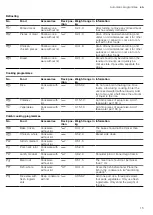
16.3 Defrosting, heating and cooking with
the microwave

Recommended settings for defrosting, heating and
cooking with the microwave.
The cooking time depends on the cookware, as well as
on the temperature, composition and quantity of the
food. This is why ranges are given in the tables. Begin
with the lower value and, if necessary, use a higher set-
ting the next time. It may be that you have different
quantities from those specified in the tables. There is a
rule of thumb for this: Double the amount = almost
double the time, half the amount = half the time.

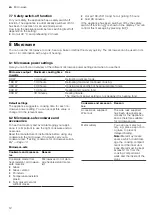
Tips on defrosting, heating and cooking with the
microwave

Follow these tips for good results when defrosting,
heating and cooking with the microwave.

Issue

Tip

You want to prepare a dif-
ferent amount than that in-
dicated in the table.

Increase or reduce the
cooking times using the
following rule of thumb:

¡

Double the amount =
almost double the
cooking time

¡

Half the amount = half
the cooking time

Summary of Contents for CM485AGB0

Page 1: ...on My Siemens and discover exclusive services and offers siemens home bsh group com welcome The future moving in Siemens Home Appliances Questo manuale d istruzione è fornito da trovaprezzi it Scopri tutte le offerte per Siemens CM585AGS0 o cerca il tuo prodotto tra le migliori offerte di Forni ...

Page 2: ... in correct connection is not covered under the warranty Only use this appliance As specified in this instruction manual To prepare meals and drinks In private households and in enclosed spaces in a domestic environment Up to an altitude of max 4000 m above sea level This appliance complies with the standards EN 55011 and CISPR 11 It is a group 2 class B product Group 2 means that mi crowaves are ...

Page 3: ...d with a high alcohol content Only use liquid with a high alcohol content in small quantities Open the appliance door carefully WARNING Risk of scalding The accessible parts of the appliance become hot during operation Never touch these hot parts Keep children at a safe distance Hot steam may escape when you open the appliance door Whether or not you can see steam depends on its temperature Do not...

Page 4: ...owave to heat cooking oil on its own WARNING Risk of explosion Liquids and other food may explode when in containers that have been tightly sealed Never heat liquids or other food in contain ers that have been tightly sealed WARNING Risk of burns Foods with peel or skin may burst or explode during heating or even afterwards Never cook eggs in their shells or reheat hard boiled eggs Never cook shel...

Page 5: ... is still hot The prolonged presence of moisture in the cooking compartment leads to corrosion Always wipe away the condensation after cooking Do not keep moist food in the cooking compartment for a long time with the door closed Do not store food in the cooking compartment Leaving the appliance to cool down with the door open will damage the front of neighbouring kitchen units over time Always al...

Page 6: ...tings tell you to do so Not preheating the appliance can reduce the en ergy used by up to 20 Use dark coloured black coated or enamelled baking tins These types of baking tin absorb the heat particu larly well Open the appliance door as little as possible during operation This will maintain the temperature in the cooking compartment and eliminate the need for the appli ance to reheat When baking m...

Page 7: ...lector can be pushed in If you turn the function selector from the off position to a function it takes a few seconds for the relevant func tion to be available Rotary selector Use the rotary selector to change the settings values shown in the display On some product variants the rotary selector can be pushed in In selection lists e g programmes the first selection follows the last For values e g w...

Page 8: ...e the active value Passive value You cannot directly adjust the values outside the brackets If you want to change a value you must first activate the value Display elements Here you can find a short explanation of the various display elements Symbol Name Meaning Timer If the symbol is highlighted the timer appears in the display Cooking time If the symbol is highlighted the cook ing time appears i...

Page 9: ...gs 1 low 2 medium 3 high Grilling flat items such as steak and sausages or making toast Browning food Programmes There are preprogrammed settings for many dishes 4 3 Cooking compartment The features of the cooking compartment make your appliance easier to use Interior lighting When you open the appliance door the light in the cooking compartment switches on If the appliance door remains open for l...

Page 10: ...ways quote the exact product number E no of your appliance You can find out which accessories are available for your appliance in our online shop or from our after sales service Glass roasting dish Use Stews Bakes Pizza tray Use Tray bakes Biscuits 5 2 Inserting the accessory The accessory can be inserted in two positions Insert the accessory so that it does not touch the appliance door Insert the...

Page 11: ...rotary selector to change the value 3 Press a The appliance starts a lights up a With a type of heating with temperature the temper ature display lights up gradually 4 If necessary use the rotary selector to change the temperature while the oven is in operation When the appliance is in operation you cannot set the temperature to 40 C 7 4 Pausing operation You can pause operation at any time 1 Pres...

Page 12: ...utes Heating liquids The maximum power setting is not designed for heating food Default settings The appliance suggests a cooking time for each mi crowave power setting You can accept this value or change it in the relevant area 8 2 Microwave safe cookware and accessories To heat food evenly and avoid damaging your appli ance it is important to use the right cookware and ac cessories Read the manu...

Page 13: ...f the cookware becomes hot or sparks are cre ated the stop the cookware test The cookware is not microwave safe 8 4 Configuring the microwave settings Different power levels and settings are available for dif ferent types of food and recipes 1 Read the safety instructions Page 4 and the section on how to prevent material damage Page 5 2 Read the information on microwave safe cookware and accessori...

Page 14: ...g compartment Always dry the cooking compartment after operation to ensure that no moisture remains 1 Allow the appliance to cool down 2 Remove the worst of the food residues from the cooking compartment immediately 3 Wipe any humidity from the cooking compartment floor 4 Use the function selector to set the type of heat ing 5 Press 6 Use the rotary selector to set the temperature to 150 C 7 Press...

Page 15: ...ice Rice foams a lot during cooking Enter the uncooked weight without liquid Add two to two and a half times the amount of liquid to the rice Potatoes Cookware with lid 0 15 1 0 Cut into pieces of equal size Add 1 tbsp water per 100 g Vegetables Cookware with lid 0 15 1 0 Cut into pieces of equal size Add 1 tbsp water per 100 g Combi cooking programmes No Food Accessories Rack pos ition Weight ran...

Page 16: ... the display 10 2 Changing the time Requirement To change the time on the clock the ap pliance must be switched off 1 Press twice a The symbol and the clock time appear in the dis play 2 Set the time using the rotary selector 3 Press a The clock time is set a If is not pressed the set value is applied after a few seconds 10 3 Cooking time You can set a time after which operation ends automat icall...

Page 17: ...any button 11 2 Deactivating the childproof lock Press and hold for approx 4 seconds a The control panel is unlocked 12 Basic settings You can configure the appliance to meet your needs 12 1 Overview of the basic settings Here you can find an overview of the basic settings and factory settings The basic settings depend on the features of your appliance Display Basic setting Selection Description S...

Page 18: ... the appliance in the indi vidual cleaning instructions 13 2 Cleaning the appliance Clean the appliance as specified This will ensure that the different parts and surfaces of the appliance are not damaged by incorrect cleaning or unsuitable clean ing products WARNING Risk of burns The appliance gets very hot Never touch the inside surfaces of the cooking com partment or the heating elements while ...

Page 19: ...ner or in the dishwasher Use steel wool or oven cleaner to remove very heavy soiling 5 Dry with a soft cloth 13 7 Tips on caring for your appliance Follow the tips on appliance care to make sure your appliance functions properly at all times Measure Advantage Always keep the appli ance clean and remove dirt immediately Always clean the cooking com partment after use Prevents dirt from accu mulatin...

Page 20: ...anufac turer s Customer Service or a similarly qualified per son in order to prevent any risk 14 1 Malfunctions Fault Cause Troubleshooting The appliance is not working The mains plug of the power cord is not plugged in Connect the appliance to the power supply The circuit breaker is faulty Check the circuit breaker in the fuse box There has been a power cut Check whether the lighting in your kitc...

Page 21: ...was a one off the message disappears 3 If the message appears again call the after sales service Please specify the exact error message when calling Customer Service Page 35 The message appears in the display The automatic safety cut out function has been activated Press any button The message appears in the display Moisture in the control panel Allow the control panel to dry 15 Disposal Find out ...

Page 22: ...carefully Keep children at a safe distance When the dish is ready switch off the appliance 16 2 Tips for keeping acrylamide levels low during cooking Acrylamide is dangerous to your health and is pro duced in particular when you cook cereal and potato products at high temperatures Dish Tip General Keep cooking times as short as possible Brown dishes until they are golden brown and not too dark Use...

Page 23: ...90 1 3 2 10 15 Meat in pieces or slices of beef veal or pork 500 g 1 Cookware without lid 1 180 2 90 1 5 2 15 20 Meat in pieces or slices of beef veal or pork 800 g 1 Cookware without lid 1 180 2 90 1 8 2 15 20 Minced meat mixed 200 g 2 Cookware without lid 90 10 15 Minced meat mixed 500 g 2 Cookware without lid 1 180 2 90 1 5 2 10 15 Minced meat mixed 800 g Cookware without lid 1 180 2 90 1 10 2 ...

Page 24: ...g Distribute the food flat in the cookware Food which lies flat cooks more quickly than food which is piled high Turn or stir the food two or three times during the defrosting time After heating leave the food to rest for 1 2ºminutes The food transfers heat to the cookware The cookware can become very hot Use oven gloves Dish Accessories cook ware Rack position Microwave output in watts Cooking ti...

Page 25: ...e times during the defrosting time After heating leave the food to rest for 1 2ºminutes The food transfers heat to the cookware The cook ware can become very hot Use oven gloves Baby food Place bottles without a teat or lid on the wire rack Stir or shake well after heating Always check the temperature of the baby food Dish Accessories cook ware Rack position Microwave output in watts Cooking time ...

Page 26: ... 10 2 20 25 Desserts e g blancmange instant 500 ml 1 Cookware with lid 600 6 8 1 Stir 2 to 3 times with a whisk while heating Microwave popcorn Recommended settings for heating food ATTENTION When preparing microwave popcorn at a high mi crowave power the door pane may crack due to over loading Never set the microwave power too high Use a power setting no higher than 600 watts Always place the pop...

Page 27: ... ready Push a cocktail stick into the highest point on the cake If no dough sticks to the wood the cake is ready You want to bake using your own recipe Use similar items in the baking tables as a guide Use bakeware made of silicone glass plastic or ceramic The bakeware must be heat resistant up to 250 C Cakes in this bake ware brown less When using the mi crowave the cooking time is shorter than t...

Page 28: ...ured metal baking tins are most suitable Dish Accessories cookware Rack position Type of heating Temperature in C Cooking time in mins Biscuits Round pizza tray 150 170 20 35 Macaroons Round pizza tray 110 130 35 45 Meringues Round pizza tray 100 80 100 Muffins Muffin tray on wire rack 160 180 35 40 Puff pastry Round pizza tray 190 200 35 45 Bread and bread rolls Recommended settings for baking br...

Page 29: ...in and cover it several times with a cold wet cloth Next time you bake grease the baking tin and sprinkle it with breadcrumbs Sparks are generated between the tin and the wire rack Check that the tin is clean on the outside Change the position of the tin in the cooking compartment Continue baking without the microwave and increase the bak ing time 16 5 Roasting and grilling Recommended settings fo...

Page 30: ...een grilled Salt draws water from the meat Note Dark meat such as beef browns more quickly than lighter coloured meat such as veal or pork When grilling light coloured meat or fish these often only brown slightly on the surface although they are cooked and juicy on the inside The grill element switches on and off continuously This is normal The frequency of this depends on the grill level that is ...

Page 31: ...dless joint e g pork neck approx 750 g Wire rack Cookware with lid 220 230 180 40 50 Joint with rind e g shoulder approx 1 kg Wire rack Cookware without lid 190 210 130 150 Pork neck 2 3 pieces 2 3 cm thick Wire rack Glass tray 3 25 35 Other meat dishes Recommended settings for cooking other meat dishes Note Preparation tips The recommended settings apply to dishes placed into the non preheated ap...

Page 32: ... 300 g each Wire rack Glass tray 3 20 30 Tips for next time you roast If roasting is not successful the first time you can find some tips here Issue Tip Your roast is too dark and the crackling is partly burnt Select a lower temper ature Reduce the roasting time Your roast is too dry Select a lower temper ature Reduce the roasting time The crackling on your roast is too thin Increase the temperat ...

Page 33: ...ufacturer s instructions on the packaging The recommended settings apply to dishes placed into the non preheated appliance Do not arrange chips croquettes or potato röstis on top of each other Dish Accessories cookware Rack posi tion Type of heating Temperature in C Microwave output in watts Cooking time in mins Thin crust pizza Wire rack 220 230 10 15 Pizza baguette Wire rack 1 2 220 230 1 600 2 ...

Page 34: ...way through the cooking time Dish Accessories cookware Rack posi tion Type of heating Temperature in C Microwave output in watts Cooking time in mins Potato gratin Wire rack Cookware without lid 210 220 600 25 30 Cakes Wire rack Cookware without lid 190 200 180 20 27 Chicken Wire rack Cookware without lid 190 360 30 45 Baking Recommended settings for baking test dishes Note The recommended setting...

Page 35: ...n With any warranty claims we will make sure that your appliance is repaired by trained after sales technicians using genuine spare parts including after the manufac turer s warranty has expired Detailed information on the warranty period and terms of warranty in your country is available from our after sales service your retailer or on our website If you contact Customer Service you will require ...

Page 36: ...9001494777 9001494777 000903 en BSH Hausgeräte GmbH Carl Wery Straße 34 81739 München GERMANY www siemens home bsh group com Manufactured by BSH Hausgeräte GmbH under the trademark licence of Siemens AG ...

Reviews: