


4
AP-220-MNT-W3
| Installation Guide
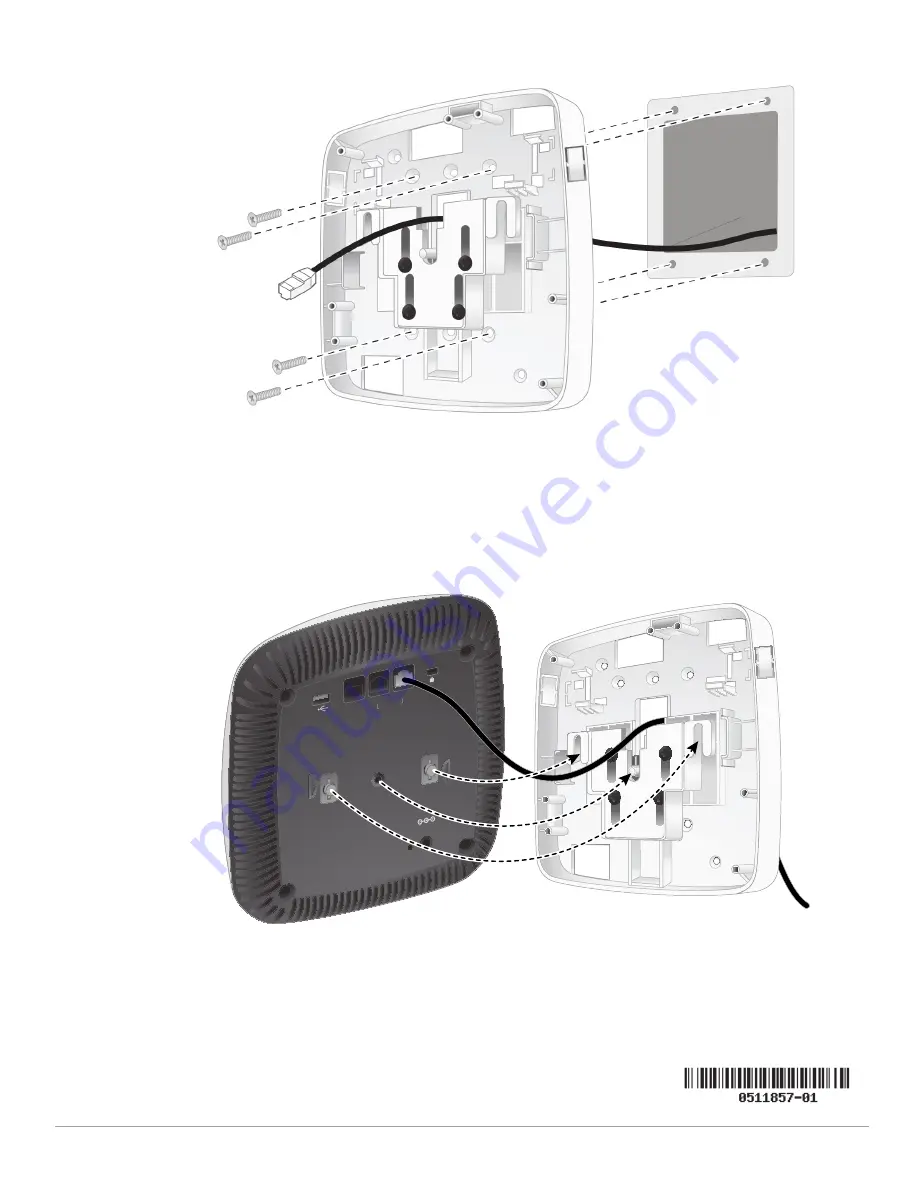
Figure 6
Installing the mounting bracket to a dual-gang wall box
2. Route Ethernet cable(s) through the back of the mount housing, as shown in
Connect the cable(s) to the ENET0 and/or ENET1 port on the back of the access point.
3. Once the cable(s) is/are connected to the access point, align the pins on the rear panel of the access
point with the slots on the mount housing. Press the button on the bottom of the mount housing and
slide the access point into the slots. Release the button to secure the access point to the mounting
bracket. See
Figure 7
Securing the access point to the mounting bracket
4. To lock the access point to the mounting bracket, insert the T6 Torx security screw into the hole beside
the button, located at the bottom of the mount, then tighten until the screw is snug.
CONSOLE
ENET1
ENET0
56V…
— 350mA
K
12V
…
—
25A