WLL180T Photoelectric sensors for fiber-optic cables
2 0 1 0 - 0 8 - 0 2
S I C K
1 3
S u b j e c t t o c h a n g e w i t h o u t n o t i c e
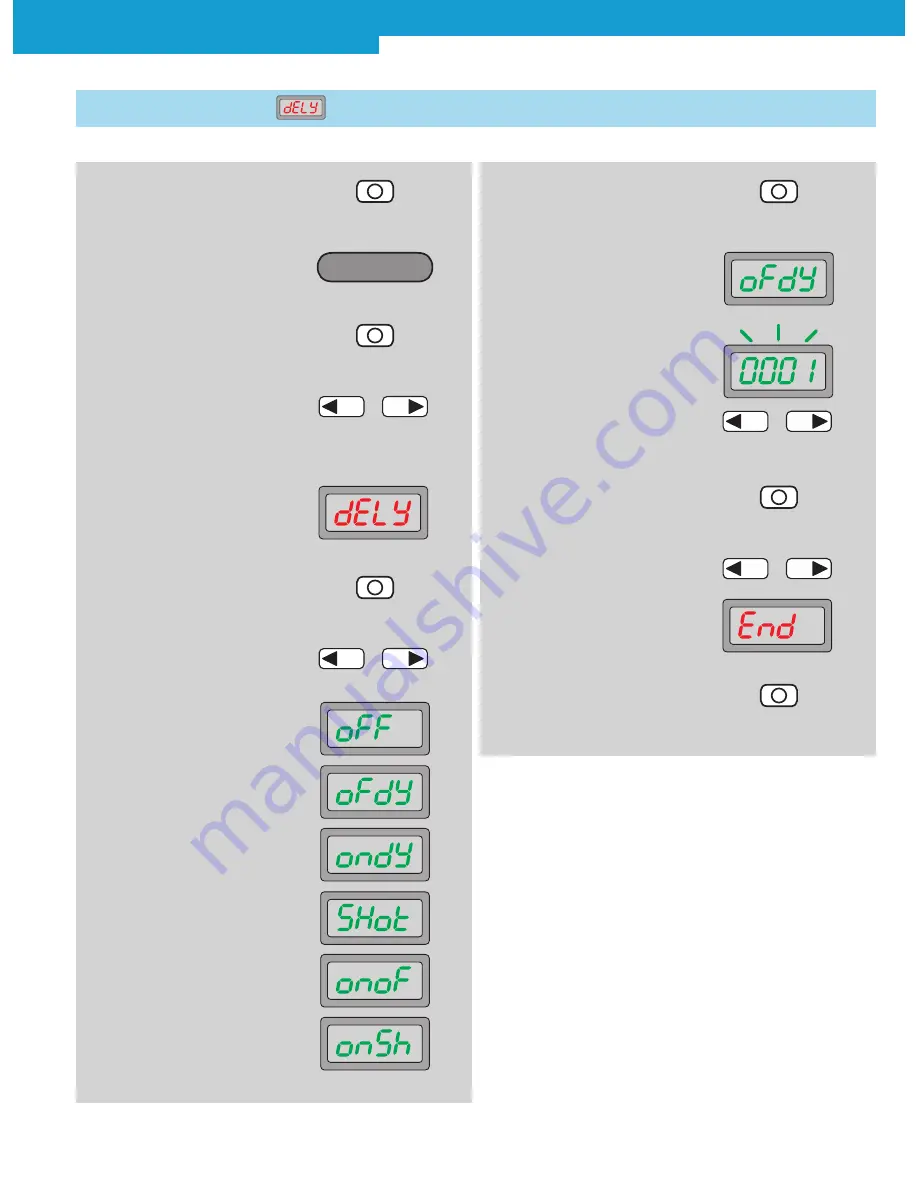
2. Operating mode Configuring
active
4. In the basic menu, select
required mode by pressing
the arrow keys
5. Timer setting is shown
on the display
–
+
6. Press Mode key, setting option
flashes
7. Select between deactivation
(oFF), OFF delay (oFdY), ON
delay (ondY), One-Shot (SHot),
On-OFF-Delay (onoF) and On-
Shot (onSh) by pressing the
arrow keys
2.3 Time delay setting
3. Press Mode key
–
+
1. Press Mode key for 2 s
Option for various time delays and variable time range:
oFF = no time delay activated (factory setting),
oFdY = OFF delay (release delay),
ondY = ON delay (on delay),
SHot = One Shot (output active for set time window, regardless if
object is present),
onoF = ON and OFF delay
(on and release delay),
onSh =
ON delay One Shot (set time window (One Shot) is active
after response time (ON delay)).
Time delay selectable from 0,1 ... 9999 (0,1 ms ... 9999 ms)
Typical application:
Ignoring small variations of light intensity caused by dirt or
temperature and detecting only the objects. Slight differences
of light intensity can be detected without readjustment of the
sensitivity.
10. Finish selection with Mode key
11. Select ending the adjustment
(End)
–
+
12. Finish selection with Mode key
9. For activated time stage,
setting the time value
–
+
8.
Finish
selection
Configuring


